
The Scion tC is arguably one of the most popular tuner cars around. It is affordable, customizable, and well-supported by major tuners and aftermarket companies. The second generation Scion tC is what we’re going to focus on here, the PASMAG project tC2 to be exact, and we have installed Descendant Racing’s 2011 Scion tC Turbo Kit, a turn-key out of the box turbocharger kit that includes everything you need to take your tC2 to the next level. Now if you don’t know who Descendant Racing is then you haven’t been in the Scion game for too long. Descendant Racing are the 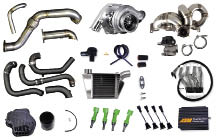 same guys behind the fastest Scions in the world in both drag racing and time attack. When it comes to Scion performance, nobody has proven themselves quite like Descendant Racing.
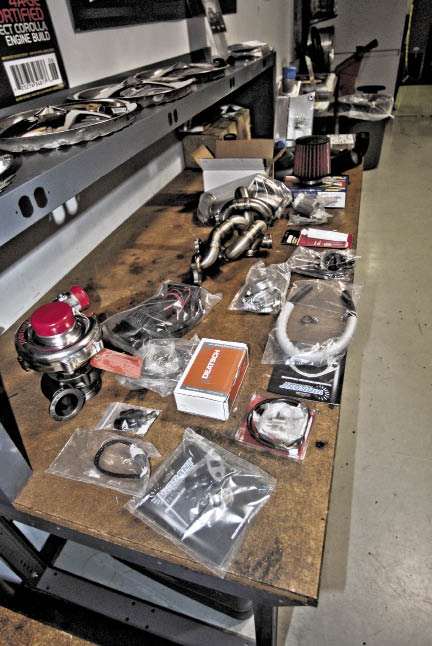
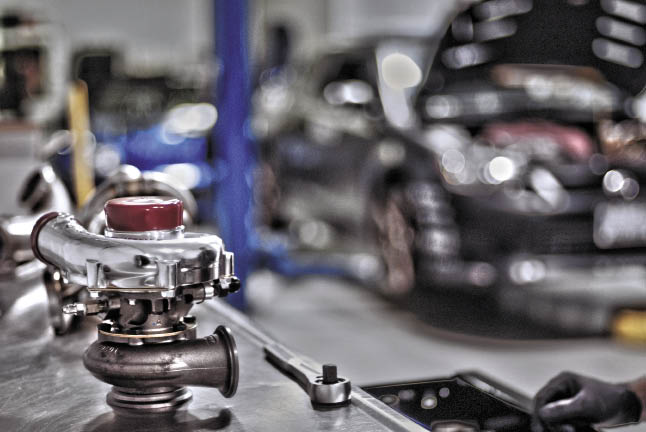
We may not be building a world record-holding race car, but let’s get to the meat of the matter by discussing the turbo kit we went with for our own tC2 project. The Descendant Racing Bolt On & Go kit features a Turbonetics turbocharger, Tial wastegate, AEM fuel and ignition controller, and even new 750cc Deatsch Werks fuel injectors to compliment the host of Descendant Racing pieces that make the entire kit work.
As far as turbo kits go, this one is easy to install, but due to the fact that improper installation can result in engine failure, we always recommend you have your turbo kit installed by a professional. Should you wish to take this on yourself however, here are some tips:
First, make sure you have the proper tools and a safe way to get your car off the ground to work underneath it. When installing the Descendant Racing turbo kit, take the time to install everything properly and without mistakes. It’s often the case that taking your time is actually quicker than rushing and having to go back and fix mistakes afterwards.
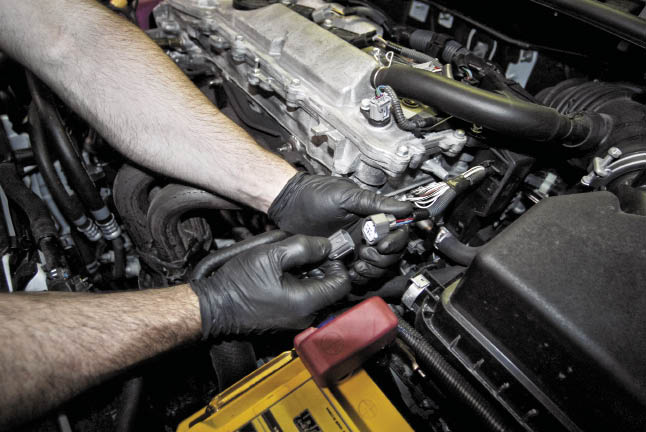
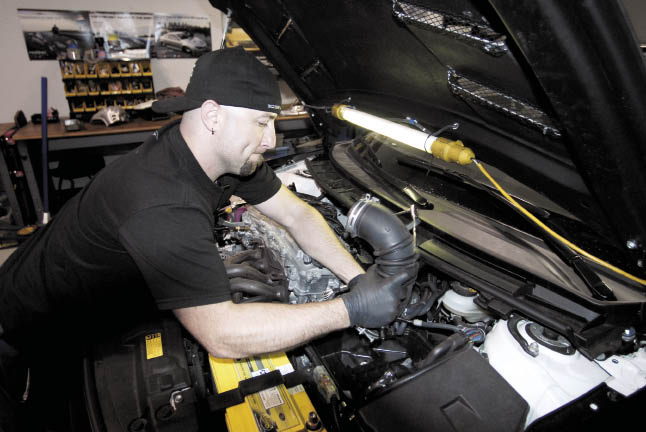
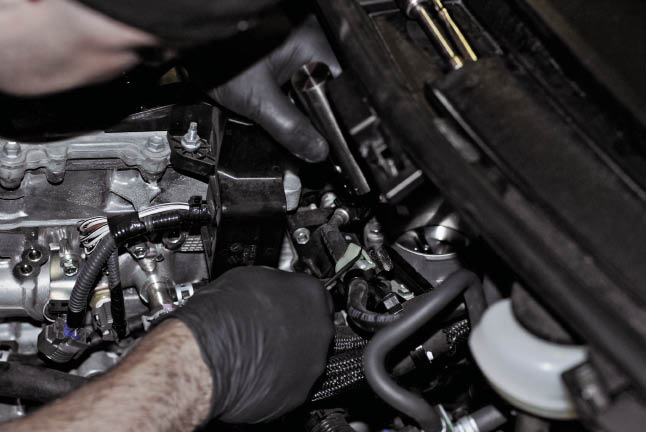
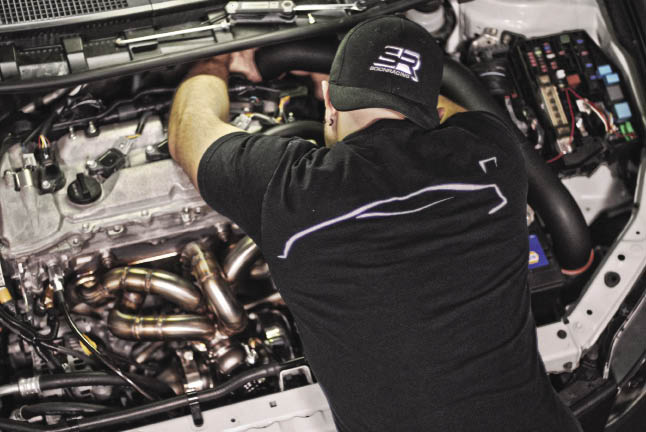
Step one is to disconnect the negative terminal on the battery to discharge any electrical parts and avoid accidental shorting of electrical components. Next, start on the top side of the engine bay with the removal of the factory components. Keeping all removed bolts and small pieces in labeled Ziploc baggies is a great way to stay organized. Start by removing the heat shield covering the exhaust manifold. Next, loosen any of the exhaust manifold bolts that are easy to get to from the top side of the engine bay. Finally, disconnect the wiring that leads to the O2 sensor inside the exhaust manifold.
 |
 |
|
 |
 |
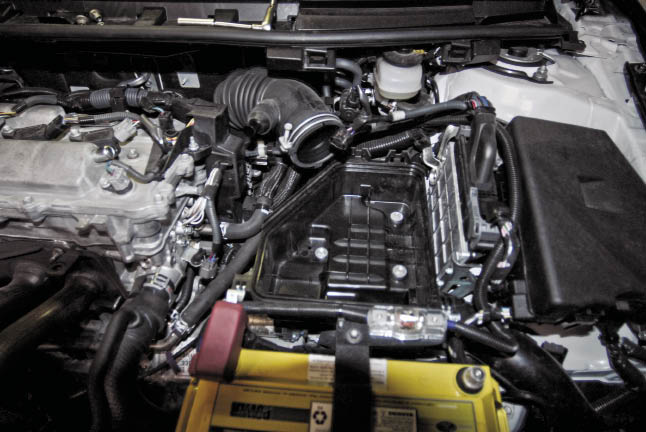
Next, remove the factory air box assembly. First disconnect the mass air flow sensor wiring harness from the sensor and proceed by loosening the hose clamps and clips that hold the top section of the air box in place. Remove the top section of the air box and air filter. Loosen the remaining hose clamps and remove the factory air intake tube, and then remove the bolts securing the lower half of the air box to the car. Finish by removing the front portion of the factory intake tube that snakes down into the front bumper area.
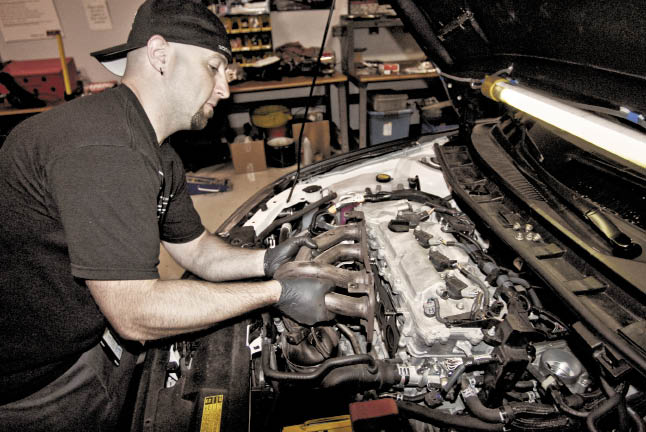
Moving back to the top side of the engine bay, check to make sure that nothing is left connected to the exhaust manifold assembly and remove the remaining loose bolts holding on the exhaust manifold. Gently remove the factory exhaust manifold assembly from the car and set aside.
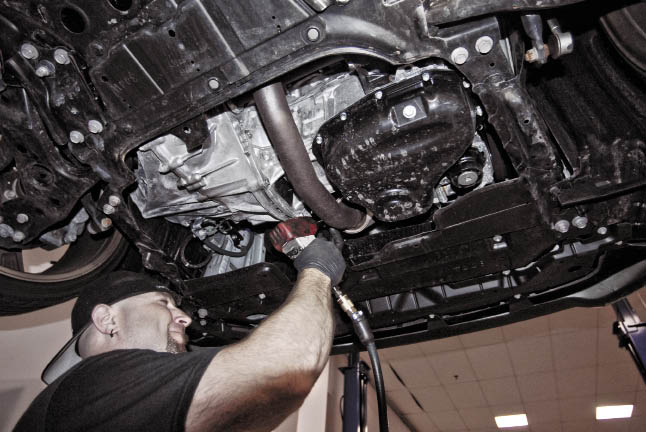
Now, it’s time to get the car up into the air so we can transition to working on the bottom side of the engine bay. A hydraulic lift is preferred, but if you don’t have access to one make sure you place the car on jack stands before getting underneath the car. From underneath the engine bay, start by removing the bolts connecting the exhaust to the exhaust manifold. Next, remove the bolts that hold the exhaust manifold to the engine block, but leave some of the top ones loosely on to make sure the assembly stays in place until we are ready to remove it. Finally, drain the engine oil by removing the drain plug in the oil pan.
 |
 |
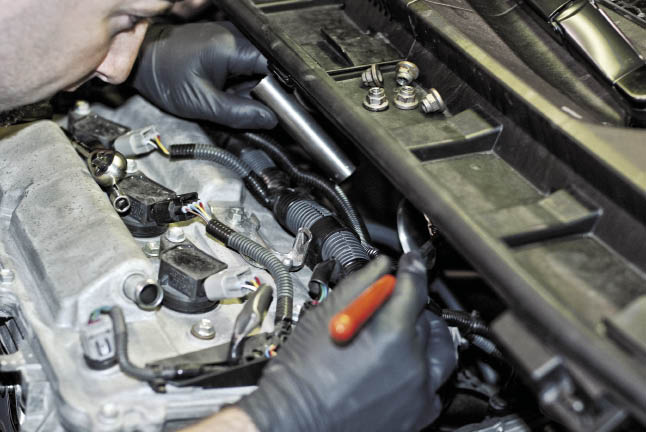
Next we will replace the factory fuel injectors with the new injectors supplied with the kit. It is important to make sure that all engine bay components are cool to the touch at this point as there is a high likelihood of spilling fuel during this step. Start by locating the factory fuel rail on the back side of the intake manifold. Locate and disconnect any clips attached to the factory fuel rail, taking notes on which clips go where so you can make sure you re-connect them properly. Next, locate and remove the bolts holding the fuel rail onto the car and slowly pull the assembly out to the point where you can access and remove the injectors. Pull on the factory injectors to remove them from the rail. Lube up the new injectors and install them into the factory fuel rail and reverse the steps to re-install the rail with the new injectors.
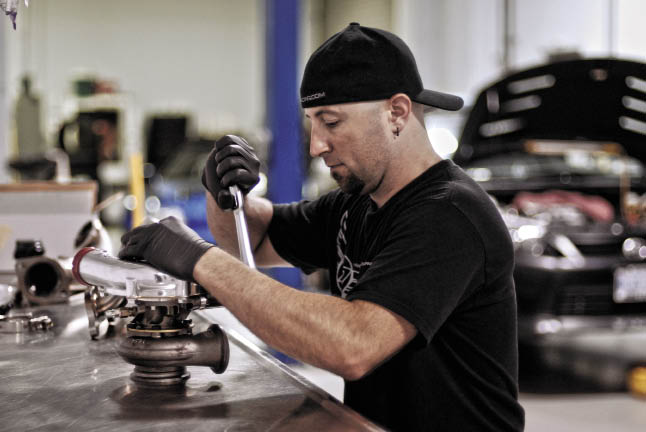
Now we’ll start the assembly process by doing some out of the car assembly. First locate the Turbonetics turbocharger and supplied turbo oil feed line kit. (2366,) Install the oil feed line kit to the turbo using Teflon tape on all male fittings being careful not to over-tighten. Locate the turbo oil drain line kit and install it onto the turbocharger using the supplied gasket, hardware, and fitting. Again, use Teflon tape on the male end of the supplied fitting. Set the supplied oil drain hose aside for future use.
 |
|
Next, loosen but do not remove the compressor housing bolts on the turbocharger so that the compressor housing can be rotated once in the car to ensure clearance. (2373) Locate the turbo exhaust manifold and one of the supplied v-band clamps. Loosely secure the exhaust housing end of the turbocharger to the exhaust manifold using the v-band clamp. Next, locate the turbocharger downpipe and loosely attach it to the exhaust housing of the turbocharger outlet using another supplied v-band clamp. Next, locate the turbocharger downpipe and loosely attach it to the exhaust housing of the turbocharger outlet using another supplied v-band clamp.
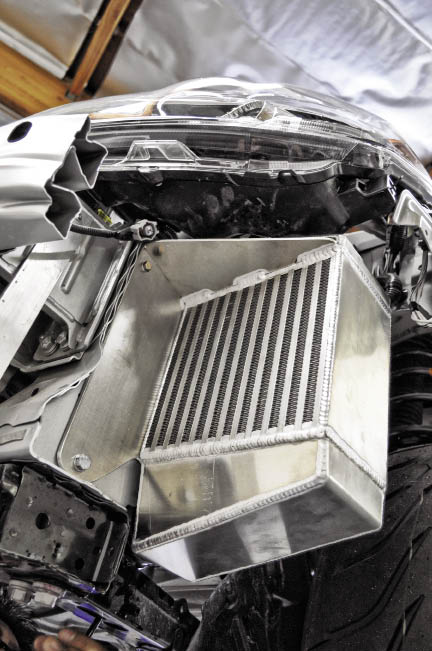
 Next we will remove the left front fender liner to begin our installation of the side mount intercooler. Removal of the left front wheel may make this task a bit easier, but it can be done in most cases by simply turning the wheel so it is out of the way as much as possible. Remove the factory inner fender liner so you can access the area behind the front bumper cover. Remove the plastic piece in the front left side of the front bumper that is blocking the opening in front of the tire. This will allow air flow to the intercooler which will be placed behind this opening. Next, install the Descendant Racing side mount intercooler to the chassis using the two supplied bolts.
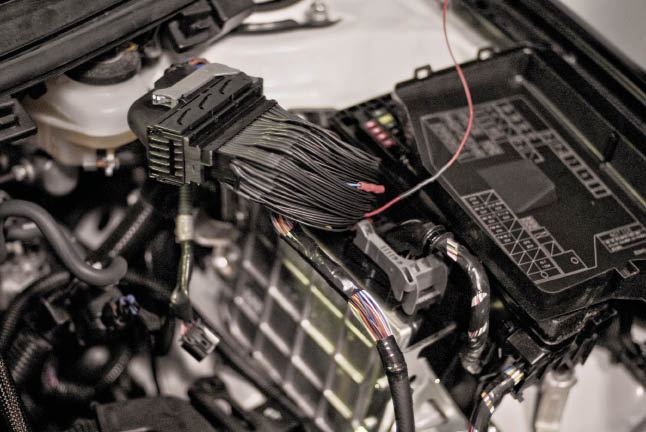
While the engine bay has open space, this is a good time to fish the wiring for the supplied AEM F/I controller 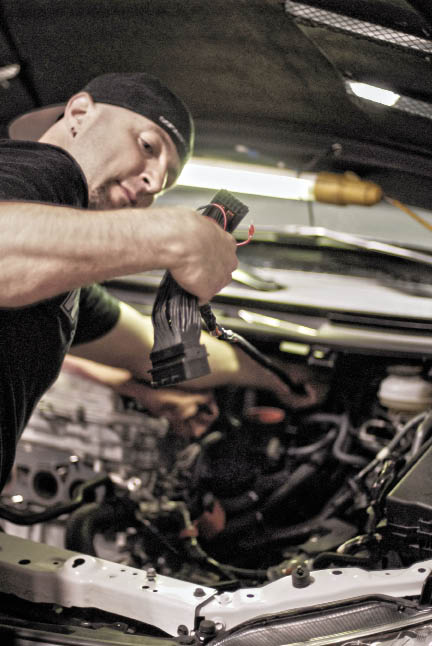 through the firewall and into the cabin. Locate a good place to penetrate the firewall, usually a point in which factory wiring passes through the firewall and punch a hole in the rubber boot large enough to insert the new AEM wiring being careful not to damage the factory wires in the process. Fish the new wiring harness through the firewall and into the cabin. Next, locate the factory ECU located on the left side of the
 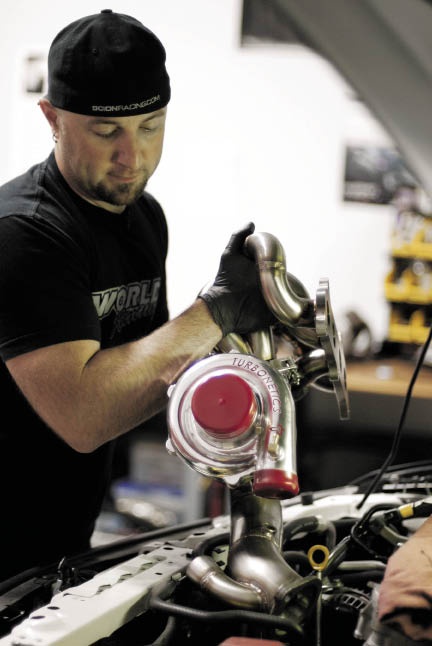 engine bay next to where the factory air intake box used to be. Unclip the factory ECU wiring harnesses and install the supplied jumper harness from the AEM F/I controller kit. Plug the AEM jumper into the factory ECU and then the factory ECU harness into the jumper. Tuck the wiring out of the way as much as possible.
Remaining on the top side of the engine bay, we will now start our final assembly. Start by slipping the supplied silicon couplings over the factory mass air flow sensor as well as the intercooler outlet. To make life easier, slip the supplied hose clamps over the couplings but do not tighten, making sure they are loose enough to allow the bead rolled piping to slip inside the coupling. Re-install the turbocharger and exhaust manifold assembly back into the engine bay and secure it to the engine block, tightening the exhaust manifold bolts from the center, outward to ensure a proper seal. Loosely install the turbo oil lines and finally, use the supplied O2 sensor extension to plug the re-located O2 sensor back into the factory wiring harness.
Moving back underneath the car, we will begin by installing our lower intercooler pipe. First, slip the silicon couplings and hose clamps over the intercooler inlet and turbocharger compressor housing outlet. Install the lower intercooler pipe, rotating the compressor housing to make fine adjustments to the angle of the outlet. Next, make sure the exhaust downpipe is in proper position and bolt it to the rest of the exhaust system. Once everything is in place, tighten the associated hose clamps and turbo housing bolts both on the compressor side and exhaust side ensuring there is proper fitment of the intercooler piping and exhaust down tube and re-install the inner fender liner.
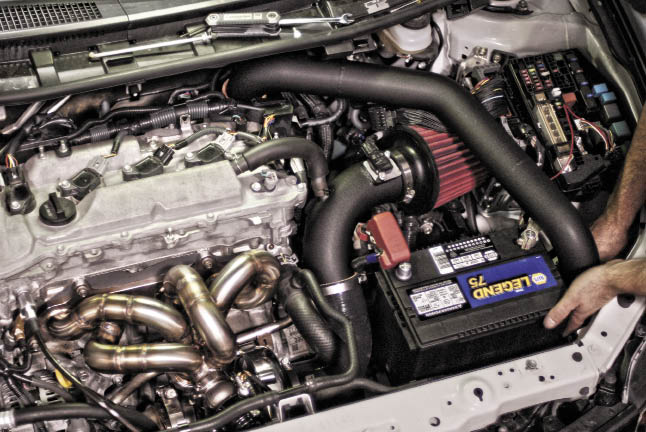
Back to the top side of the engine bay we’ll now install the supplied intake tube and air filter. First, loosely install the silicon coupling and hose clamps onto the turbo air inlet followed by the intake tube and filter. Position everything accordingly and tighten the hose clamps. Next, re-install the factory crank case pressure tube to the bung on the new intake pipe. Finish by installing the factory mass air flow sensor into the new intake tube.
Now we will install the Descendant Racing upper intercooler pipe which should slip into the couplings on the factory mass air flow sensor and intercooler that we loosely fit earlier. Once in, leave the hose clamps loose and begin installing the blow-off valve, connecting it from the upper intercooler pipe to the intake pipe. Once everything is in place, tighten all associated hose clamps. Finally connect the boost source line to the blow-off valve and leave the other end disconnected for the time being, tucking the tube out of the way.
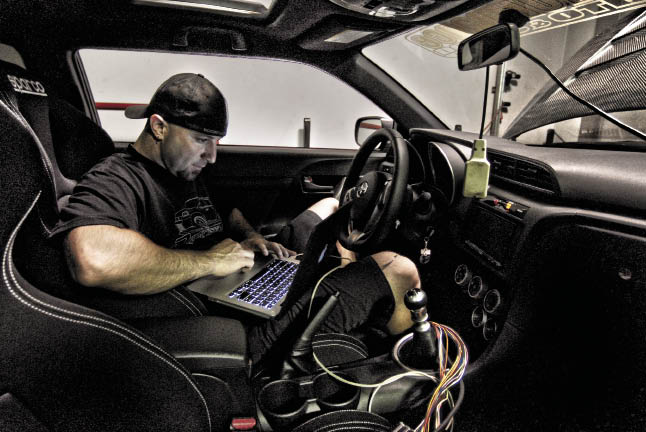
If everything is ok then we can proceed to finishing the install of the AEM F/I controller. Inside the car, finish plugging in all wiring connections and boost/vacuum source to the controller. Once everything is finalized, the last step is to get your car tuned to ensure proper performance and reliability. During the initial tune it is important to continually check for leaks and after your first small pull, check to make sure that none of the bolts have come loose.
Once tuned, our PASMAG project tC2 gained an impressive 100 horsepower at the wheels, a much needed kick to the already fun to drive Scion! The crew at Descendant Racing has done an amazing job with this off-the-shelf turbo kit meeting all expectations of quality, fit, finish and performance!

Moving forward, we will install the wastegate next, loosely attaching it to the exhaust manifold. Install the dump tube and rotate the wastegate to the proper position. Once loosely installed, use the supplied v-band clamp to connect them together and tighten everything up. Next, connect the supplied vacuum port to the wastegate using the supplied banjo bolts and crush washers. Finally, connect the loose end of the boost source line to the vacuum port.
Now that all of the parts are installed, double check your work. Go through and make sure that every bolt is tight, every hose is connected, all parts have proper clearance, and every electrical connection is secure with the exception of the AEM F/I controller which we will install later. Once you have double checked your work, add new oil back into the motor and ensure there are no leaks. While still on the lift or jack stands, re-connect the battery and start the car. Ensure that there are no leaks and everything is sounding and operating as it should. Avoid revving the engine or getting the car into boost at this point as your car is not properly tuned.
Sources
Scion • www.scion.ca
|
Descendant Racing • www.DescendantRacing.com |
|
WORLD Racing • www.WORLD-Racing.com |