Written by Dave MacKinnon | Photos by 20Hz Audio Sound and Security
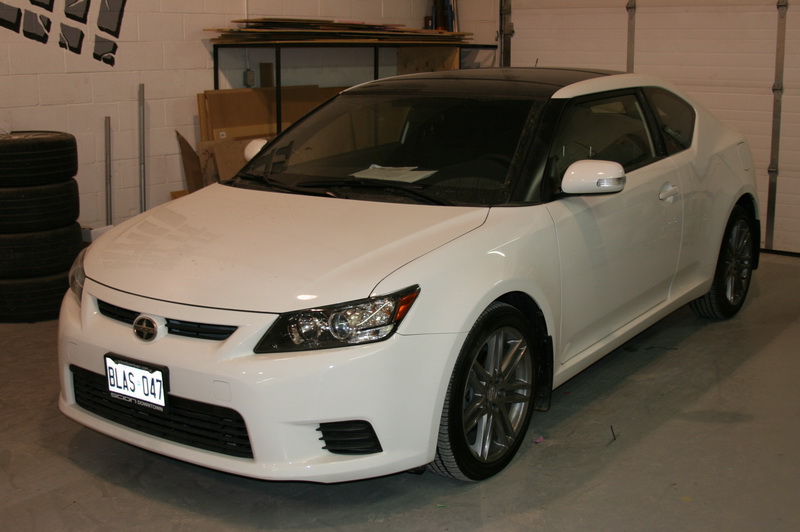
The PASMAG Scion tC audio build is done, but before we show you what we did to the rest of the car, we’re going to tease you with a step-by-stop of how the entertainment system came to fruition. A shout out to Frank ‘Crazy’ Valenti and the crew at 20Hz Audio Video and Security for the work and to Sony and Stinger for the product support.
Don’t worry, we didn’t forget the final pics – we’re saving those for a full feature coming soon!
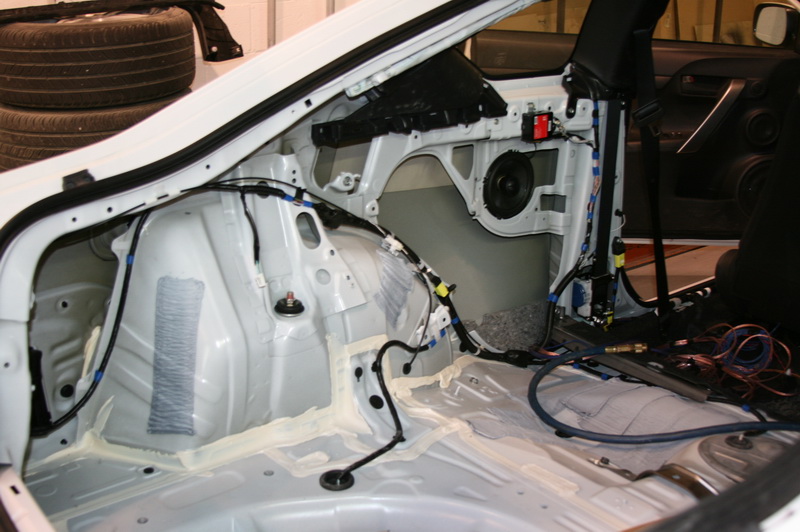
Step 1: The interior of the car was stripped in preparation for the installation of power, signal and speaker wiring. The rear speakers have also been installed.
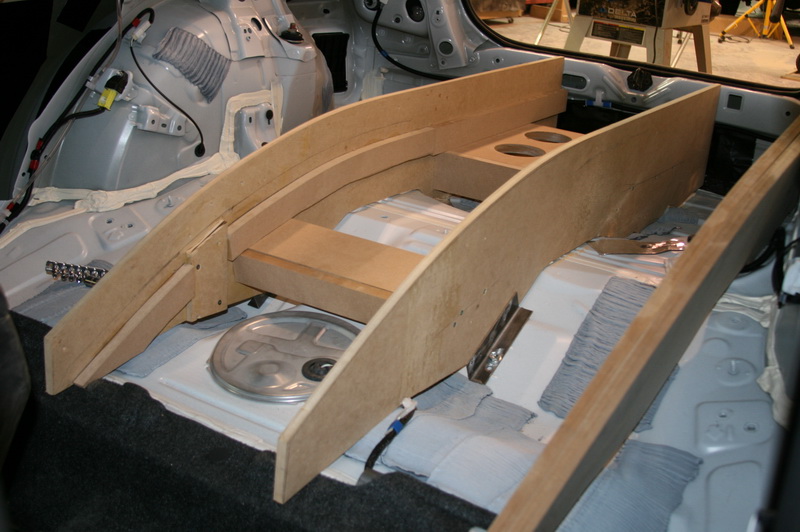
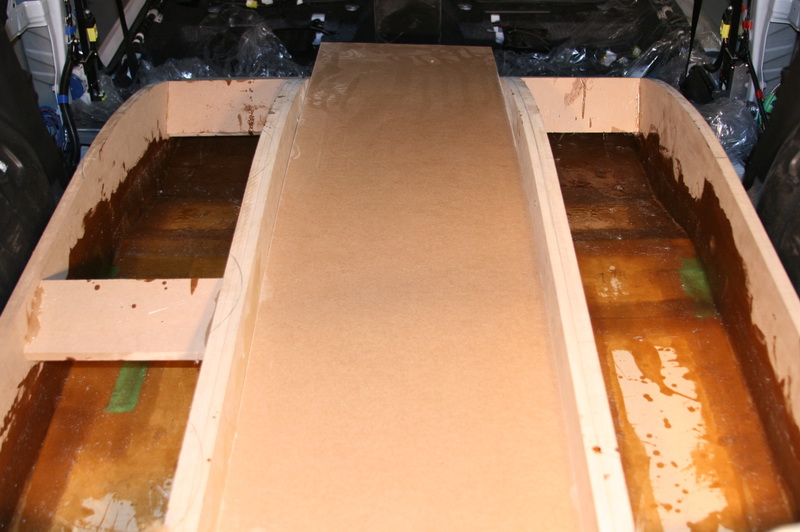
Step 2: The walls for the subwoofer enclosure and amp rack have been cut to conform to the floor of the car.
Step 3: The exterior walls of the subwoofer enclosures have been put in place and bottom panels are cut and temporarily installed.
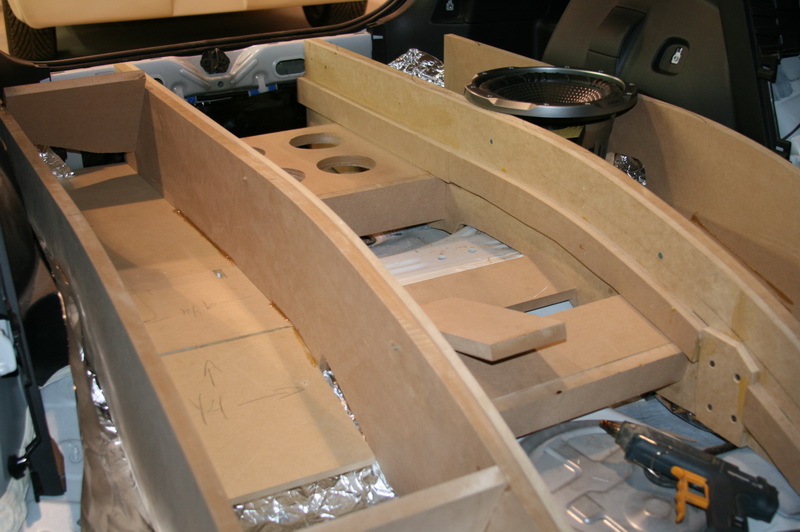
Step 4: The bottoms of the enclosures are fiberglassed into place to ensure maximum strength for and a perfect airtight seal.
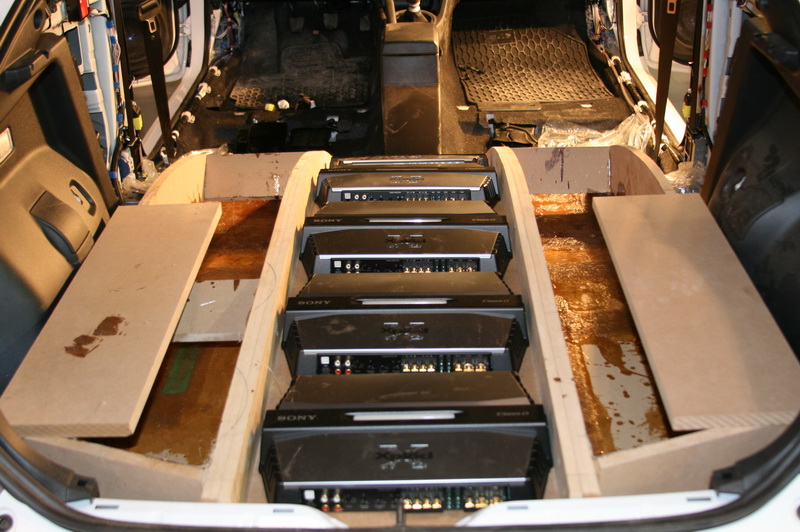
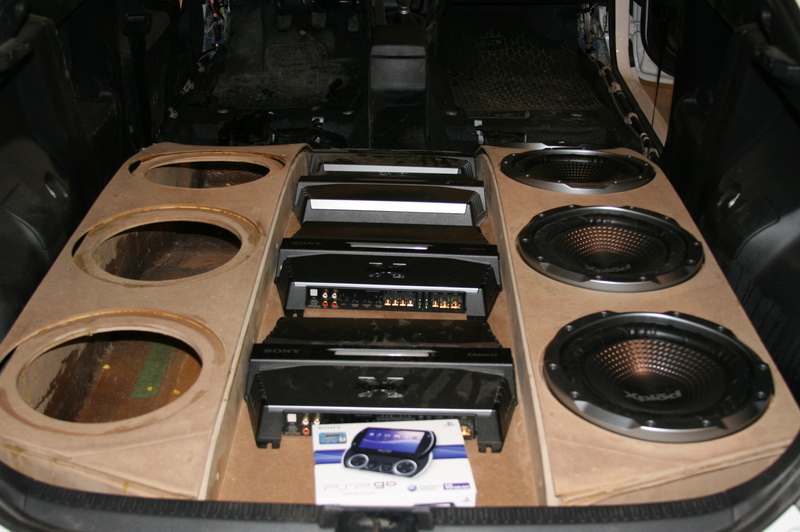
Step 5: The top of the amp rack was put in and the amplifiers mocked in place for accurate placement and measurement.
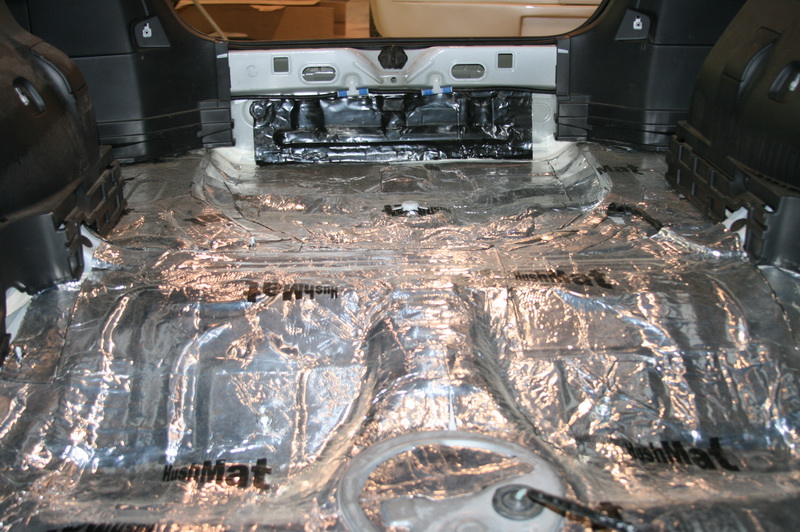
Step 6: A layer of Hushmat Ultra sound deadening covers the entire rear seat and hatch floor of the Scion. This ensures the vehicle will be nice and quiet.

Step 7: The doors were treated to another layer of Hushmat. This layer helps to seal the doors to maximize speaker performance, as well as reduce exterior noise transmission.
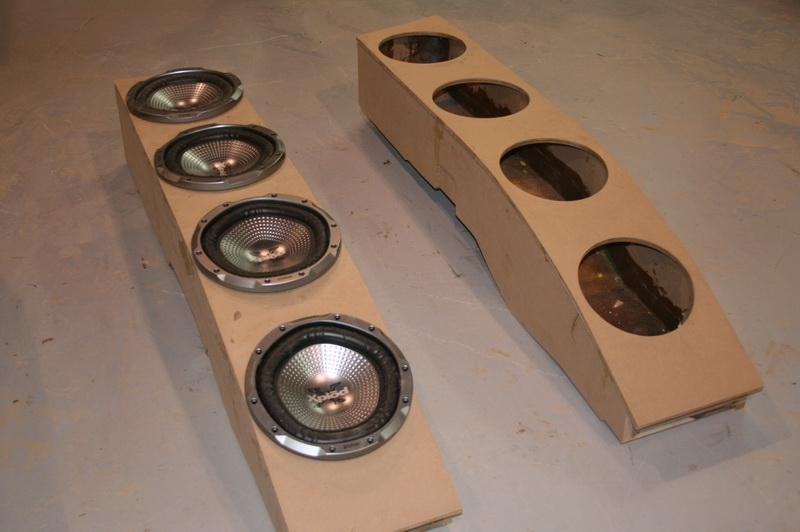
Step 8: The subwoofer enclosures have been removed from the car and the top panels installed.
Step 9: The first of two trim panels are installed on the tops of the subwoofer enclosure. This layer allows for the installation of LED lighting.
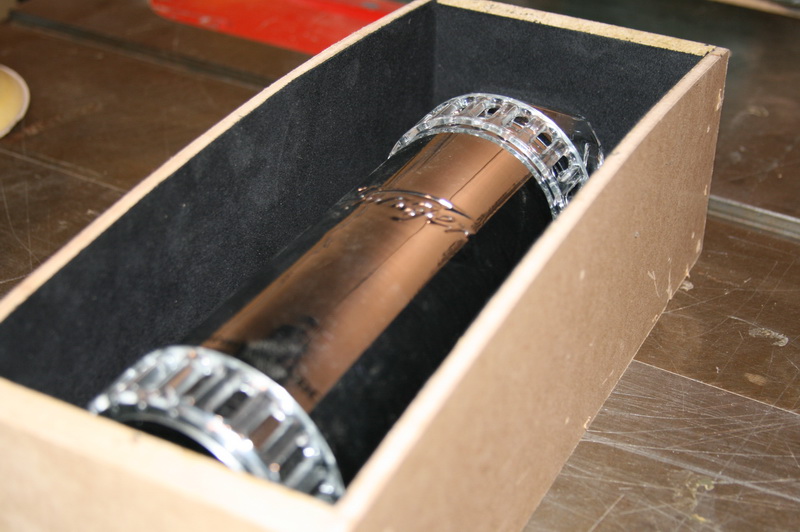
Step 10: Each of the 1-Farad Stinger capacitors was housing in a custom enclosure. The enclosures are lined in suede and will have their own LED illumination.
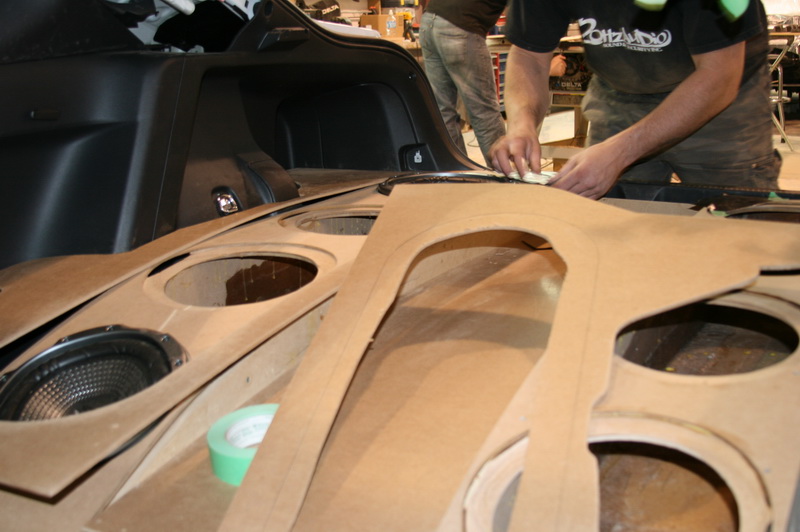
Step 11: The main trim panels for the subwoofers are cut to closely follow the shape of the factory side panels.
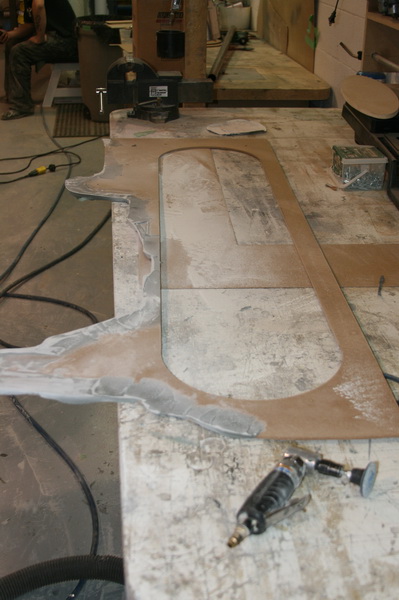
Step 12: Here you can see the final edge finishing on the main trim panels. At this point they are almost ready for to be wrapped in vinyl
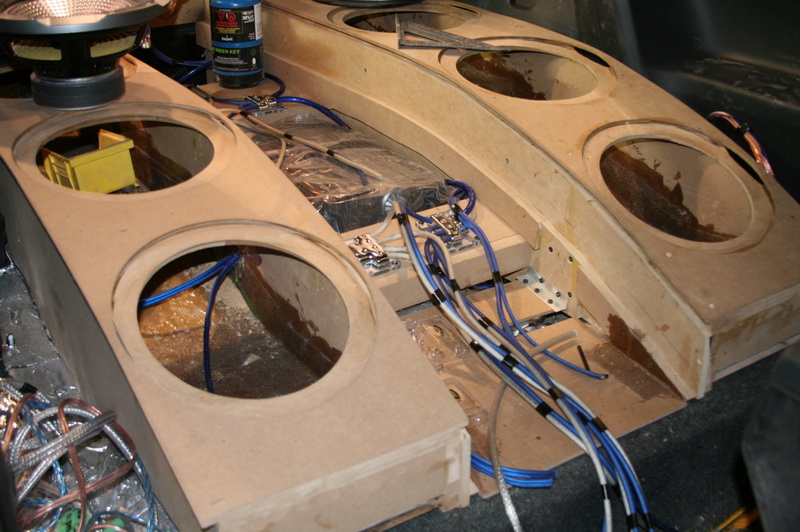
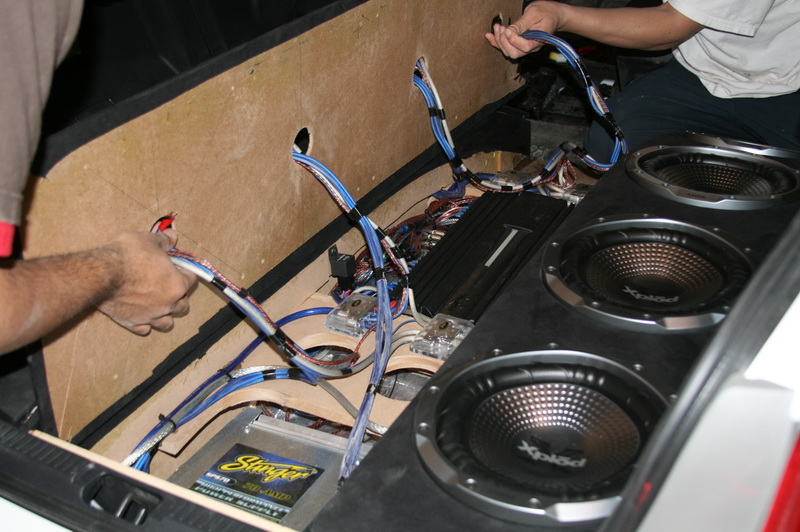
Step 13: Here you can see the Stinger wiring distribution installed on the space under the amp rack. Each of the four subwoofer amps will be fed by 8-gauge Stinger power and ground cable.
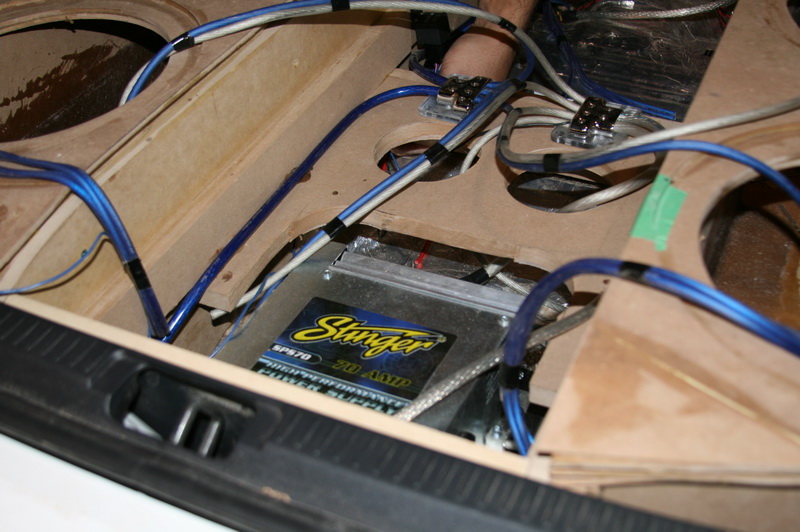
Step 14: A 120V Stinger power supply provides the ability to play the audio system endlessly while on display at an event.
Step 15: Here you can see some of the detailed wiring underneath the amp rack.
Step 16: The amp rack is buttoned up, and ready for the power the amplifiers to be installed.
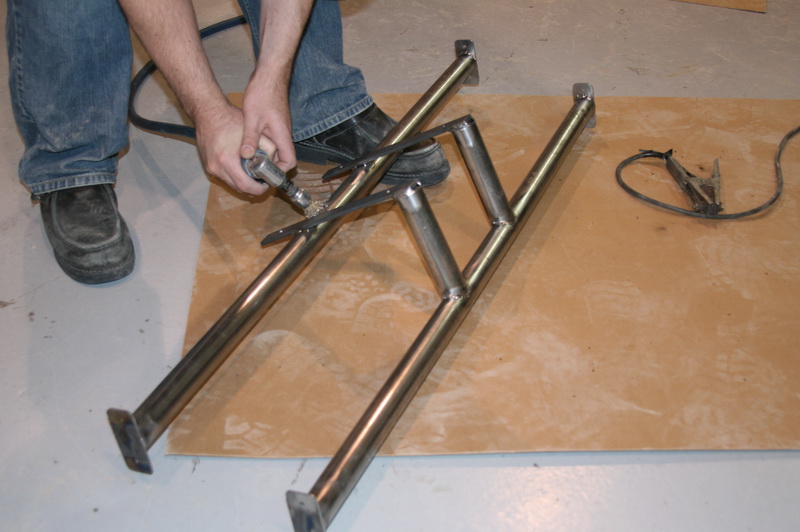
Step 17: Construction begins on the 32-inch Sony Bravia TV mounting bracket
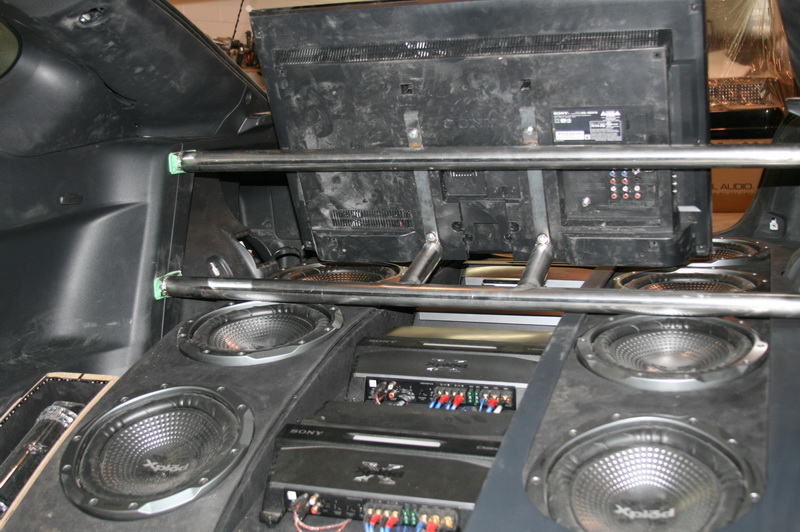
Step 18: The big TV is now in place. This is the view of the back of the TV from the driver's seat location.
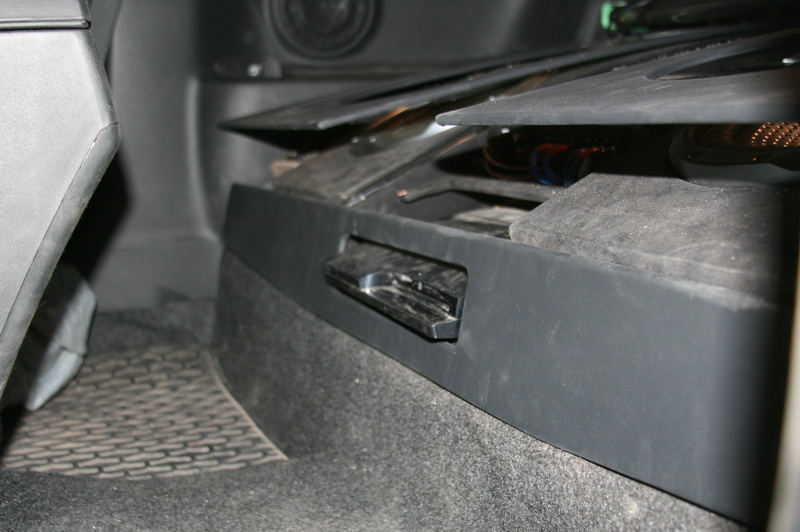
Step 19: Here you can see the vinyl-wrapped trim panel around the PS3 game system. This is located right behind the center console and faces the front of the car for quick and easy access.
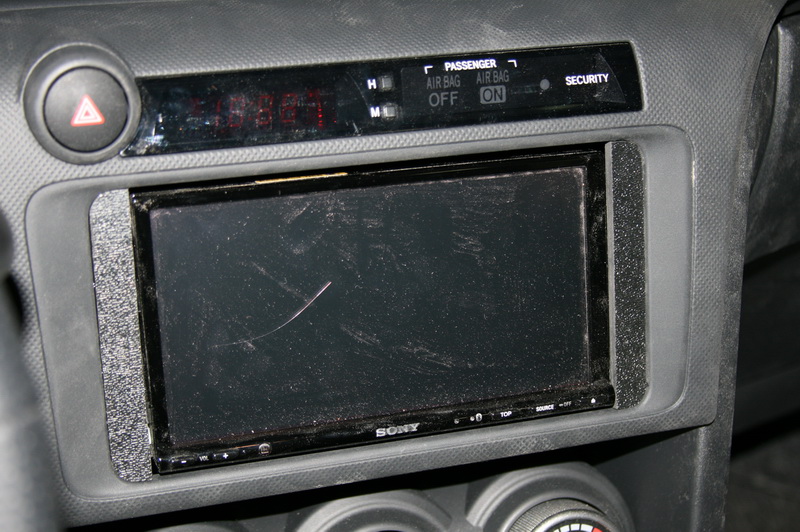
Step 20: A Sony XNV-770BT Audio Video Navigation Receiver installed in the dash of the tC. Small filler plates were made for either side of the deck.
ESSENIALS
Sony XNV770BT - 7" 2DIN Audio/Video Receiver with Navigation
Sony KDL32EX701 - 32" Bravia LCD TV)
Sony XAR800C - Rear-View Camera)
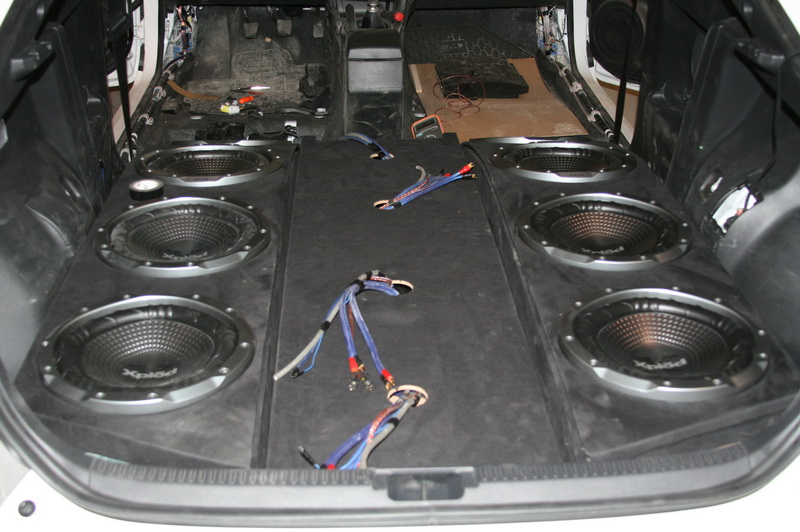
Sony XSGTR100L - 10" GTR Series Subwoofers x 8
Sony XSGTR1720S - 6 3/4 2-way speakers
Sony XSGTR1720S - 6 3/4 component speakers
Sony XMZR704 - 4 Channel Amp
Sony XMZZR3301 Class D Mono Amp x 4
Sony Playstation 3
Sony Playstation 3- 320GB Move Bundle
Stinger HPM Power and speaker wire
Autopage C3-RS665 (security alarm/starter)