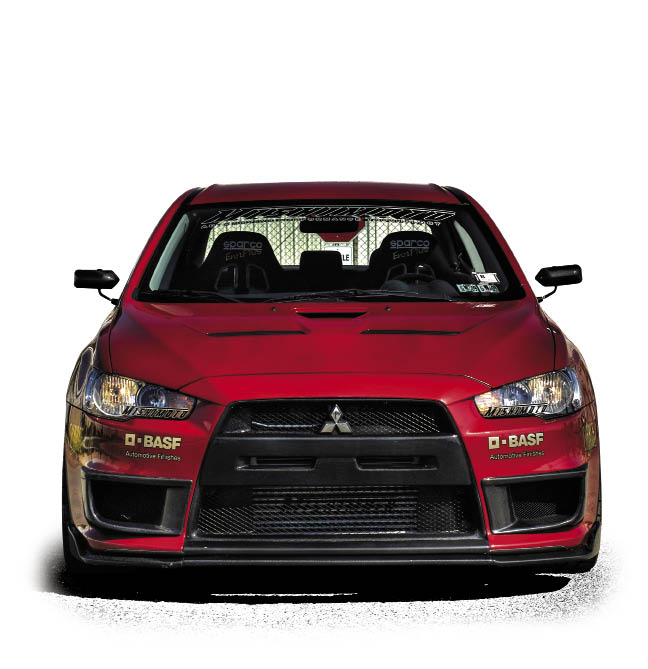
 A few houses down the block from me lives my neighbor Randy. Although he makes his living as a dentist, he is a bona fide “car-guy,” and over the years has always managed to have something interesting in his garage. Like me, he’d rather drive a car with a story, character and some history, rather than something brand new. Since we’ve been friends he’s had everything from a big block ‘68 Mustang reported to have been once owned by Jack Roush, to a 1980 Datsun 280Z with a nitrous assisted small block Chevy under the hood, to his latest acquisition, a very unmolested 2004 Mitsubishi Lancer Evolution.
The previous owner bought it because the Evo is cool and fast, but tended to prefer his Lexus as a daily driver, so the Evo sat mostly unused for about 4 years, (and had under 20,000 miles on it) until Randy took it off the original owners hands. Randy has owned it for not quite a year now, and has changed a few things, and upgraded the horsepower with a full exhaust system and some other under the hood goodies. Now it’s time to work on the creature comforts, so over a couple pints of his excellent homemade beer, we got to talking about improving his stereo system.
Like many of you readers, Randy’s a performance enthusiast and generally not a big car stereo guy. He tends to spend his “car money” on hardcore performance parts to make it stop, turn and go quicker. His trusty 280Z didn’t even get a stereo because as he explained, “amps and woofers are heavy, plus, it’ll just be in the way of the roll cage and nitrous bottles!” However, being my neighbor gets you automatically exposed to some pretty good audio systems and after listening to a system I’d built for another friend, he decided it was finally time to step it up.THE GAME PLAN
We talked about what the plan of attack would be and within a minute or so, Randy summed it up like this, “I want the car to be quieter inside, I want decent bass and I want it to be simple and easy to install. It doesn’t need to make my ears bleed, and the whole thing should weigh less than I do.” Randy is a not a big guy and tips the scales around 170 pounds. Well, I’d never really designed a system with weight instead of money as a major constraint, but what the heck I thought, how hard could it be? Plus it’d make for an interesting article.
For those of you who are lucky enough to own an Evo, you know the car uses a single DIN headunit, and 6.75-inch speakers front and rear. You also know Mitsubishi didn’t spend a lot of effort on sound deadening, and the cabin can be fairly noisy, particularly with a free flowing aftermarket intake and exhaust system.
The goal was to build a relatively light and low powered system, which would still offer superior performance by making good use of sound deadening 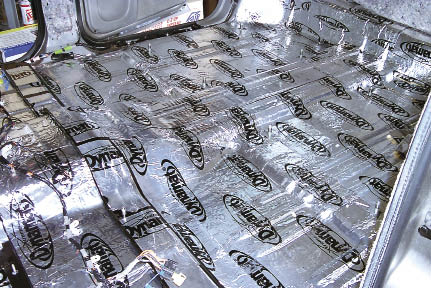 materials to get the interior noise levels down. Many people into high performance cars believe they need really high powered systems to overcome the vehicles noise, but in fact, they often overlook the obvious benefits of simply reducing the noise in the first place. Every dB of noise reduction means you can use less power to achieve the same volume levels, and it’s not uncommon to reduce noise by 6 to10dB. A reduction in power of 10dB is ten times less power! This means, by proper attention to reducing noise, you can achieve the same relative performance with 100 watts instead of 1,000!
Dynamat Xtreme & Dynaliner
We began by stripping the interior of the car, and figuring out how much and what type of deadening materials we’d need to use. Because I’m familiar with the well engineered Dynamat brand of products, and the excellent success I’ve had in the past with their stuff, Randy spent about $750 on various quantities of Dynamat Xtreme and Dynaliner. Seems like a lot of money when you look at the pile of boxes, but I knew it would more than pay off later. With the interior stripped to bare metal, we began by installing the Xtreme damping material on the floor, inner doors, roof, and basically everywhere we had bare metal. We also applied full coverage to the trunk lid, inner fenderwells, and the trunk floor. Once we had the bare metal basically covered, we added sheets of Dynaliner to the firewall, floor and the roof. This material is very lightweight acoustic foam, about ½-inch thick, that acts more as a sound insulator rather than a high mass vibration dampener. By the time we were finished, my rough calculations told me that we had already added almost 60 pounds of weight, but I wasn’t concerned, because I knew the cabin would be a much quieter and pleasant place to be, and we’d need far less power than Randy had originally envisioned.
As regular readers know, choosing speakers can be a highly personal mission, so armed with a CD of some of his favorite tunes, Randy and I drove over to a local car stereo emporium that carried some well respected brands to do our listening. The idea was, we’d pick out the speakers first, then the new head unit, then the subwoofer and amplifier combination. Upon arriving at the shop, the salesperson informed us they were in the process of changing out some gear on their main demo board and it wasn’t working. He laughingly (but very unprofessionally) suggested if their lazy installer would spend less time on the phone and more time working it would have been done by now. I mentioned to him I’d been in the same store 4 days earlier, and noticed then they had the board apart, so I thought for sure it would be up and running by now! He just said, “Oh, we should have it done in a few more days.” (Note to readers who work in retail stereo stores – Your demo boards need to work 100% of the time if you expect to sell things!) Unimpressed and not amused, we drove to another reputable shop, and lo and behold… they were able to demo things, answer questions and best of all, they had everything in stock! Because of their ability to actually be ready to do business, Randy spent over $3,000 bucks right then and there.Alpine SPS-600 Coaxials
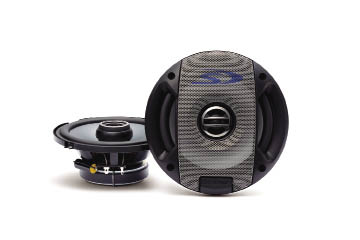
After listening to several brands, Randy chose Alpine SPS-600’s for the front and rear speakers. These good sounding systems use a poly-mica cone with an air injected rubber surround for good sound quality and reliability, and have an 80 watt continuous power handling specification. The tweeter is a 1-inch silk dome affair, mounted on a swivel post for better control of the highs and using a high quality poly cap for the crossover.
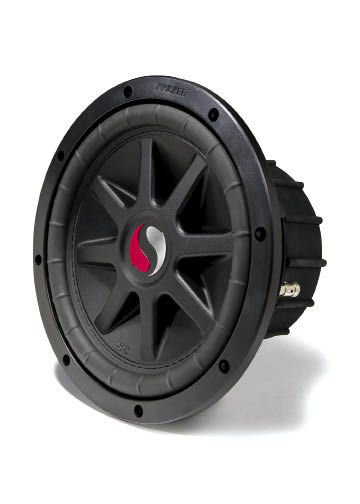
Kicker Solo Classic Subwoofers
Having those speakers selected, we moved on to the subwoofer choice. We had already decided it was going to be a pair of 8-inch subs to keep the enclosure size small and the weight down. A few minutes later, Randy elected to go with the new Kicker Solo Classics. These Kicker woofers were selected because they were small and worked quite well in very small sealed enclosures. The SoloKon cone uses a one-piece, polypropylene design for exceptional rigidity and a ribbed rubber surround provides high excursion and good control. The stamped steel basket, stitched surround, and spring-loaded terminals are all taken from the very successful original Solo-Baric woofers. We listened to the Kicker woofers in the store, and we agreed they sounded great and would have all the output Randy needed. Additionally, they were available in dual 4 ohm voice coil configurations with power handling rated at up to 300 watts, which would give us plenty of flexibility when it came time to choose the woofer amplifier. Watch these pages for a full review on the new Kicker Solo Classics next issue.
Alpine CDA-9886 Head Unit
The next component to choose was the headunit, and this was Randy’s most difficult choice of the entire system. Confronted with so many features, options, cosmetics and dancing displays to choose from, anyone can quickly feel overwhelmed. His eyes had glazed over and he looked confused, so I stepped in and pulled him aside. After a bit of logical discussion, we knew he wanted a head unit with AM/FM and HD ready tuner, CD, and maybe Bluetooth. Randy is not an MP3 guy, so no iPod connection was needed, (but it’s getting harder to buy a head unit without it these days) nor did he care for video or navigation. Understanding what you need or want before you go shopping is a big help. Then I told him to go and use a few units, check the feel of the controls, look carefully at the displays and find some choices that are easy to use and operate without really looking at them. Re-energized, with a firm plan of attack, we went back into the demo room and spent the better part of half an hour fiddling with a few radios.
When it was all said and done, his final choice was an Alpine CDA-9886. When I asked him why he chose that model, his reply was simple and logical. “I like the way the volume knob feels and with the animations turned off, the display is real easy to read. The most used buttons are placed where I can use them without looking and the way it’s laid out just makes sense to me. Plus, I’m going to add the HD Radio and Bluetooth options.” That folks is the best set of reasons for choosing a head unit I’ve ever heard. I’d like to think I had a bit to do with the logic involved, but it doesn’t really matter. There are many other good things about the Alpine CDA-9886 as well that came into play during the installation and setup, such as the ability to turn off the internal amplifier and the easy one button press to access the most often used features like subwoofer level and tone settings.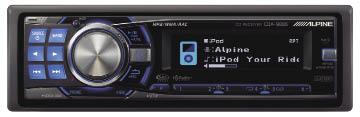
Alpine PDX-5 Amplifier
To drive all the new speakers, Randy was again attracted to a compact sized solution, and with a bit of help from a fairly knowledgeable salesperson, quickly decided on an Alpine PDX-5, five-channel amp to drive the whole system. The Alpine PDX-5 amp uses a full range Class D design for excellent efficient at all power levels and provides 75 watts to each of the full range channels and 300 watts to the subwoofers. This power mates perfectly with his choice of speakers and maintains his minimalist approach to getting his bump on. The Alpine PDX-5 also comes with built in -12dB front and rear crossovers and a -24dB crossover for the subwoofer output.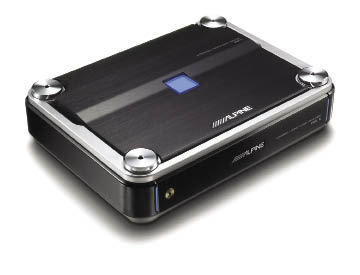
Wiring / Accessories & Custom Enclosure
With all the gear selected, we needed the wiring to make it all work, and for that Randy chose a Stinger SPK5241R 4-gauge Pro Power amplifier wiring kit and some additional Stinger gear. The subwoofer enclosure was constructed out of ¾-inch MDF, and when completed had an interior air volume total of about 0.8 cubic feet. We covered it in matching black trunk liner, and secured it to the chassis with ¼-inch thick custom aluminum brackets I made in my garage. The Alpine amp found a comfortable home on the back side of the enclosure, and a trim panel with the Mitsubishi logo embroidered in red trimmed out the amp and hides all the wiring.
LAST WORDS
The complete system total for Randy’s car came as a pleasant surprise, as he’d been under the impression this was going to cost around 5 grand by the time all the shots were fired. As it turned out, the entire system including the Dynamat and custom woofer box construction and trim work came in at just under $3,000. And in case some of you thought I’d forgotten, the weight of everything we added to the car came in at just under 117 pounds!
Over the course of two weekends Randy and I (mostly Randy) put the Evo back together and when we had it dialed in and tuned, we went for a ride. He was completely stunned at how much quieter and solid the car felt overall. In his words, “This can’t be the same car, it feels more like my S- Class inside!” Well, it’s probably not really as uber-quiet as the big Benz, but once again the benefits of sound control were clear. The Evo’s interior was transformed into a much more peaceful and enjoyable place to spend time. The doors close with a solid “thunk,” and the exhaust resonance as well as the frenetic noises from the turbocharged engine are all now greatly muted. Tire and road noise is reduced as well, and this high performance hotrod is actually quieter inside than a new Galant. The systems general sound quality and output also came as a surprise, the Kicker woofers supply more bass than he’d ever had in a car before and the Alpine speakers contribute clean and articulate output to what is actually a very musical system. Randy’s also thrilled with his new hands free Bluetooth functionality, and is quickly finding his favorite HD stations around the Valley of the Sun.
From my point of view, this was a great build. We came in well under budget and built a simple yet effective system that far exceeded expectations without losing anything that made the car fun to drive! I’m not sure what his next project will be, as the Evo is pretty complete, but he did mention he knows of a 1969 Opel GT in need of restoration and likely a new stereo… happy listening.
www.alpine-usa.com
www.alpine-canada.com
www.kicker.com
www.stingerelectronics.com