
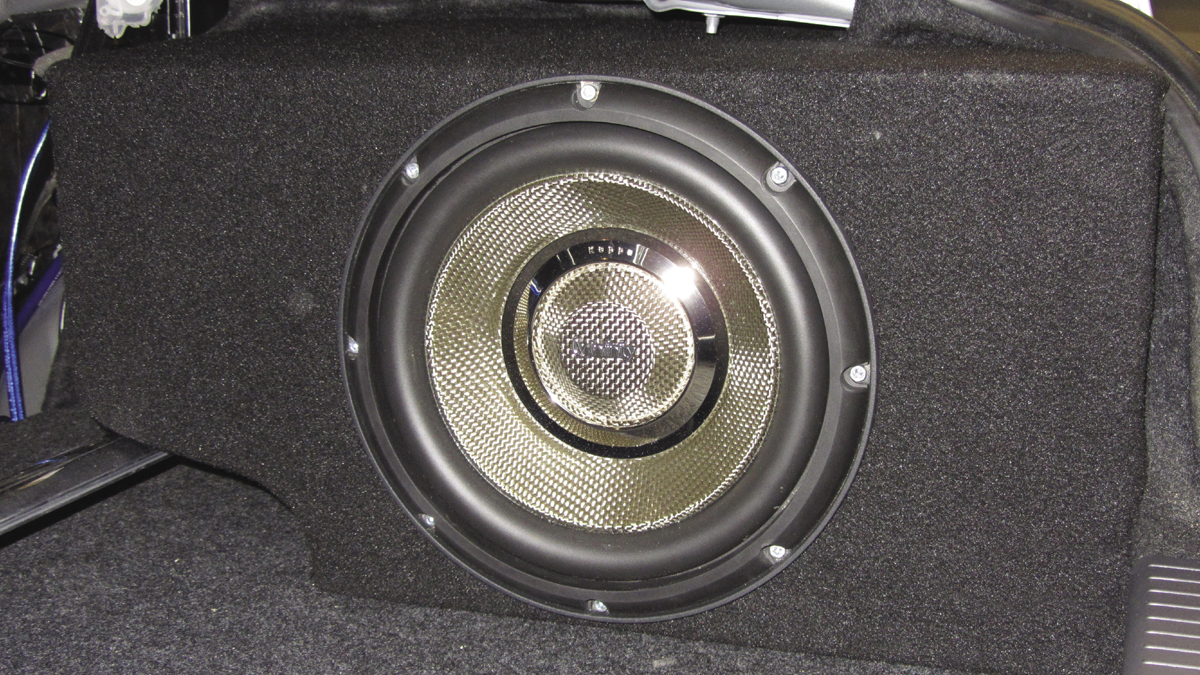
Once again, we catch up with Future Shop ConnectPro head installer, Benson John and his team for part two of the audio install on the Scion FR-S project car. Previously, the team upgraded the head unit, component speakers and internal wiring, while JRP Inc. took care of the suspension, air intake and exhaust upgrades. For part two, the ConnectPro guys will install an Infinity Kappa Series 10-inch 100.9 watt subwoofer and Infinity Kappa FIVE Amplifier.
Infinity boasts innovative materials and breakthrough engineering, making it an easy decision for the FR-S upgrade. The 10-inch 100.9 watt subwoofer offers two and four ohms options for the two most popular subwoofer impedances, while the amp offers a 12 dB per octave electronic crossover, allowing you to optimize speaker performance based on type and placement.
Before we classify this install as officially complete, let’s take a look at the process. Thanks again to the ConnectPro crew and all the sponsors who have helped create one of the most impressive project cars of 2012.
Install
Subwoofer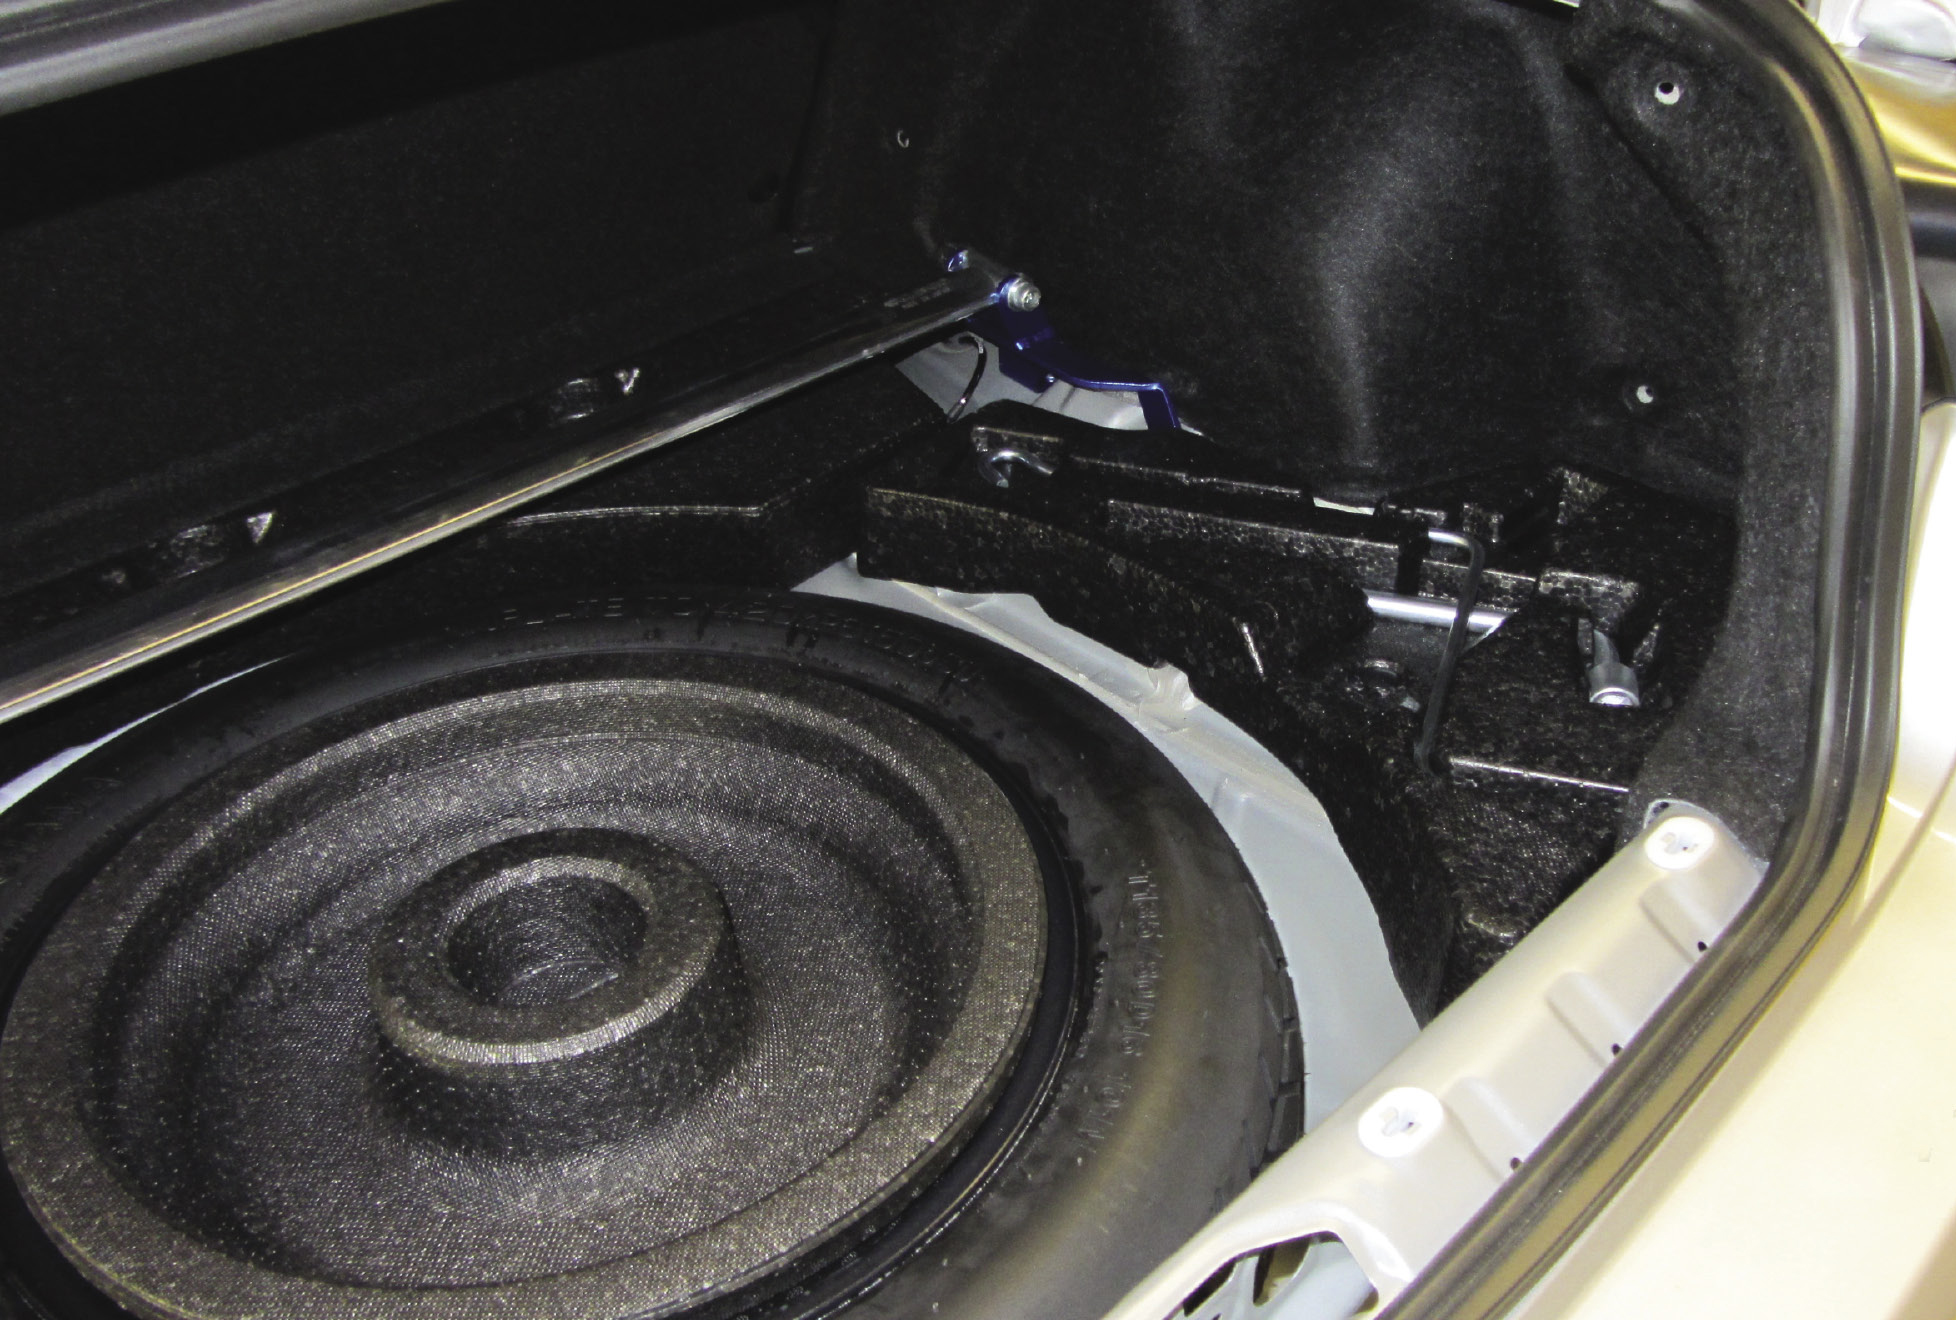
1. The trunk is stripped of all necessary wiring for the sub and amplifier, before being reassembled.
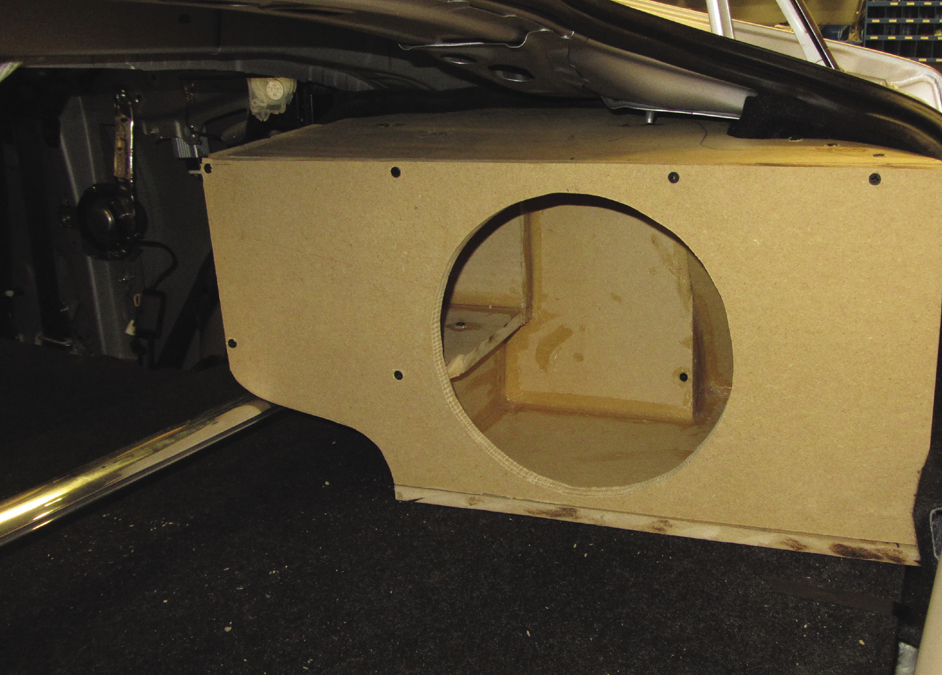
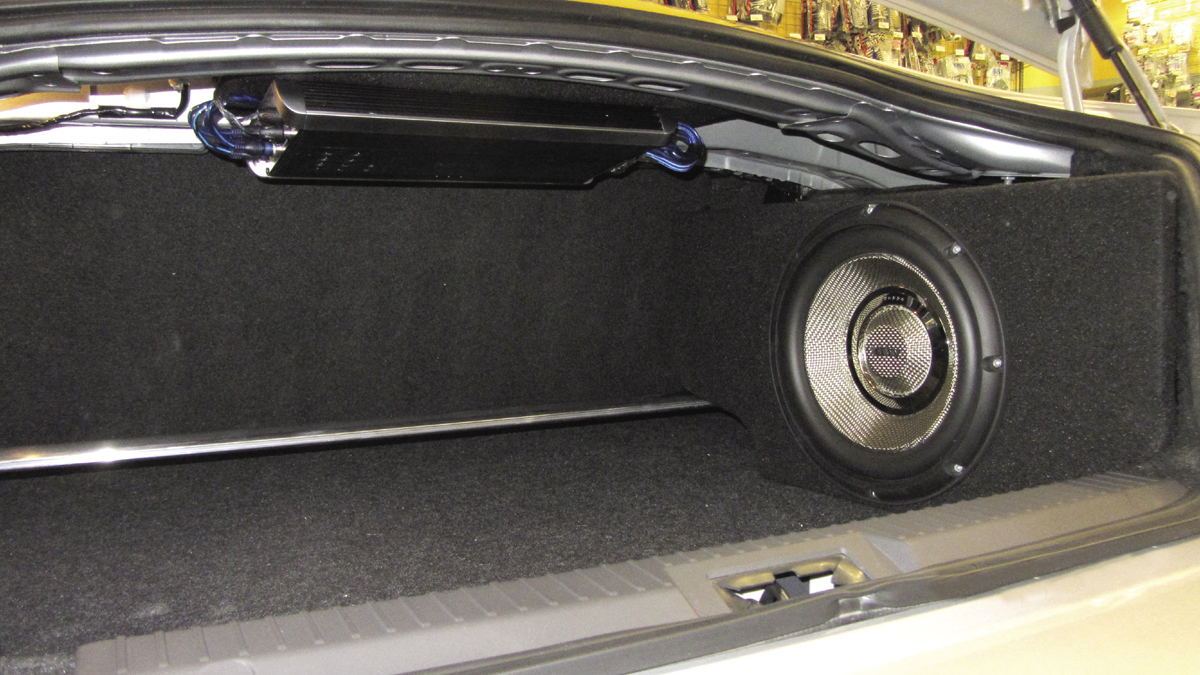
2. A custom speaker box is built after measuring the right side of the trunk, where the sub will be placed.
3. Once the measurements are complete, the box is cut, glued together with industrial wood glue, screwed with wood screws for extra strength, then sealed using silicon. This will prevent air from escaping the box. The box is then covered in carpet to match the trunk interior. Once the box is finished, it is left to cure for two days.
*Quick Tip: When deciding on speaker box dimensions, it comes down to personal sound preference. For more bass, you may want a larger box. Before securing the box to the trunk, make sure it suits your preferred tastes.
Amplifier
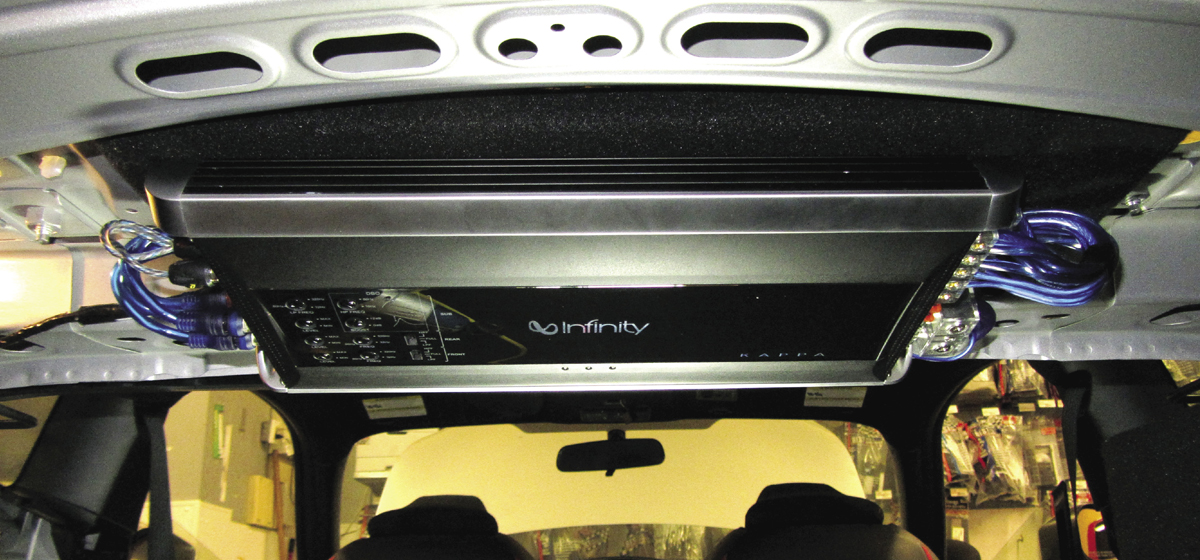
5. Before attaching the wiring, the amp is fastened to a custom amp board. The board was also carpeted to blend with the trunk interior.
*Quick Tip: When deciding on amp placement, think about how you use your trunk. Would you like to utilize the space? Your best bet may be to fasten the amp to the back of the back seats. There is also a good chance the amp screw holes don’t match any factory ones in your trunk, so a custom board is a good option.
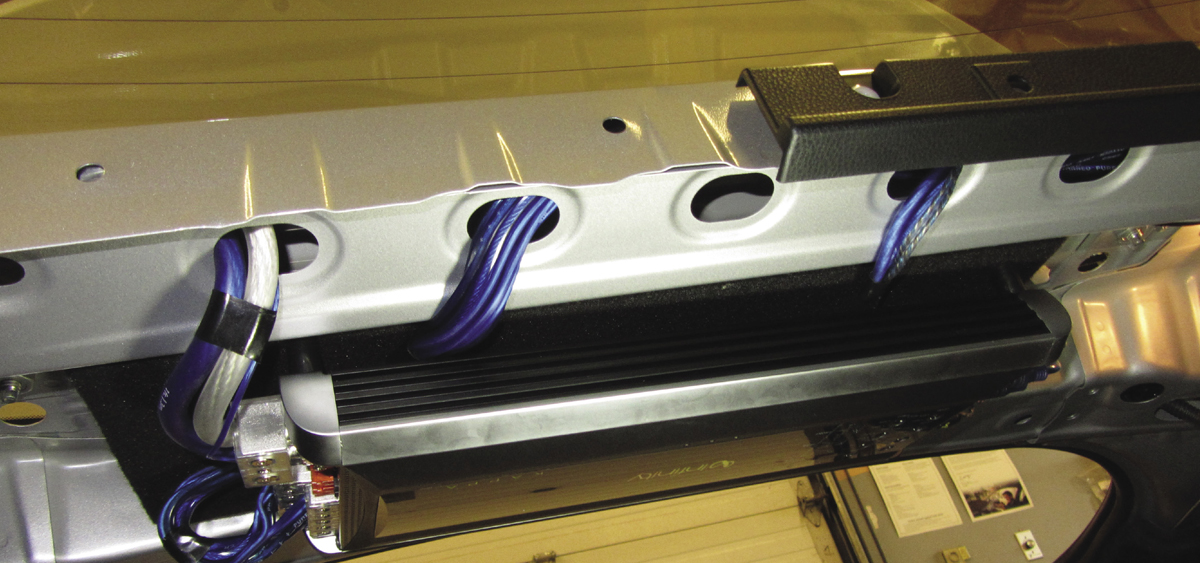
6. In this case, the owner did not want to drill into the frame of the vehicle, so the amp is screwed into the factory holes on the trunk ceiling between the two rear speakers.
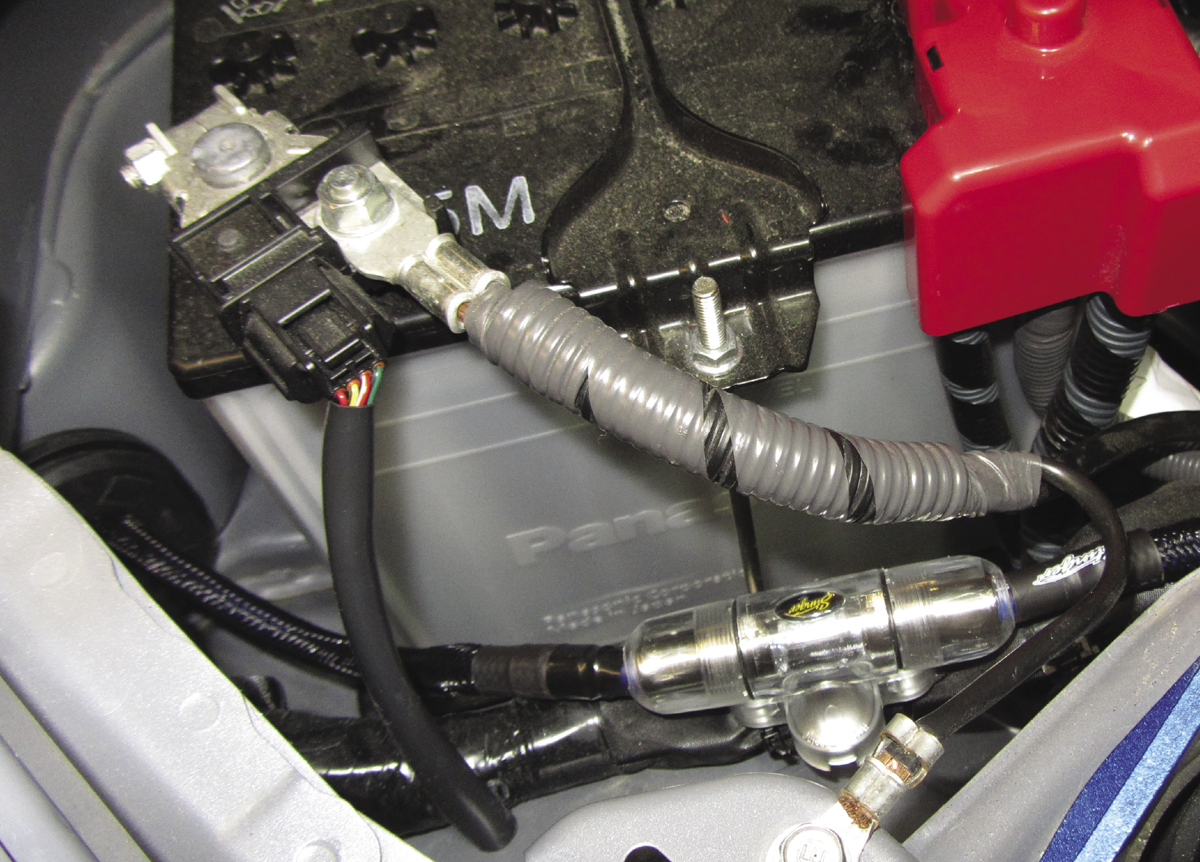
7. Once the amp is fastened, it is connected to the wiring before the wiring is connected to the battery.
*Quick Tip: Your last step should always be attaching the wire to the battery. This will prevent damage to the battery or audio equipment.
Sources
Johnston Research & Performance
Scion Canada
Future Shop
ConnectPro
Pioneer
Yokohama Tires
KW Suspensions
Cusco USA
Whiteline
Ingalls Engineering
Injen Technology
Magnaflow
NV Auto
Infinity by Harman