Graphiti.ca: Vehicle Wrap Installation

Imagine if you could draw or paint new graphics on your car in a matter of hours? It sounds like a stretch, but thanks to high quality materials like Scotchprint from 3M and companies like Graphiti of Mississauga, ON, completely changing the look of your vehicle in only a few hours is easy. Any design, color and textures that include carbon fiber and brushed aluminum are at your disposal for coming up with a new design for your ride.

Graphiti.ca: Vehicle Wrap Installation

Step 1

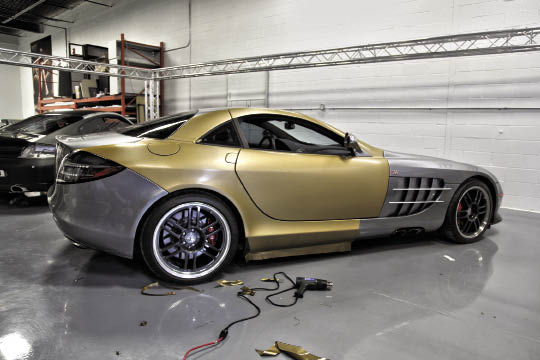
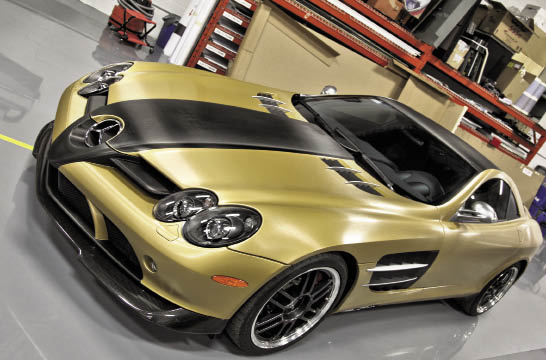
A classic Mercedes Benz McLaren SLR, ready for a facelift.
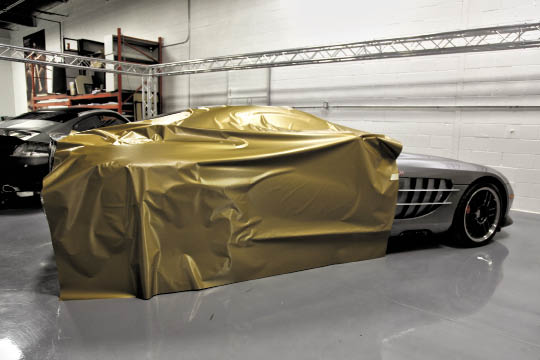
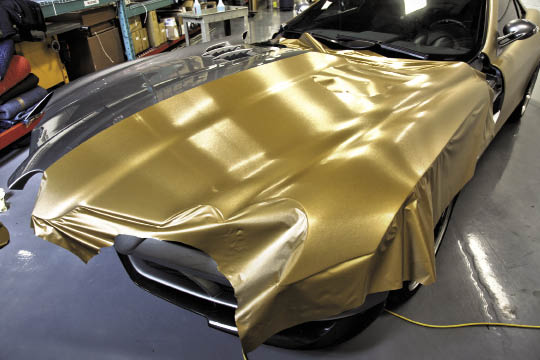

Graphiti.ca: Vehicle Wrap Installation


Step 2

Focusing on one side of the car, the gold-coloured brushed aluminum-finish vinyl is draped over the side of the car.
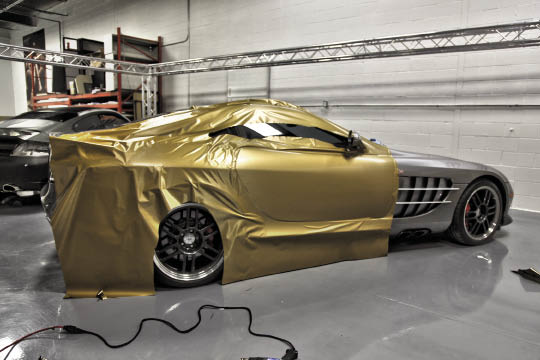
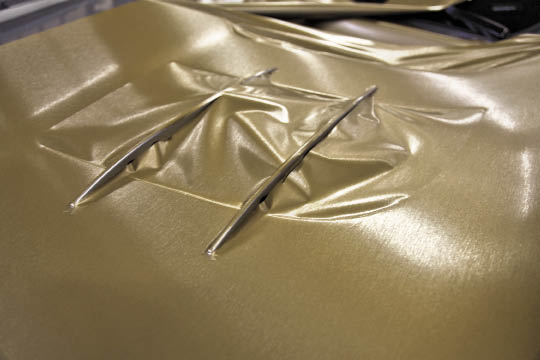


Graphiti.ca: Vehicle Wrap Installation


Step 3

The vinyl is stretched tight over the door area.


Graphiti.ca: Vehicle Wrap Installation


Step 4

The rear fender and roof pillars were next. A heat gun and years of experience let the vinyl conform perfectly.
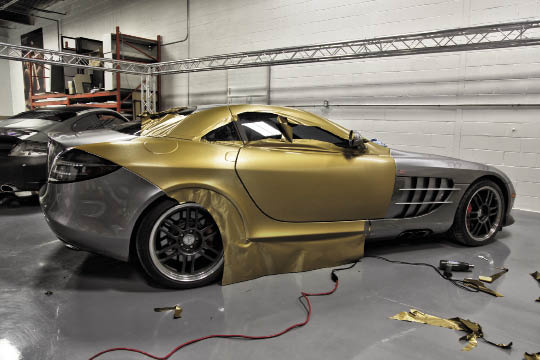


Graphiti.ca: Vehicle Wrap Installation


Step 5

Here we can see the trimming is done around the door handle and fuel filler cap.


Graphiti.ca: Vehicle Wrap Installation


Step 6

Voila – the passenger side is done. Using a single piece ensure the grain of the vinyl flows smoothly front to back.
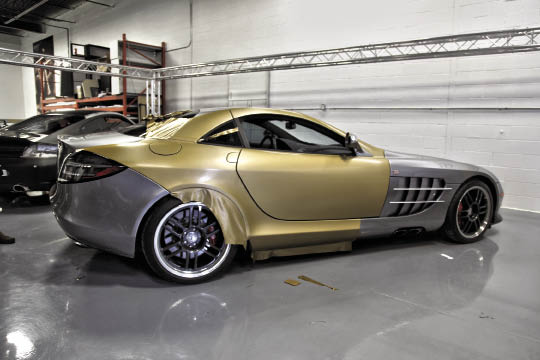
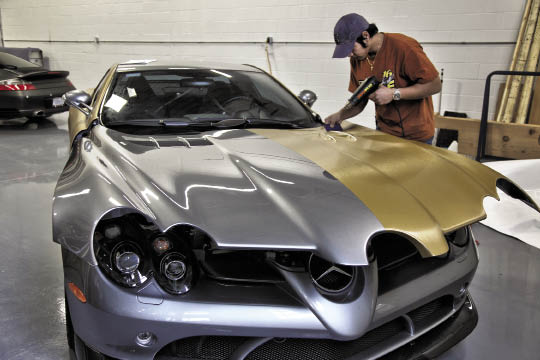
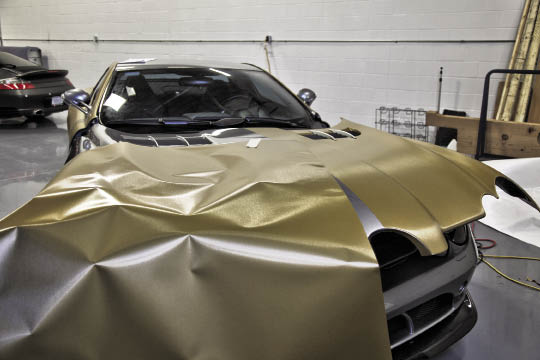


Graphiti.ca: Vehicle Wrap Installation


Step 7

The driver’s side was next, followed by the hood – which will be done in two pieces.
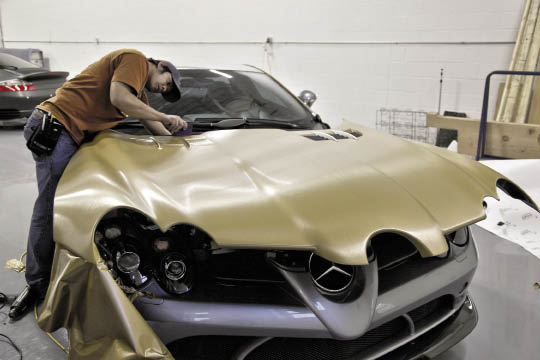

Graphiti.ca: Vehicle Wrap Installation


Step 8

Every feature needs to be addressed – here is the hood vent with just some basic trim work completed.


Graphiti.ca: Vehicle Wrap Installation


Step 9

The heat gun and application tool are put to work around the hood vent.


Graphiti.ca: Vehicle Wrap Installation


Step 10

Hood vent done, passenger side under way.


Graphiti.ca: Vehicle Wrap Installation


Step 11

Left side almost done – another vent gets some attention.
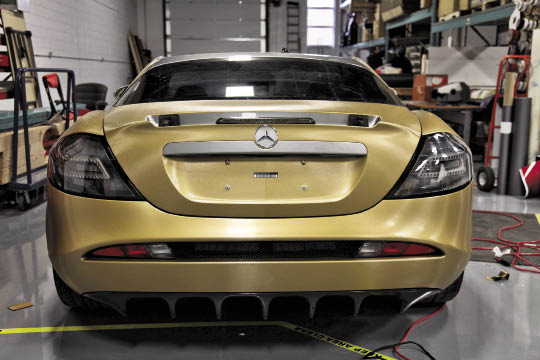


Graphiti.ca: Vehicle Wrap Installation


Step 12

The rear of the car, wrapped. Several components were removed to ensure a seamless and tidy look around the edges.
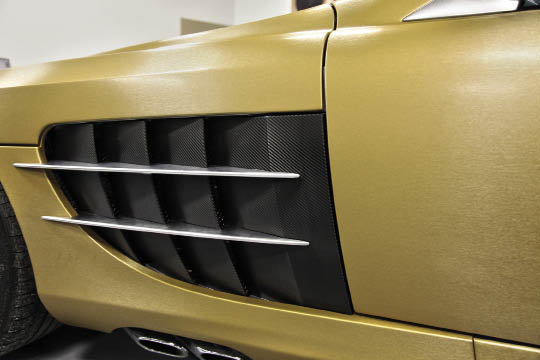


Graphiti.ca: Vehicle Wrap Installation


Step 13

The driver’s side-air-vent wrapped in carbon-fiber finish vinyl.
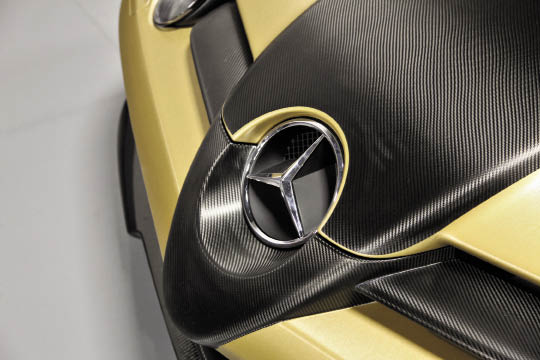


Graphiti.ca: Vehicle Wrap Installation


Step 14

Another back carbon-looking stripe down the hood hides the seam and accentuates the F1 styling cues of the SLR.


Graphiti.ca: Vehicle Wrap Installation


Step 15

In a matter of hours, this SLR has been dramatically changed and looks awesome!

Related Articles

KICKER Supports Future Installers at SkillsUSA Championships KICKER Supports Future Installers at SkillsUSA Championships
KICKER Supports Future Installers at SkillsUSA Championships KICKER continued its long-standing support of SkillsUSA by participating in the...
ST Suspensions Adds XTA plus 3 Coilovers for Nissan S13 ST Suspensions Adds XTA plus 3 Coilovers for Nissan S13
ST Suspensions Adds XTA plus 3 Coilovers for Nissan S13Photos Courtesy of KW automotiveFew 1990s Japanese platforms have stayed as relevant as the...
Toyota unveils 2026 GRMN Corolla Toyota unveils 2026 GRMN Corolla
It’s not often that an auto manufacturer caters to the enthusiast community directly in these days of seemingly endless SUV announcements, but on...
William Howard’s 2018 Ford Mustang GT Wins Best American at Tuning 365 Englishtown 2025 William Howard’s 2018 Ford Mustang GT Wins Best American at Tuning 365 Englishtown 2025
William Howard’s 2018 Ford Mustang GT Wins Best American at Tuning 365 Englishtown 2025 Photos Courtesy of William Howard / PASMAG Some builds make...
Kijiji to Kaido Kijiji to Kaido
Kijiji to Kaido Gary Zackodnik - 1988 Toyota Soarer Story by Adam Gordon Photography by Rayelin Asselin (@Rayelin__) Gary Zackodnik didn’t set out...
An Ode to JDM Tuning An Ode to JDM Tuning
An Ode to JDM Tuning Anthony Gonzales - 2014 Scion FR-S Story by Adam Gordon Photography by Caden Underwood (@cru_media) Inspired by the OGs of...