Step 1
A large concern when installing this type of equipment is the demand that it will put on the electrical system but more importantly the factory headlight wiring and connectors, for this install we are installing a total of 4 ballasts and 4 HID bulbs. The demand on the system could require the installation of relays that would be wired to supply the current needed to the HID’s.
Step 2
When opening anything new you should always look over what you are going to be working with. It is also important to read the instruction booklet as it will undoubtedly have important installation data. To my surprise the ballast were only 3/8th of an inch thick and about 3 ½ square making them very easy to hide and properly install. As mentioned in the instructions the HID light itself is very delicate and will be permanently damaged if the grease from your fingers touches the bulb.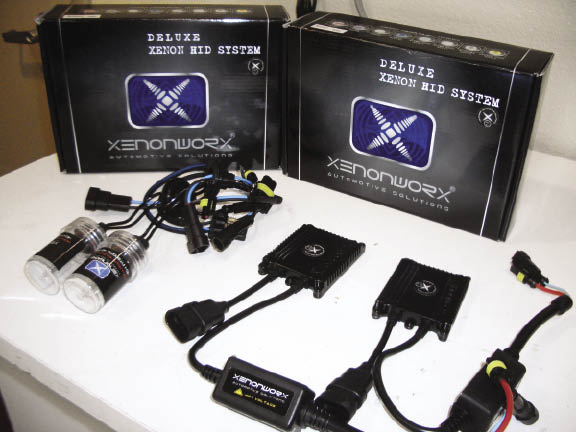
Step 3
The 05 Civic was pulled into the bay and our vehicle check in procedure was done to make sure that before any work began we knew what worked and didn’t work. With the check in sheet completed we could know start on the installation. First was the left side of the vehicle we started by removing the battery and battery tray to give us easy access to the factory lights and the mounting location for the ballasts.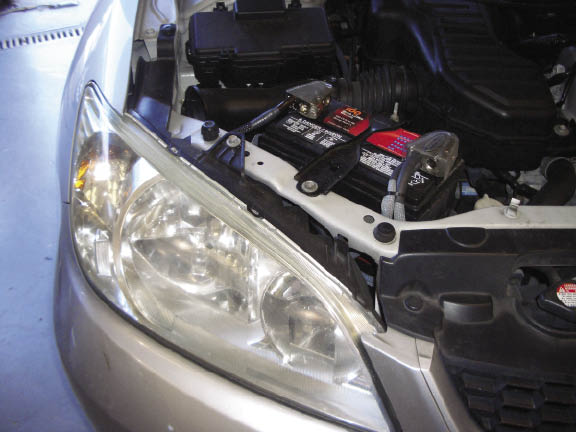
With the battery out of the way the factory bulbs were removed and the HID ballast and bulbs were prepped for installation. Because the HID kit was specific to the Civic everything was plug ‘n’ play. Be sure when you are connecting the HID plug to the factory plug you push the connector in all the way. Also, use caution when inserting the new HID bulb into the headlight.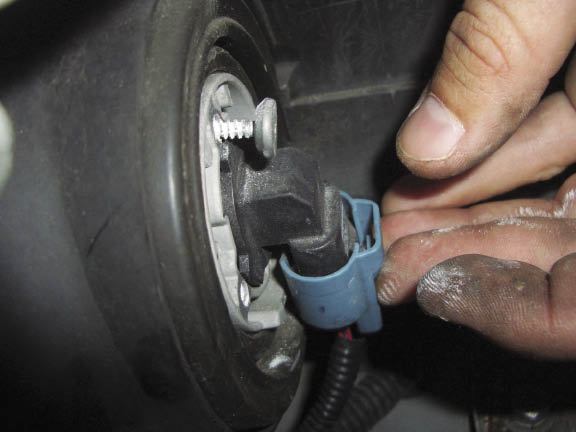
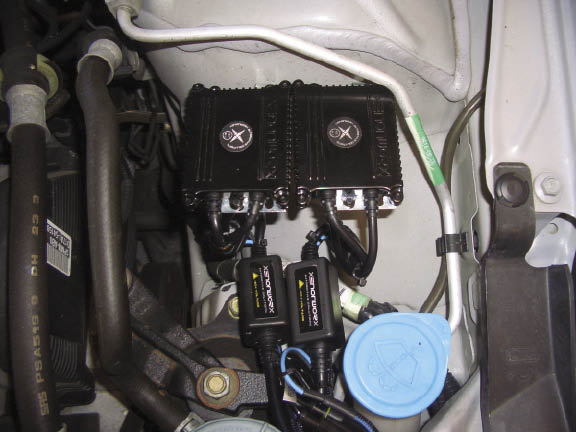
Step 5
Mounting brackets came with the kits and they fit the ballasts, the brackets were attached to the ballast and prepped for mounting. To properly mount anything in a tight or small area it is always a good idea to pre-drill you holes using an 1/8” drill bit. This make it less likely that you will slip when securing the brackets down with screws.
Step 6
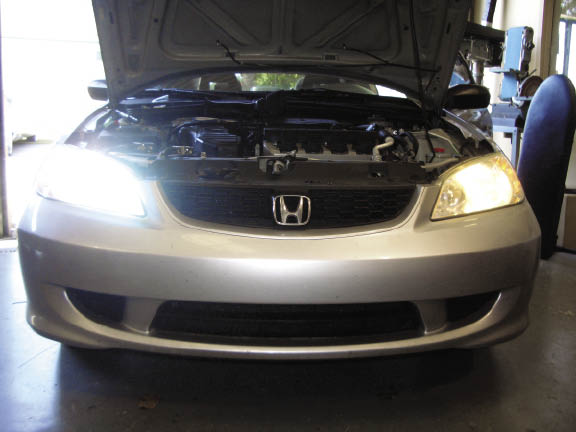
With both the high and low beams completed on one side it was time for a trial run, the battery was reinstalled and the head light were turned on. Immediately we saw a difference in the quality of light. What a difference. Be aware that when you first turn the light on you will hear a high pitch wine from the ballast, this is normal don’t worry.
Step 7
It was time to install the lights on the other side, all that has to be done was to repeat the steps from the previous side and our installation was complete. The only difference was the mounting location of the ballast, it was decided that they would be mounted in a more visible place to show the new students that come into our class.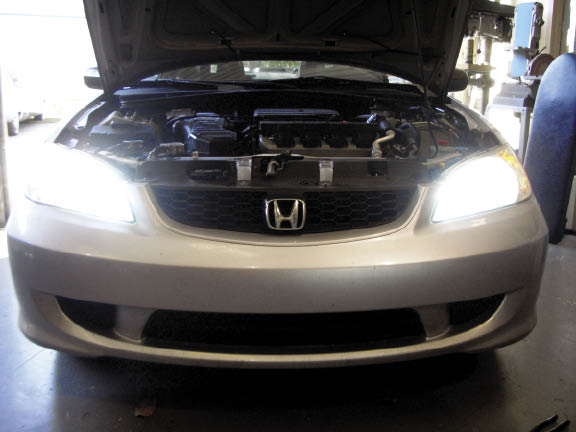
For more information and were to purchase the Xenonworkx HID kit find a local shop in your town that sells Metra Electronics product and ask for the kits.
If you would like to build your skills as a mobile electronics installer and learn from the best fabricators in the industry log onto our web-site www.installerinstitute.com and see what the Installer Institute can do for you.
Source:
1524 Ridgewood Ave.,
Holly Hill, FL,
32117
(800) 354-6782
www.installerinstitute.com
Related Articles
 PASSWORD: JDM - Dry Carbon GT-R Parts
 Project R32: Proper Exedy Racing Clutch Selection
 Getting Hyphy: Calvin Wan's 1993 Mazda RX-7
 BIG BALLIN'
 Rugrat: Sean Driscoll's 2004 Scion xB
 Project R32: Adjustable Suspension Links