Step 1 The storage bin was removed from underneath that rear passenger seat and the Pioneer TS-SW251 was set into place to check the clearance between the sub and the bottom of the seat.

Step 2 2” masking tape was applied to the entire area to help protect the carpet. We applied some red electrical tape so the reader came see the outline of what the base of the enclosure will be. Once we had the outline we cut 5 layers of 1 ½ oz fiberglass mat.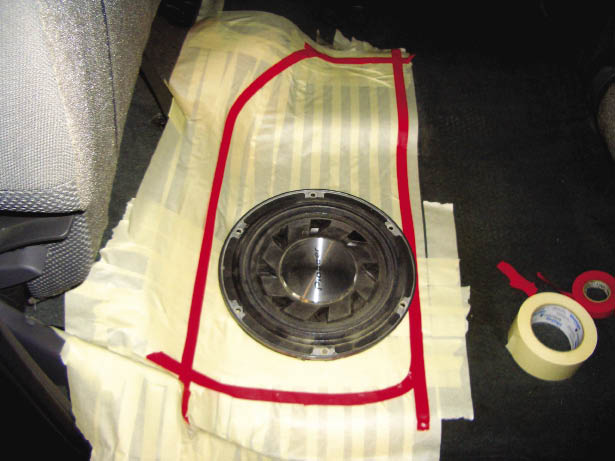
Step 3 Aluminum foil was then applied over the tape, it was attached with 3M super 77 spray glue. When using this technique you should apply 2 layers of foil, this will make it much easier to separate from the floor when you are ready to remove it. Fiberglass resin was mixed up and applied to one layer at a time. After each layer you should roll any air bubbles out with a fiberglass roller.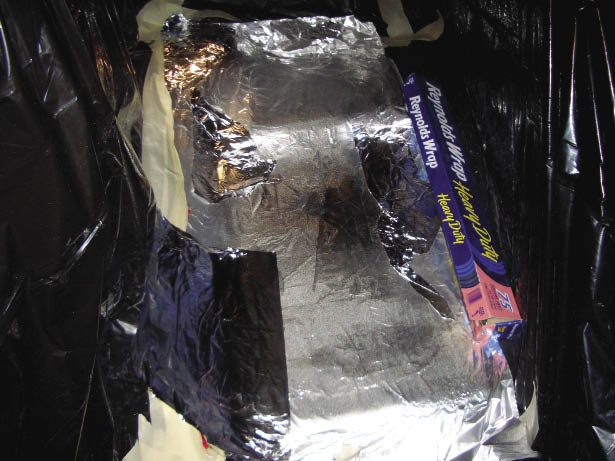
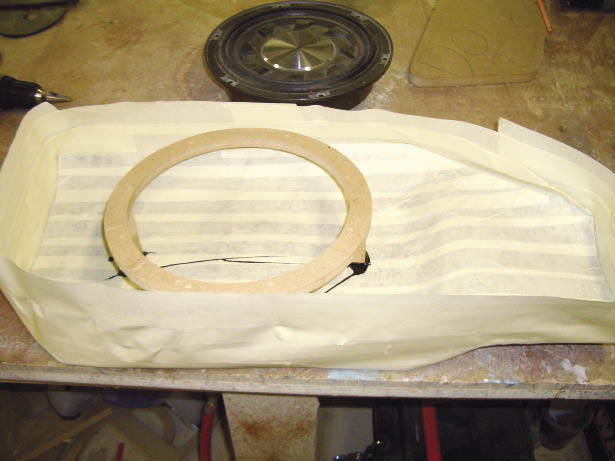
Step 4 With the glass dry we popped the base out and begin to shape it. First, remove all the foil and retrace our line, then a jig saw was used to trim edges smooth. Next a speaker ring was made and the base and ring were set back into the vehicle to check the available height. Wooden supports were set into place and the seat was dropped again for a final check.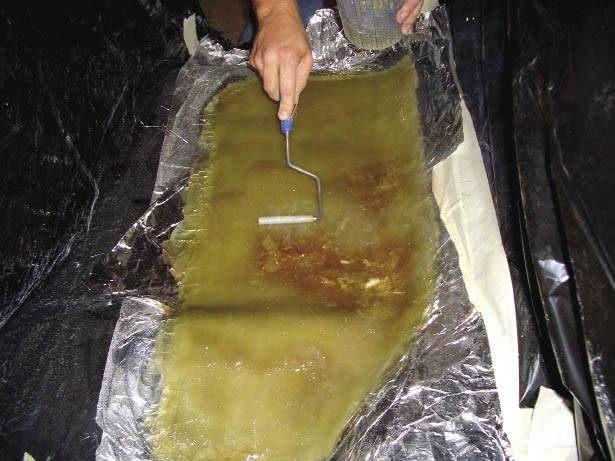
Step 5 With the supports made the next step was to tape up the top of the base and create a wall of tape around the edges of the part. Once completed the ring was super glued into place on top of the tape. 2 part expanding foam was mixed up and poured into the taped area. Special note: using a cheap blender to mix up the 2 part foam will give the foam even consistency throughout the entire project. Once the foam dried it was cut and roughly shaped with a hacksaw blade and a grinder.
Step 6 With the shape rough the project was sanded flat by hand and then set back into the vehicle for another test fit. When everything checked out we started to reshape the panel to give it some unique contours. With the final shape decided on the panel was covered with aluminum foil, then mold release wax and prepped for fiberglass.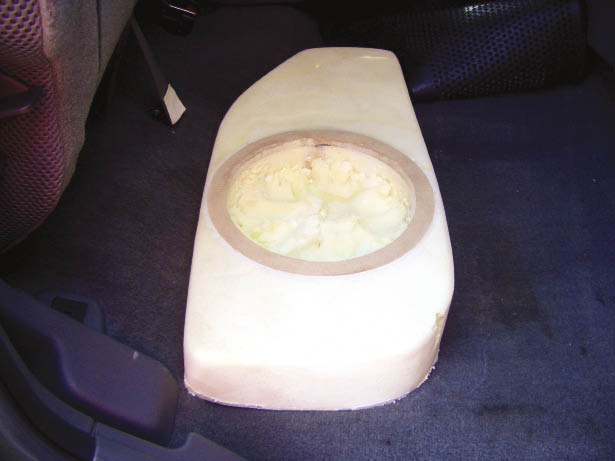
Related Articles
 PASSWORD: JDM - Dry Carbon GT-R Parts
 Project R32: Proper Exedy Racing Clutch Selection
 Getting Hyphy: Calvin Wan's 1993 Mazda RX-7
 BIG BALLIN'
 Rugrat: Sean Driscoll's 2004 Scion xB
 Project R32: Adjustable Suspension Links