Alright, so you have all of the visual upgrades, but what happens when it is time to make some power for  your V8-powered M3? You upgrade! Doing so, however, isn’t as easy in the BMW world as it would be for a Honda. The intakes for M3s are few and far between, not to mention expensive. Buyers have to figure out which intake is going to perform for them as advertised in order to ensure their hard-earned money is well spent.
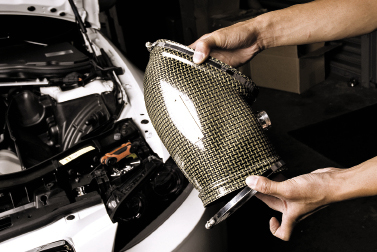
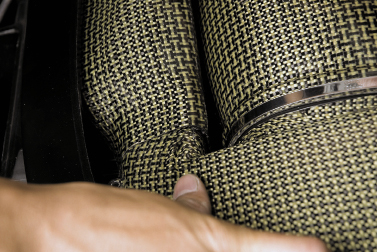
Elaborate intakes have formed a hot luxury and exotic market in their own right, and the carbon experts at Tecnocraft have decided to design their ENVY™ Intake System line to take advantage. Their craftsmanship is unparalleled and the free-flowing design creates horsepower across the band. Best of all, this piece is 100% designed and built in the USA, which is more important now than ever. We wanted to see just how easy the smooth the relatively complex installation of this ENVY™ Intake System was in a step-by-step install.
The ENVY™ Intake System is a direct bolt-on product for the E9X - M3s and uses existing factory hardware for easy installation. Super 3M Electrical Tape is supplied and used as a lubricating dust shield for ChargePipe installation (see below).
Tools and hardware required:
- 1x Flathead screwdriver
- 1x Pin-puller (Flathead screwdriver alternative)
- 1x T20 Torx Driver
- 1x T25 Torx Driver
- 1x Super 3M Hi-Heat Environment Electrical Tape (supplied)
STEP 1. Use the Torx T-25 bit to remove a total of eight (8) T25 screws located on the perimeter of the E9X M3 OEM Intake Airbox Cover. Use these screws for reinstallation of the Tecnocraft ENVY™ Enlarged Intake Cover (BMW-NVEC-C/K) afterwards.
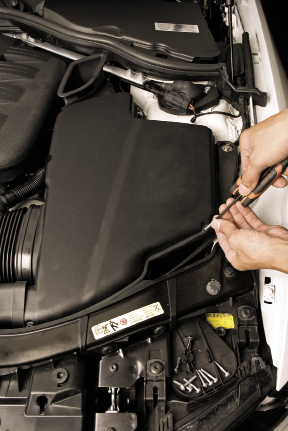
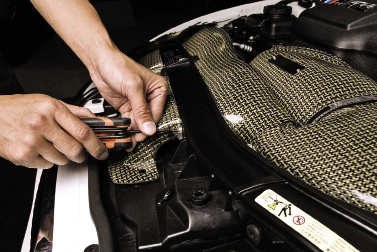
STEP 2. Use a flathead screwdriver or a pin-puller to carefully pry loose the two (2x – one on each side) push-pins holding down the E9X M3 OEM Kidney Grille Intake. Once sufficiently loosened, use a flathead to remove the complete assemblies. Carefully keep these push-pin assemblies together as they will be used later for installation of the TECNOCRAFT ENVY™ Ram Air Scoop.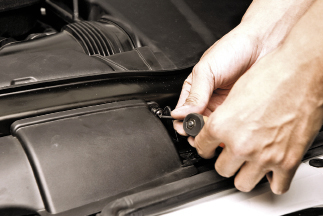
STEP 3. Use a Torx T-20 bit to remove the two (2x – one on each side) Torx screws supporting the E9X M3 OEM Kidney Grille Intake onto the E9X M3 OEM Scoop-to airbox plastic section. Keep these Torx screws handy as they will be used later for installation of the TECNOCRAFT ENVY™ Ram Air Scoop and Transition Pipe.
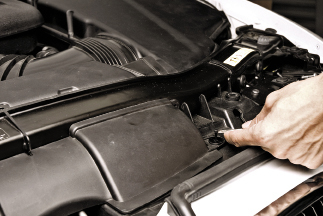
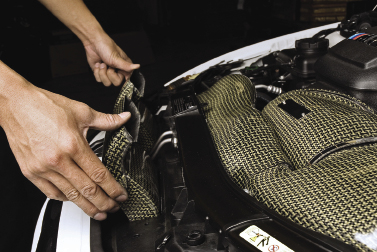
STEP 4. Lift up and completely remove the E9X M3 OEM Kidney Grille Intake. Pull and completely lift out the E9X M3 OEM Scoop-to-airbox plastic section (towards the rear, as seen below). Completing this step enables removal of the E9X M3 OEM Intake Box Cover as well.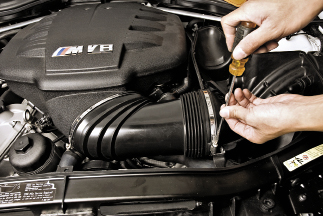
STEP 5. Use a flathead screwdriver to carefully loosen the E9X M3 OEM Rubber Accordion Intake Pipe’s hose clamps (2) for removal. These hose clamps will be reused later for installation of the TECNOCRAFT ENVY™ ChargePipe. Then Squeeze the clamp, pull and release the auxiliary hose and connector from the side of the OEM rubber intake accordion section. Safely tuck it away for reinstallation onto to the ENVY™ ChargePipe.
STEP 6. Safely dislodge and remove the E9X M3 OEM Rubber Accordion Intake Pipe in an upward motion, noting carefully how this assembly fits and sits properly together in combination with the OEM Factory Air filter inside the air box assembly. NOTE: The air filter is fitted into this system by a spring-loaded release knob inside the airbox (right
side).
STEP 7. Pull and remove the OEM plastic adapter midsection fitted on the airbox-end of the E9X M3 OEM Rubber Accordion Intake Pipe for reinstallation onto the ENVY™ ChargePipe. Also remove the aluminum hose clamps from the E9X M3 OEM Rubber Accordion Intake Pipe for reinstallation onto the ENVY™ ChargePipe.
NOTE: The supplied Super 3M Electrical Tape is to be used as a lubricating dust shield for the ChargePipe installation. Electrical tape should be wrapped around the lip section between 3-4 revolutions, layered enough to make a lubricating seal between the ENVY™ ChargePipe carbon fiber and the OEM plastic adapter midsection.
STEP 8. Super 3M electrical tape will ALSO need to be wrapped (3-4 revolutions) around the lip section on the OEM intake manifold side. It should be layered enough to make a lubricating dust seal between the ENVY™ ChargePipe and the intake manifold connection. Doing this also ensures that the dry carbon fiber ChargePipe does not rub on the OEM intake manifold connection and stays within a “moving” tolerance when the vehicle is in use. Trim as necessary as fitment of the ChargePipe should be “snug” but not forced.
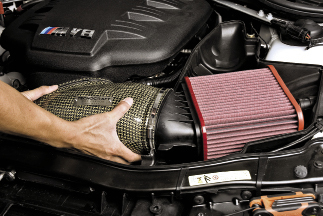
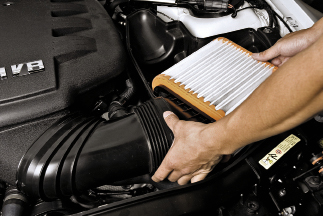
STEP 9. Reinstallation of the ENVY™ ChargePipe and BMC air filter occurs simultaneously and may require the assistance of another person to be fitted properly. The figure shown below is one of the main ways to reinstall the ChargePipe and BMC filter into the vehicle correctly. NOTE: Using the spring-loaded knob inside the airbox can also help to fit the filter with the ChargePipe assembly (at a slight angle).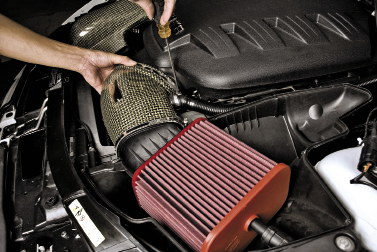
STEP 10. Secure and tighten the hose clamps on the ChargePipe at the positions below. When the system is warmed up, tighten these clamps another ½ turn or so after a break-in
of the ENVY™ system. Secure the auxiliary hose by gently snapping the connection into place.
STEP 11. The transition pipe reinstalls in a similar fashion to the way the E9X M3 OEM Scoop-to-airbox transition section was originally situated. Perform ENVY™ Transition Pipe reinstallation and fitment in reverse of STEP 4. Please keep in mind, the ENVY™ Transition Pipe and the ChargePipe come in close contact with each other in this area and are meant to maximize the available room in this section of the engine bay. NOTE: The airbox ‘mouth’ side of the ENVY™ Transition Pipe slips over the lip section of the factory airbox assembly in this area, and butts up against this section to fit properly with the ENVY™ Ram Air Scoop screw holes and scoop sections.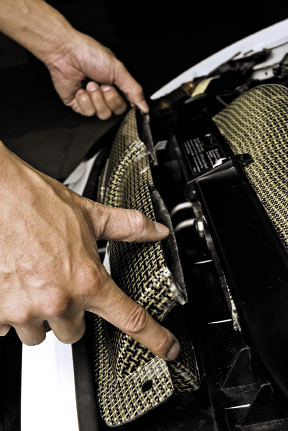
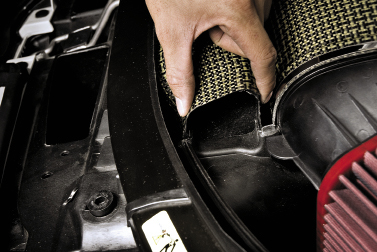
STEP 12: When installed correctly, the ENVY™ Transition pipe will be held in place with a few millimeters of its scoop section protruding through the scoop inlets of the horizontal aluminum support brace between the ENVY™ Ram Air and Transition Pipe. This ensures that screw holes will line up between both pieces and that the Transition Pipe is situated correctly in the engine bay.
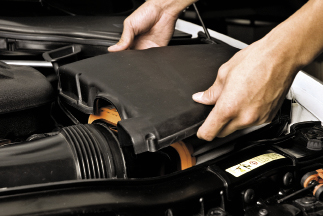
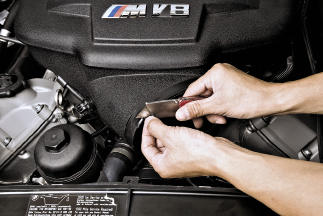
STEP 13. Installation of the ENVY™ Enlarged Intake Cover is mostly a direct cover replacement as seen in STEP 1, but with a close tolerance slip-into section with the ENVY™ Transition Pipe. EXTREME CARE AND PATIENCE is necessary in fitting these sections together, specifically in the depicted area below, to ensure correct installation of both the Enlarged Intake Cover and the Transition Pipe. This is a tight fitting junction and when lined up correctly, the Enlarged Intake Cover will line up correctly with all screw holes.
NOTE: Use a Torx T-25 bit to reinstall a total of eight (8) T25 screws onto the perimeter of the ENVY™ Enlarged Intake Cover. Tighten screws to ¼ turn after “hand-tight”. Check to make sure junctions between the ENVY™ ChargePipe and Transition Pipe appear correctly as seen above.
STEP 14. Carefully guide the ENVY™ Ram Air scoop into the kidney grille section of the aluminum support brace. The Ram Air scoop should drop-into this section fairly easily and provides +/- 1mm once dropped in to adjust for alignment onto pushpin holes and screw holes for installation. It may be necessary to support and hold the Transition Pipe in place as the Ram Air scoop installation has a tendency to dislodge the few millimeters of Transition Pipe protruding through the aluminum support brace. Support the ENVY™ pieces as necessary during the Ram Air scoop installation process.
STEP 15. Once the ENVY™ Ram Air scoop is situated correctly, line up the Ram Air screw holes with the aluminum support brace and Transition Pipe screw holes. Use a Torx T-20 bit to reinstall two Torx screws (one on each side) through to the Transition Pipe screw holes. Again, it may be necessary to support and hold the Transition Pipe in place as the Ram Air scoop installation has a tendency to dislodge the few millimeters of Transition Pipe protruding through the aluminum support brace. Support the ENVY™ pieces as necessary during the Ram Air scoop installation process.
NOTE: To finalize installation of the ENVY™ Ram Air scoop, insert the (2) pushpin bases back into place through the pushpin slots (reverse of STEP 2). Fitment should be tight. Secure the pushpin assemblies with their included pins, completing installation of the Ram Air scoop.
Source:
Tecnocraft
ENVY Intake System
www.tecnocraft.com
PY Speed
Tecnocraft Distributor
www.pyspeed.com
Related Articles
 Rimac and BMW Collaborate on Next-Gen EV Batteries
 Cabin Air Filters Do More Than You Think
 Shop Tour: YD Motorsports
 Wilwood Superlite Front BBK for BMW E36 M3
 The Art of Livery Design with Design Shop REACT
 ISC Suspension Street Sport N1 Coilovers for BMW F30 X-Drive