
If you are planning to paint your headlights, install halos, or a projector retrofit, chances are you have researched the methods to opening your factory lights. On the web, there are plenty of myths and hearsay when it comes to the proper procedure to opening and resealing headlights. Advanced Automotive Concepts (AAC) has been specializing in headlight modifications since 1999 and has successfully opened and resealed an estimated 5,000 pairs of headlights, making them experts in this field. Employing six full-time professional lighting technicians, AAC can build up to 12 sets of custom headlights in a day, including lights for SEMA vehicles, celebrities and even race teams. We caught up with AAC as they began building the custom headlights that will be used by Formula Drift Champion Daigo Saito on his Lexus SC 430 for the 2014 FD season.
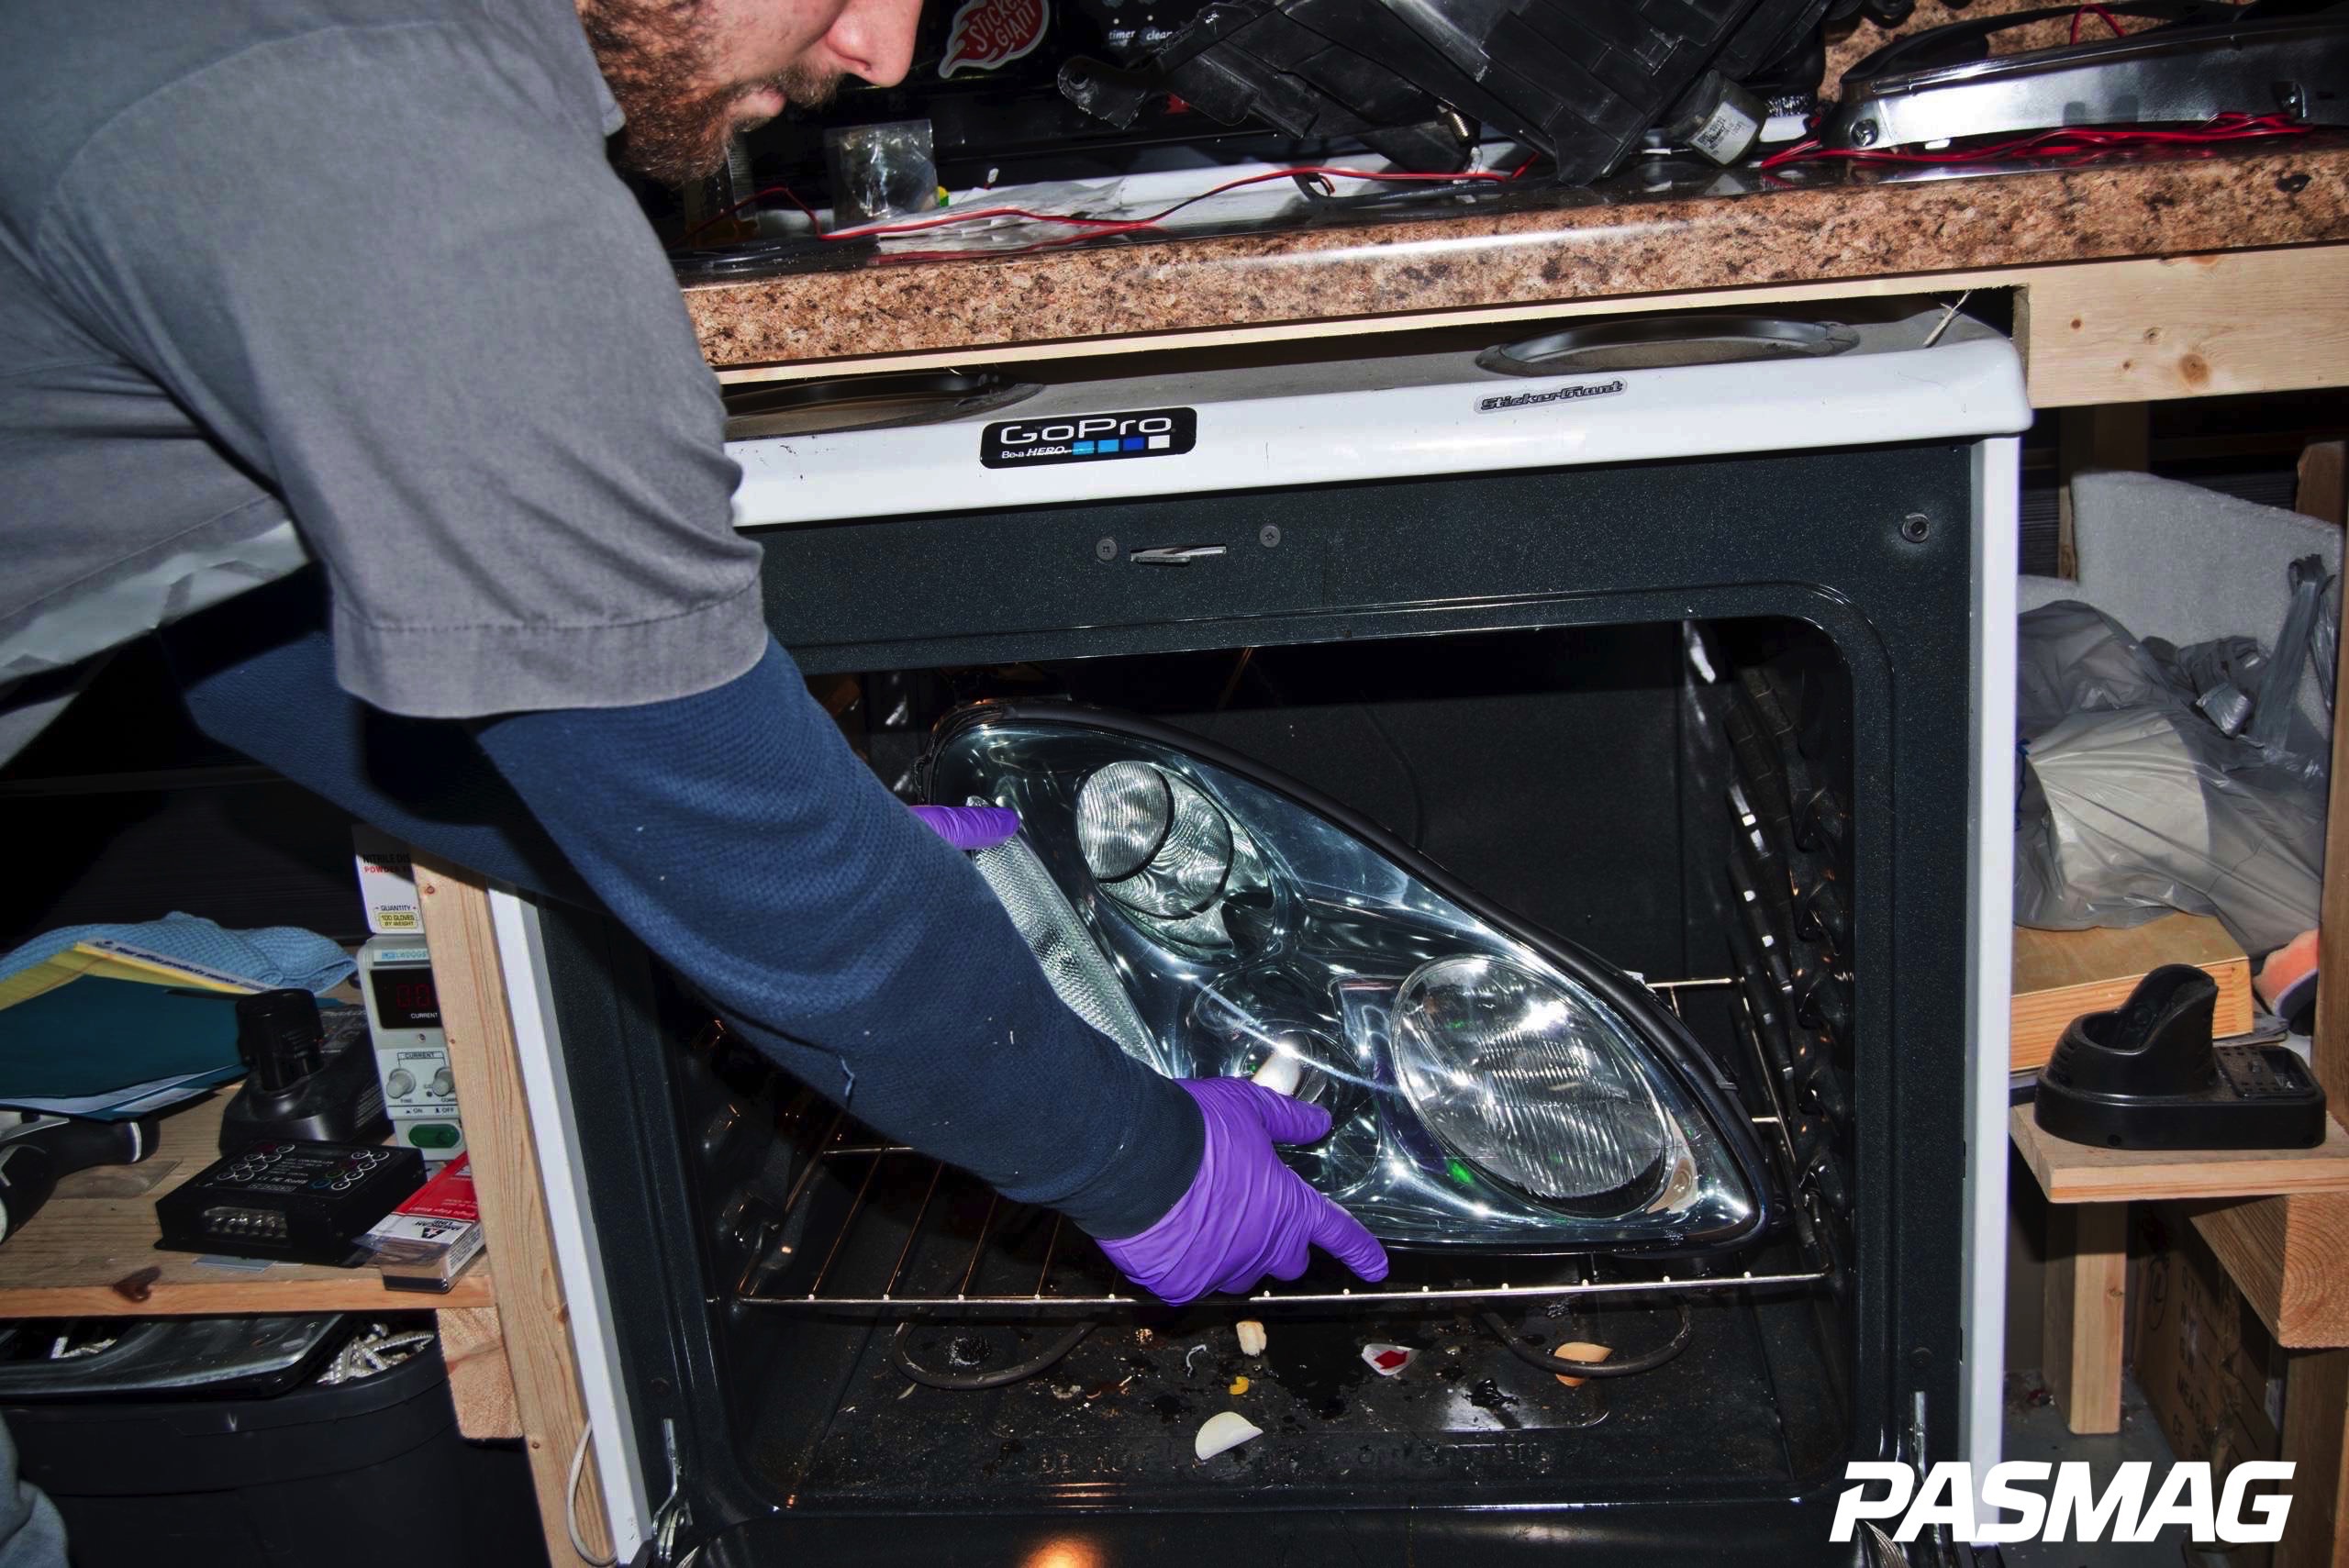
1. To open these factory headlights we need to soften the seal by applying heat. There are several ways to do this (i.e. heat gun), but the easiest and most consistent way to open the light is with a household oven. Remember not to place the headlight directly on the grill. Instead, use a plank of unpainted wood. Heat the oven to 225° F and insert the headlight for 12 minutes. This will only soften the seal; it will not damage the headlight in any way.

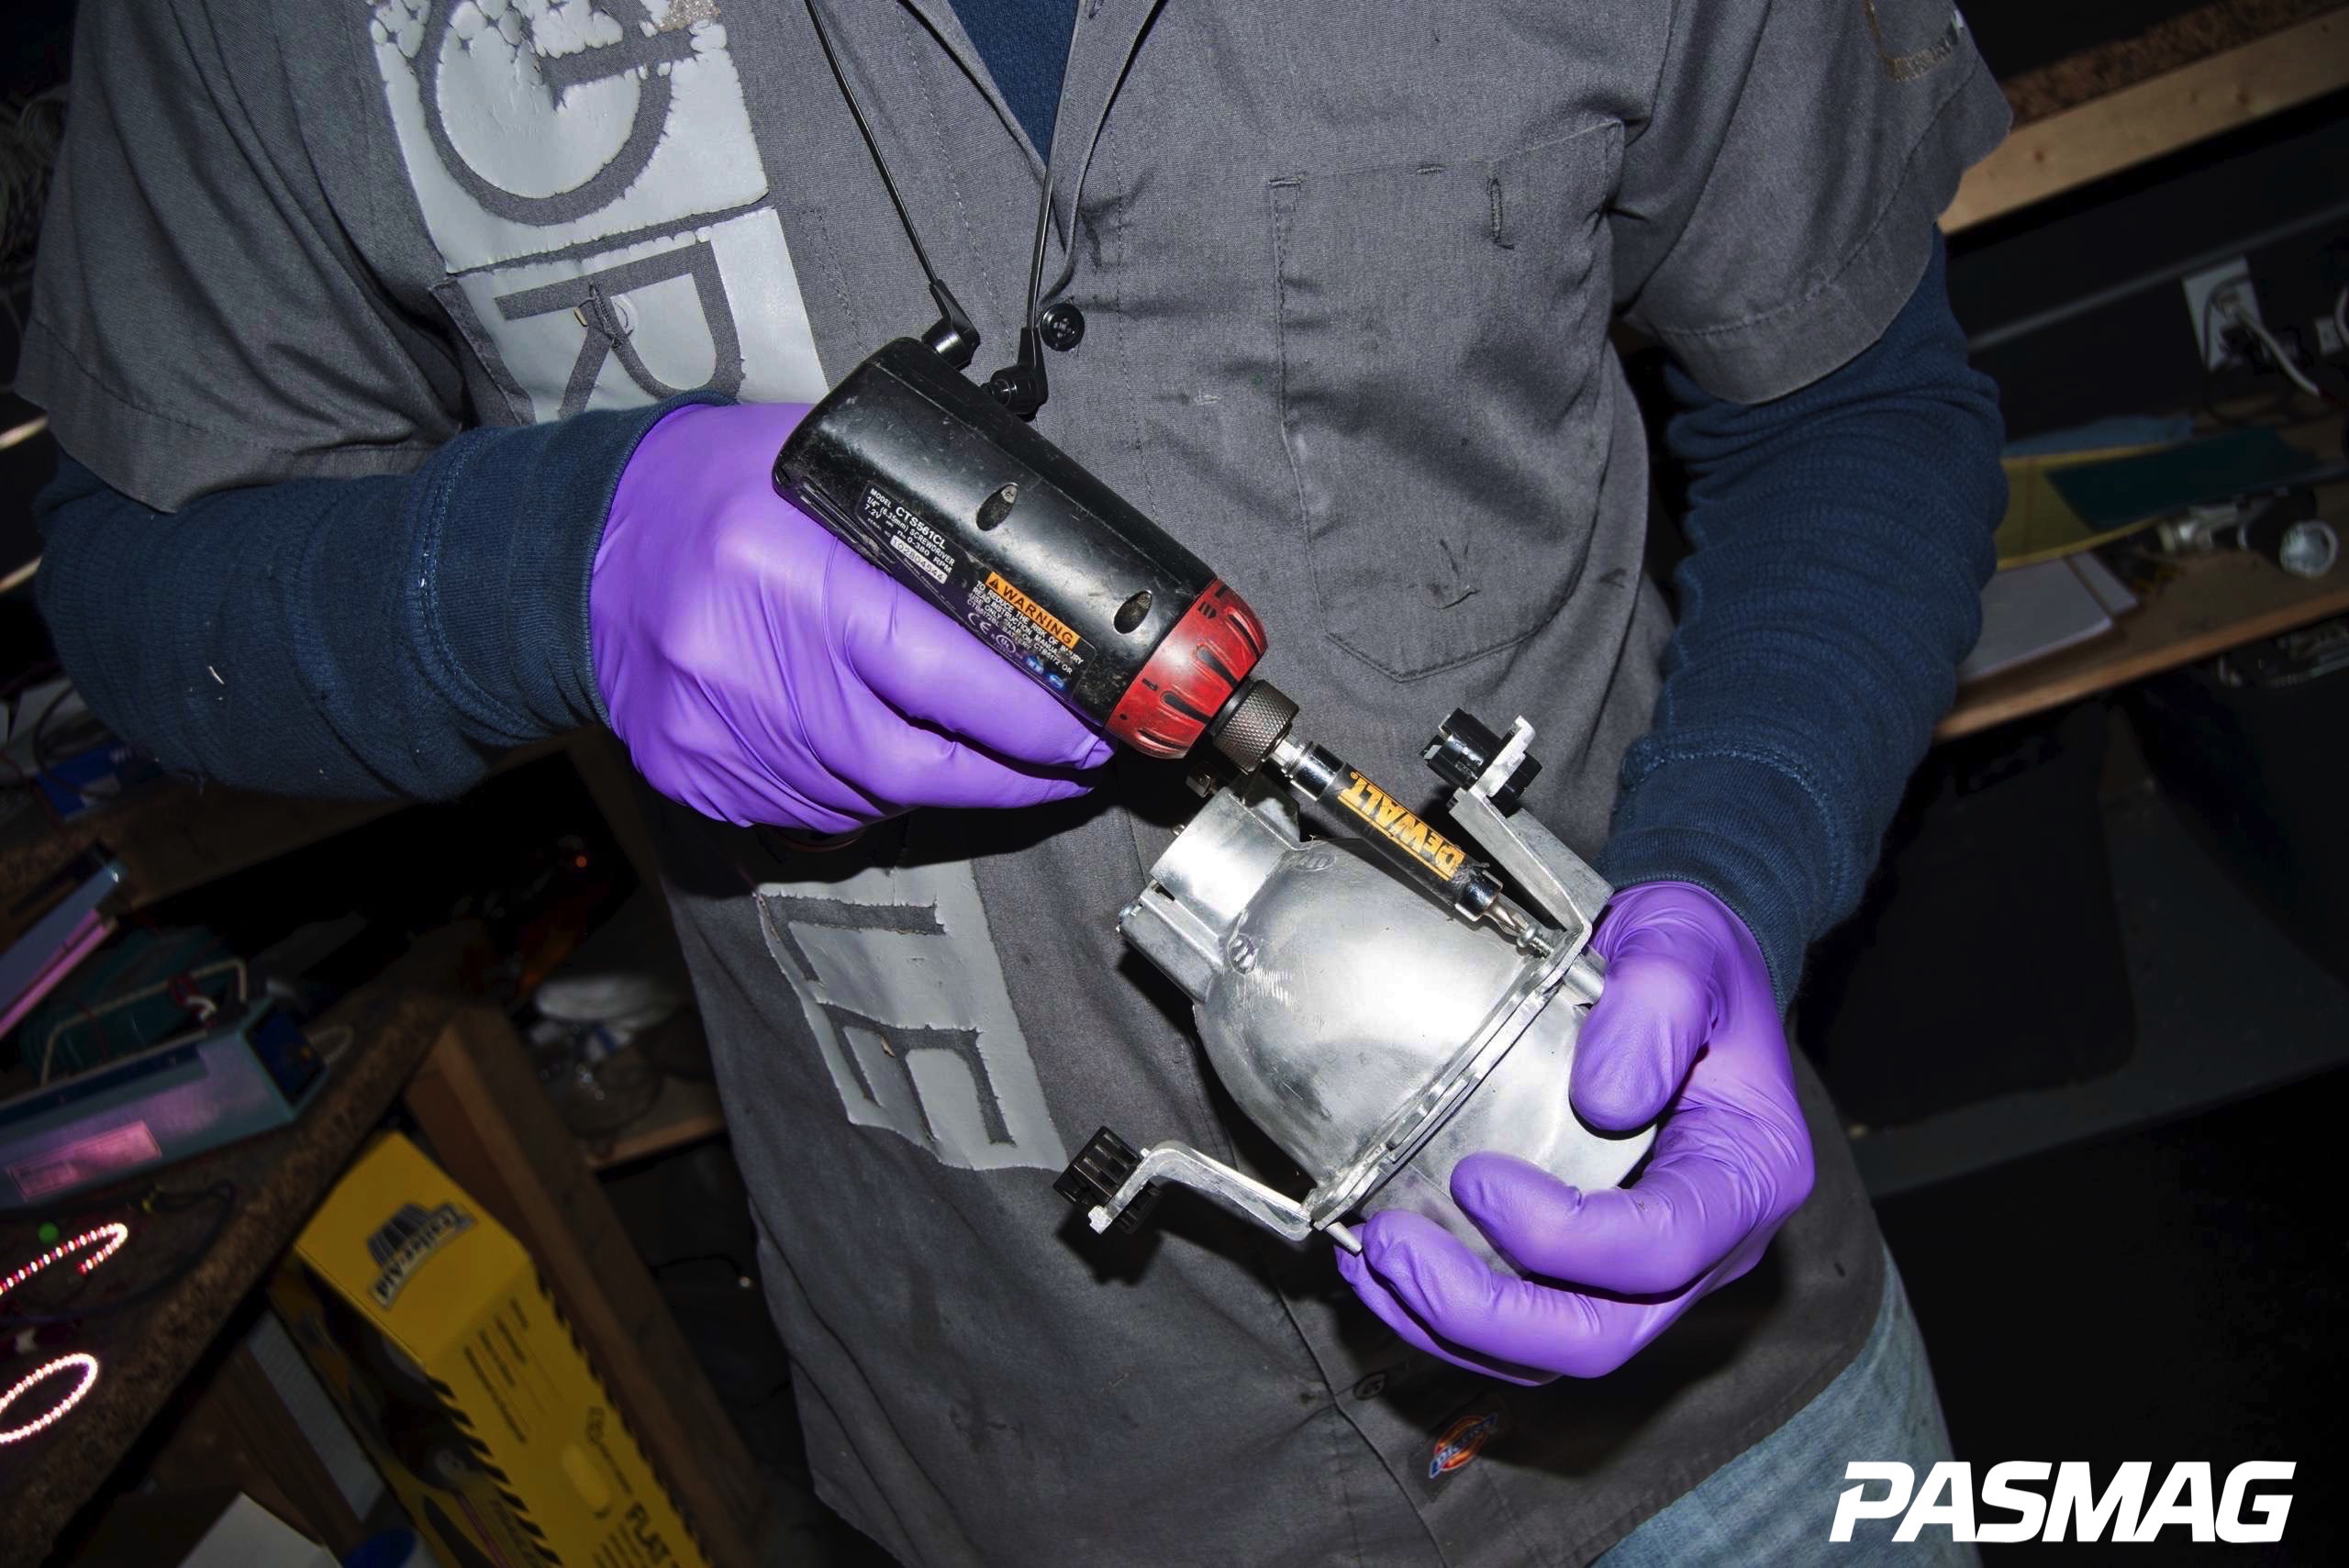
2. After 12 minutes, remove the headlight from the oven. The headlight will be hot, so wear insulated gloves while handling it. Gently push the lens away from the housing using a flat head screwdriver. Be careful not to bend or deform the plastic as you work your way around the entire perimeter of the headlight.
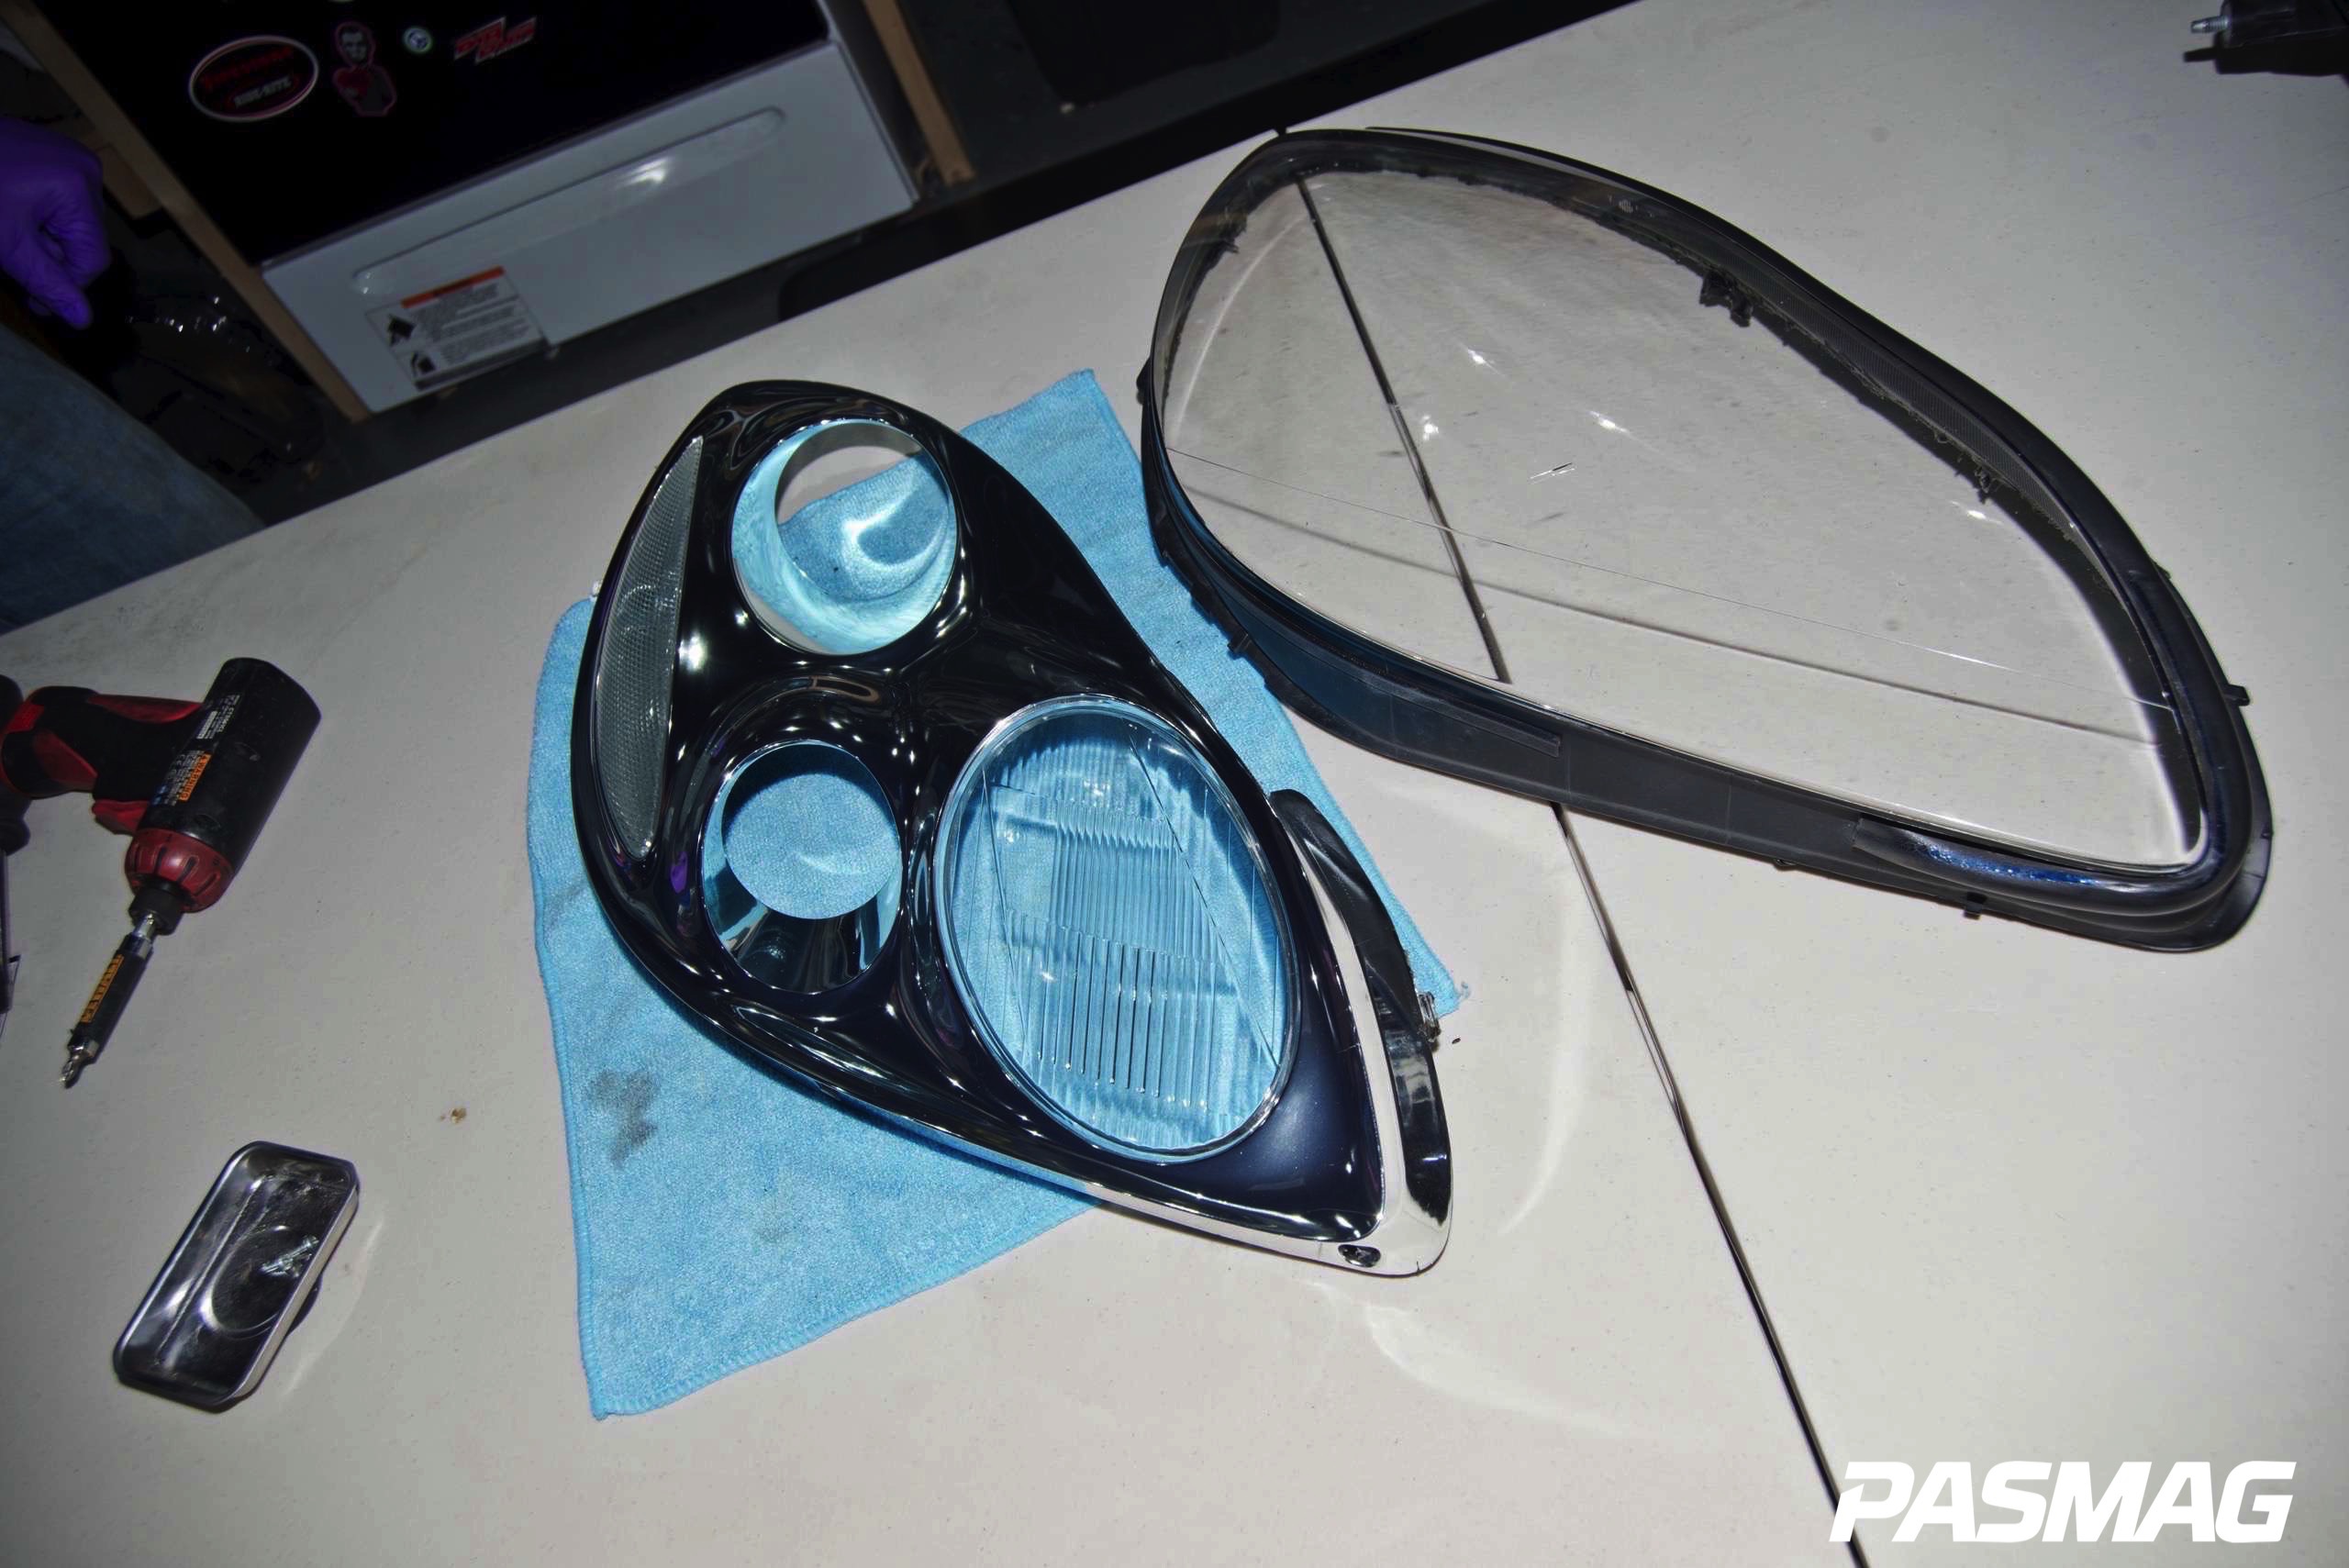
3. As the lens begins to release from the headlight housing, be careful not to get any of the hot sealant on the lens as it will be difficult to remove later. If the headlight lens does not easily separate place the light back in the oven at 225° F for five minutes and repeat Step 2 again. With the lens removed, you can now remove the inner chrome housing and let the parts cool.
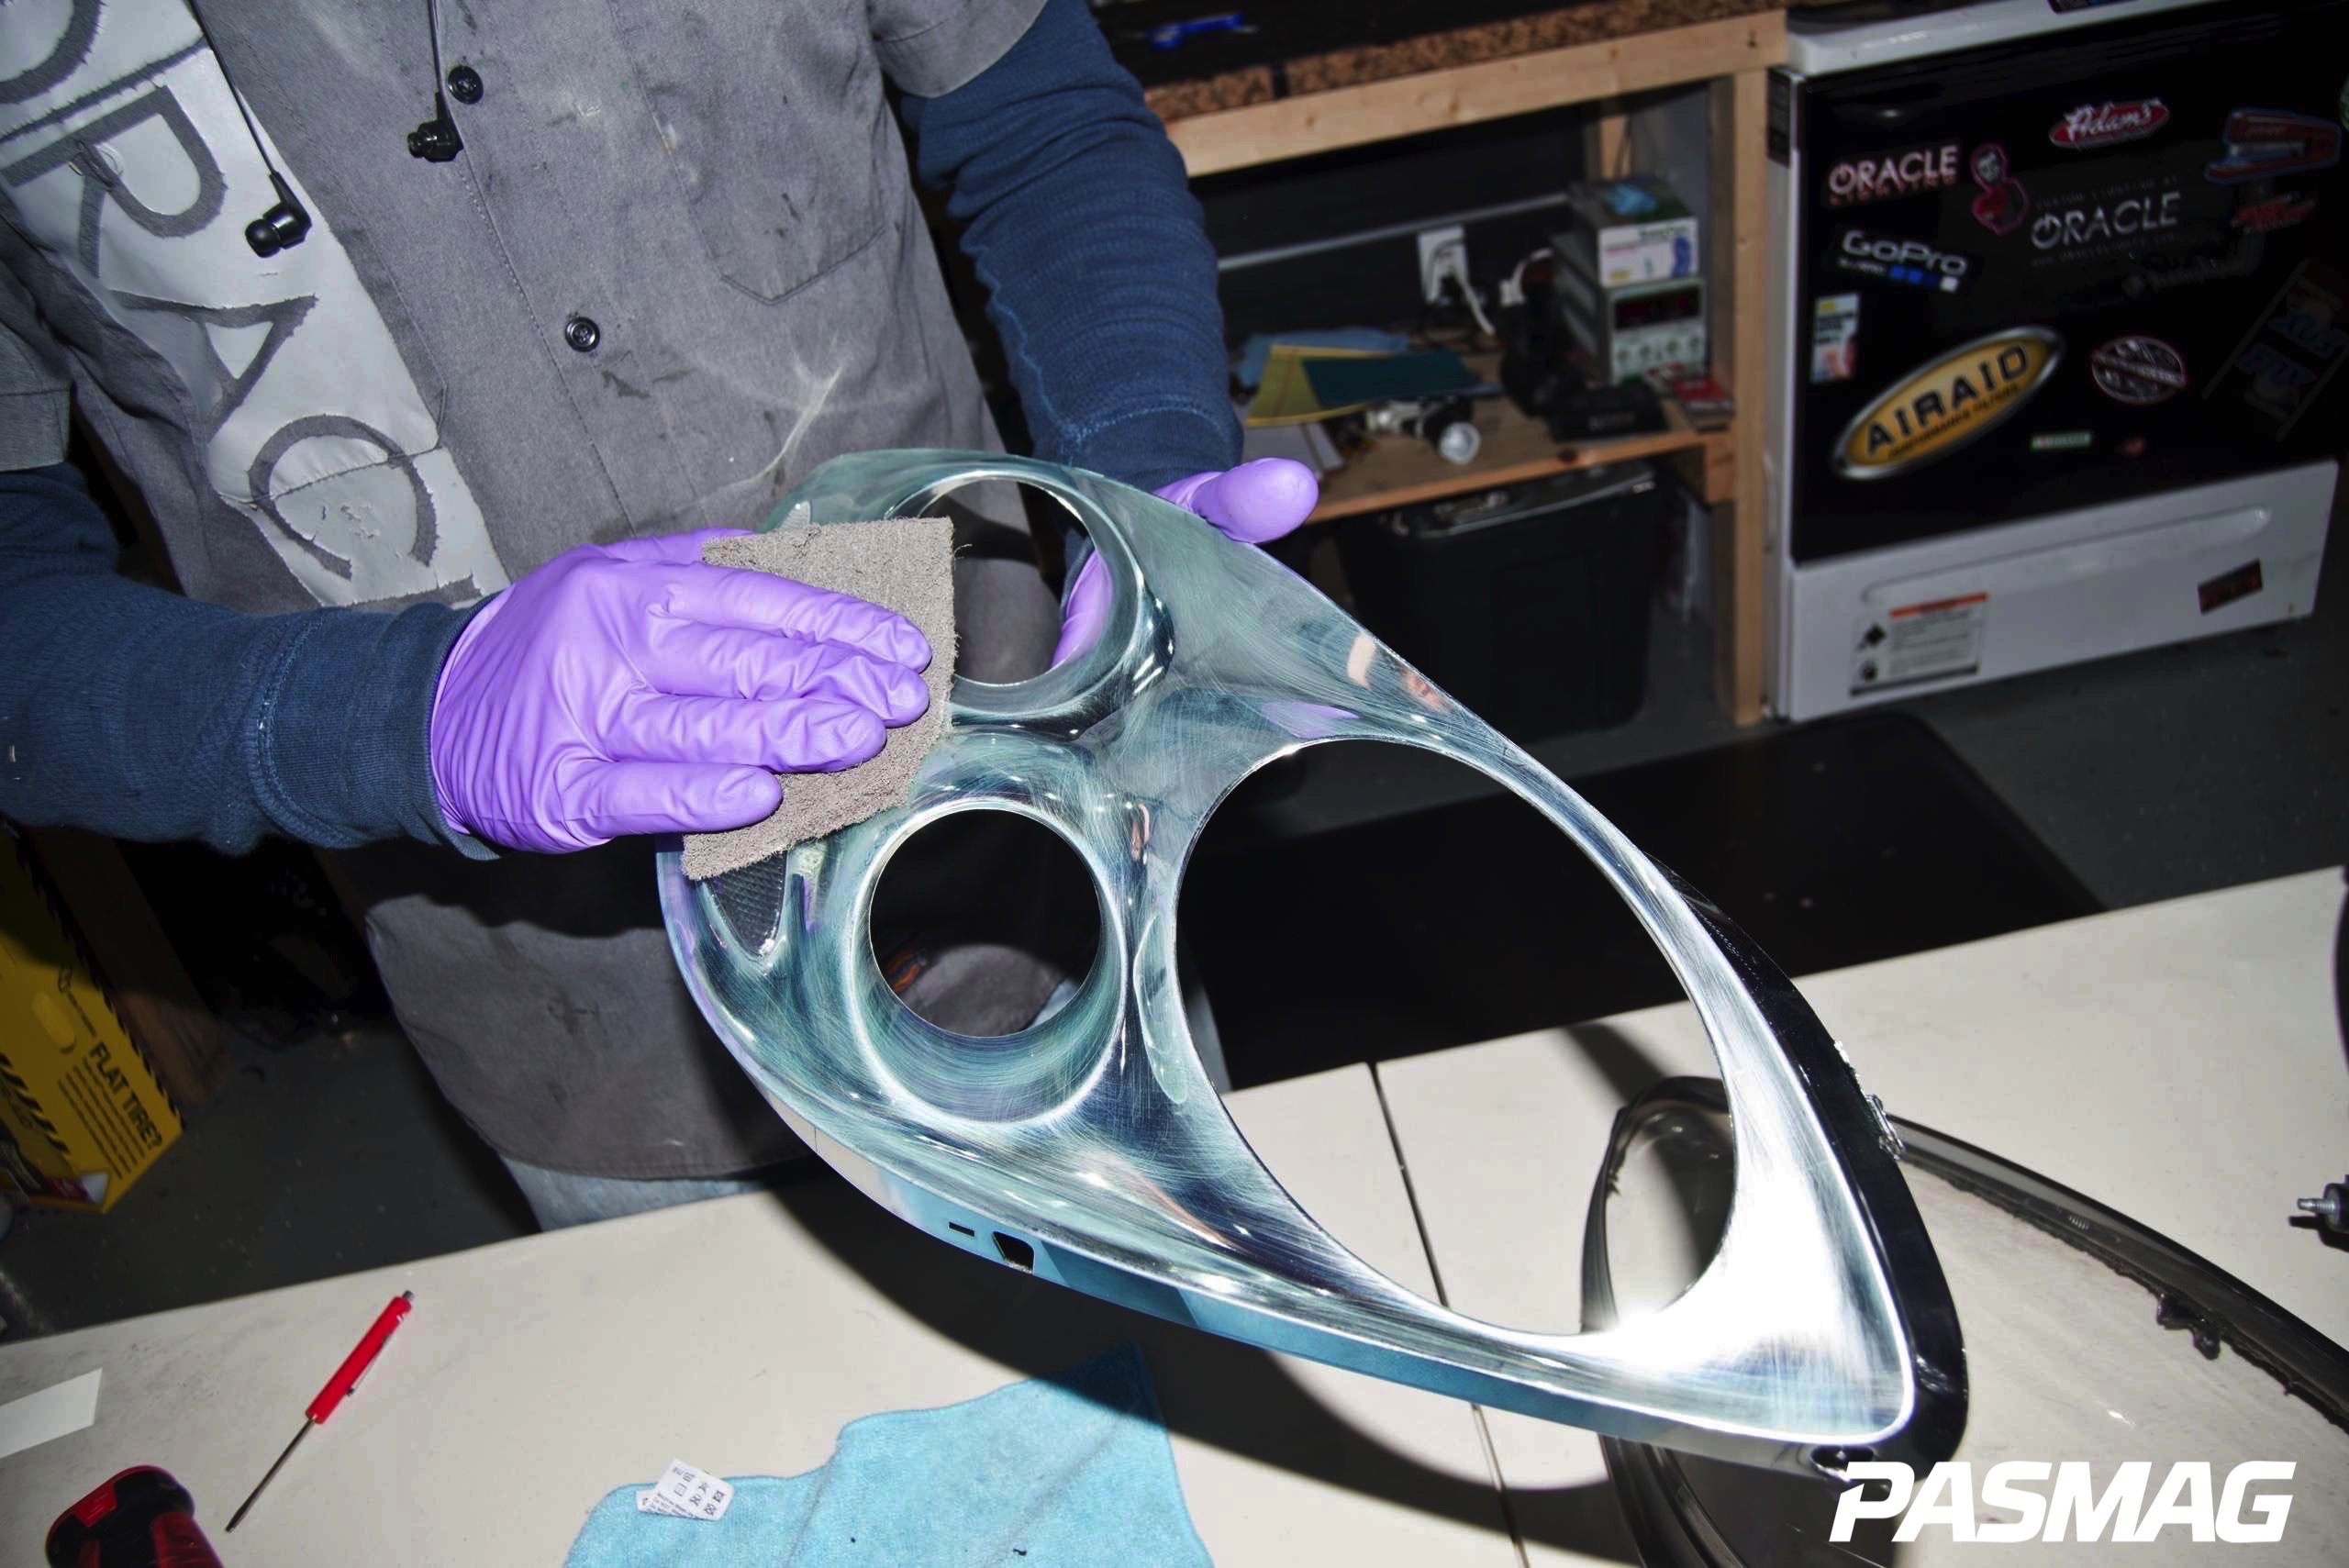
4. We will be painting these chrome inner headlight housings, so begin by scuffing the chrome. Using a 3M “fine” Scotch-Brite pad, lightly sand the surface until the chrome is a dull grey color. Remove any residue with prep solvent and a tack-cloth. If you want a two-tone effect, be sure to tape off any areas that do not need to be painted in this step.
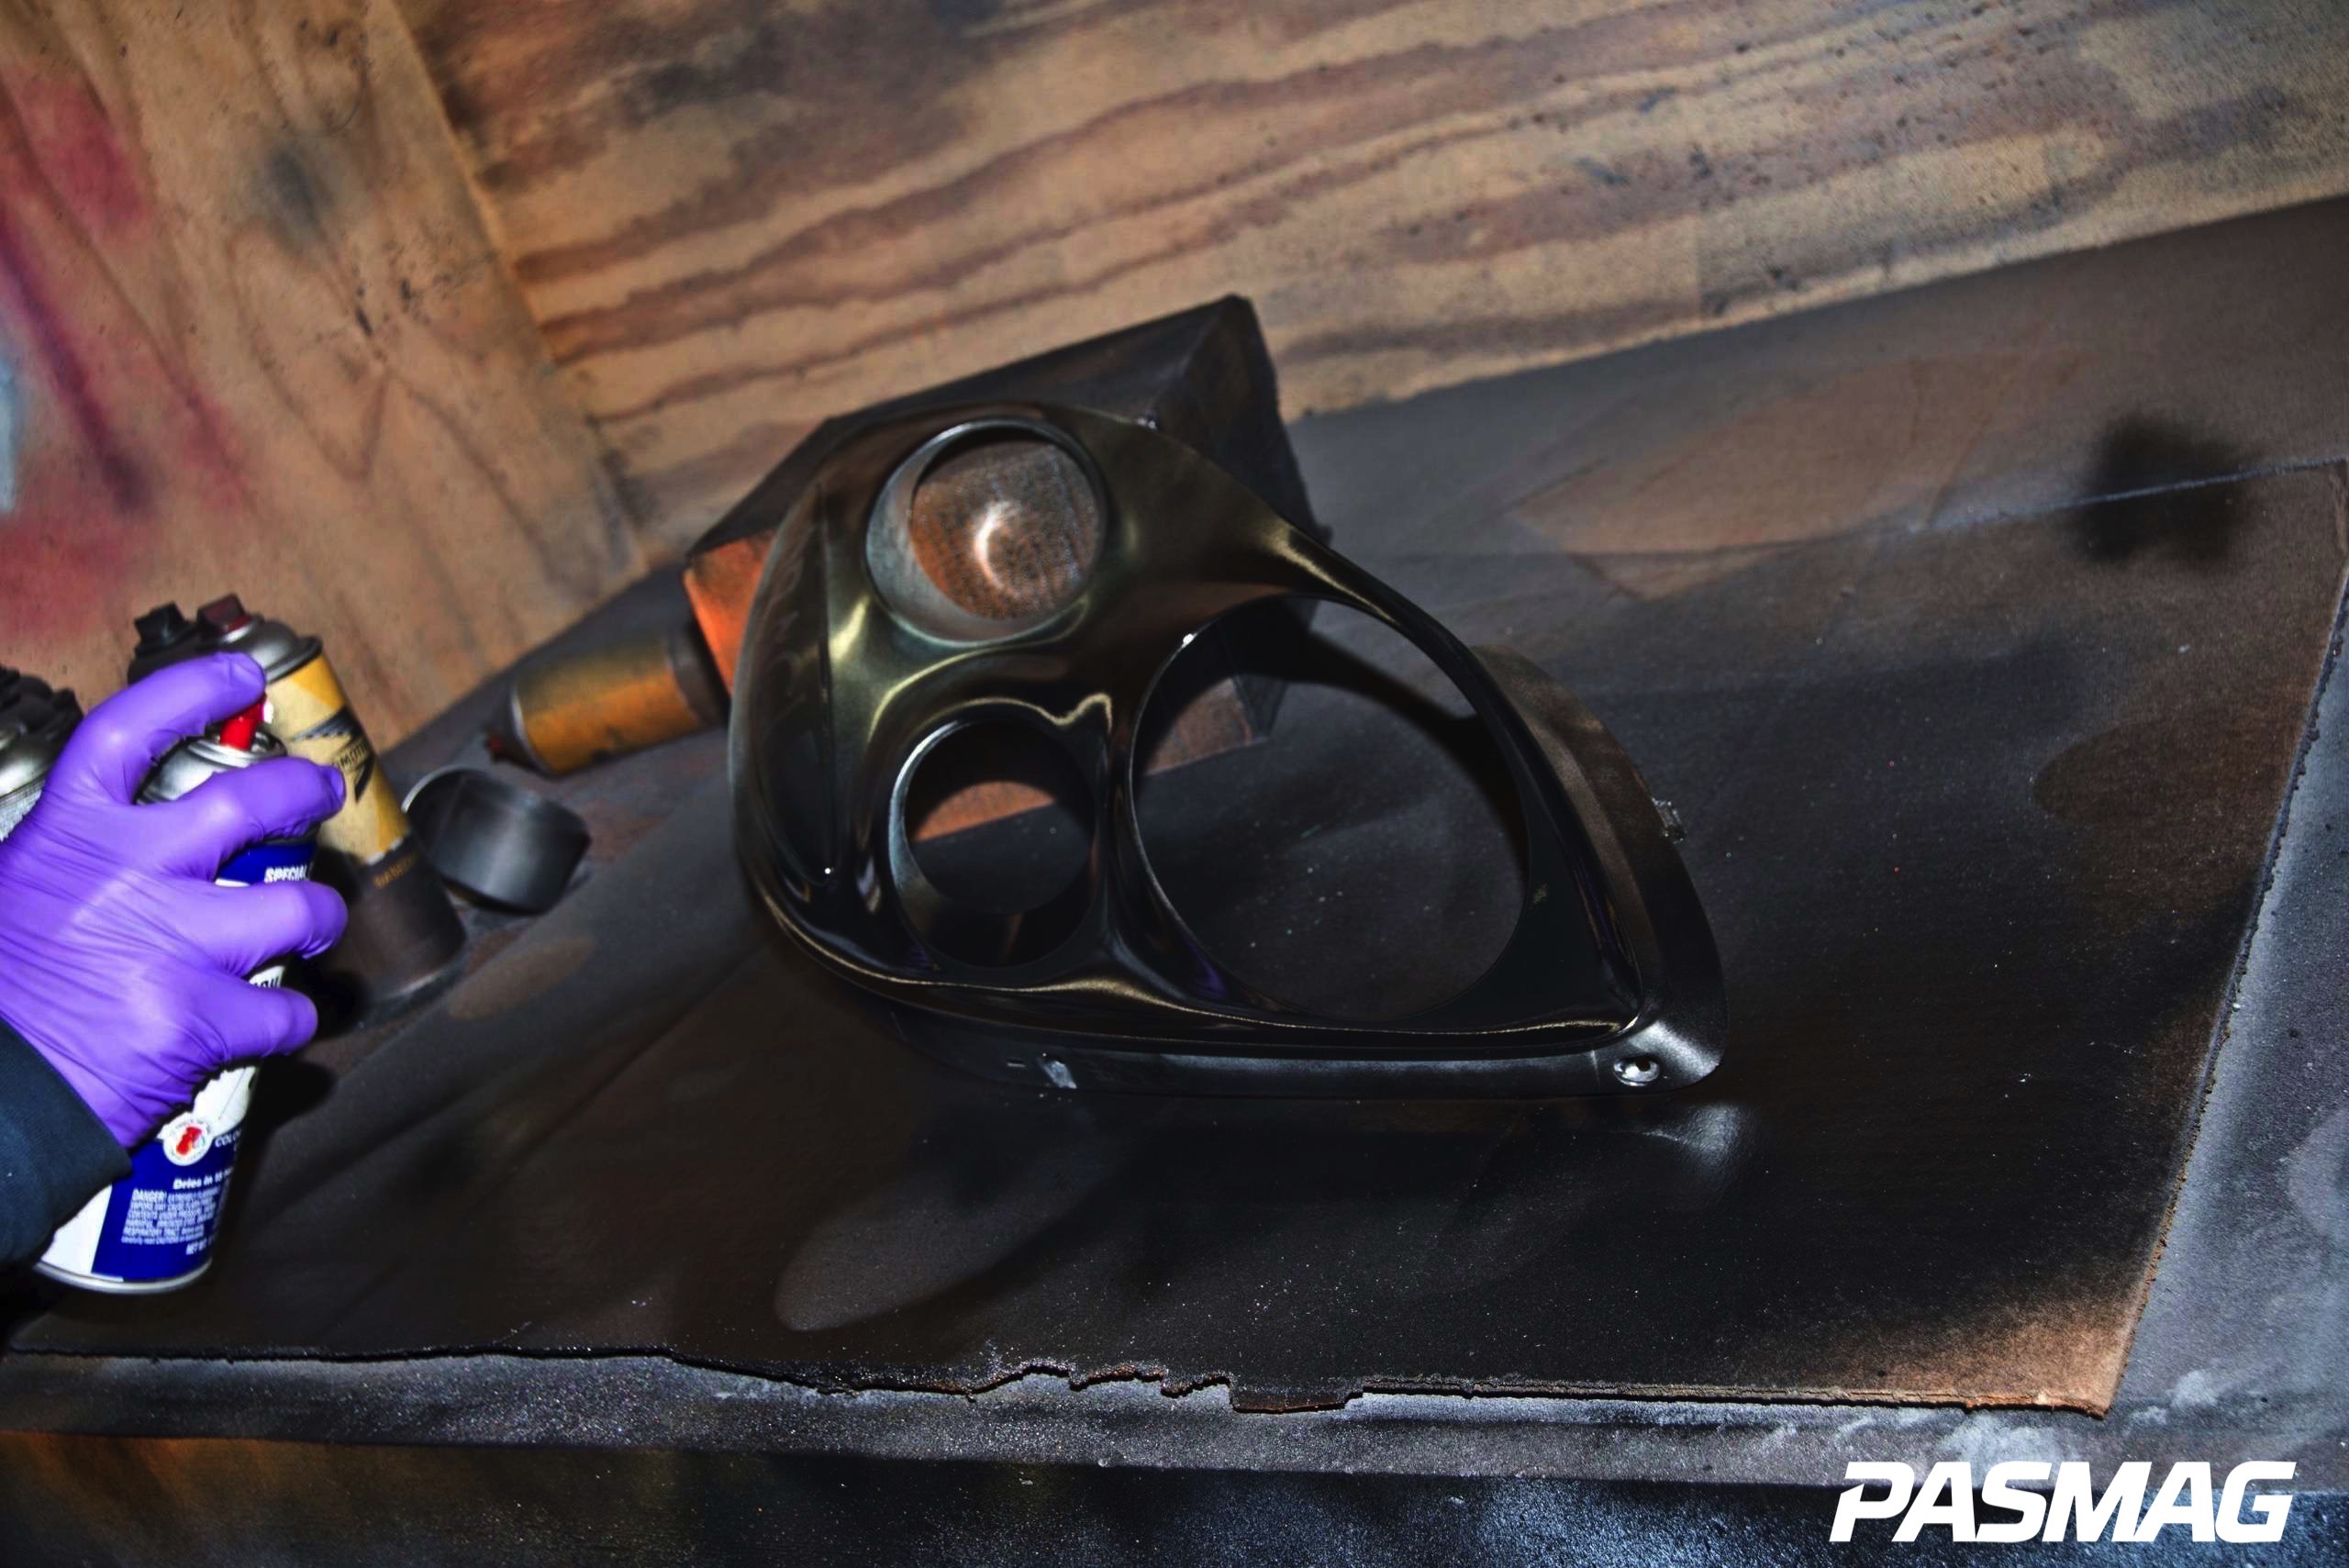
5. Using automotive sealing primer, lay down one or two layers to prevent any impurities in the plastic housing from seeping into your paint. Once the primer is dry, check the finish to ensure it is smooth and consistent. If needed, sand the primer in any rough areas. Now you can apply two or three coats of the desired color. Allow the housings to dry for 30 minutes before applying the clear coat.
6. We want to create a “green glowing eye” effect by illuminating the projector lenses while the headlights are off. To achieve this, disassemble the projector and install an ORACLE SMD Halo ring inside of the projector, facing toward the projector’s reflective cup. The light will reflect off of the cup and give the projector lens the appearance of a green glow.
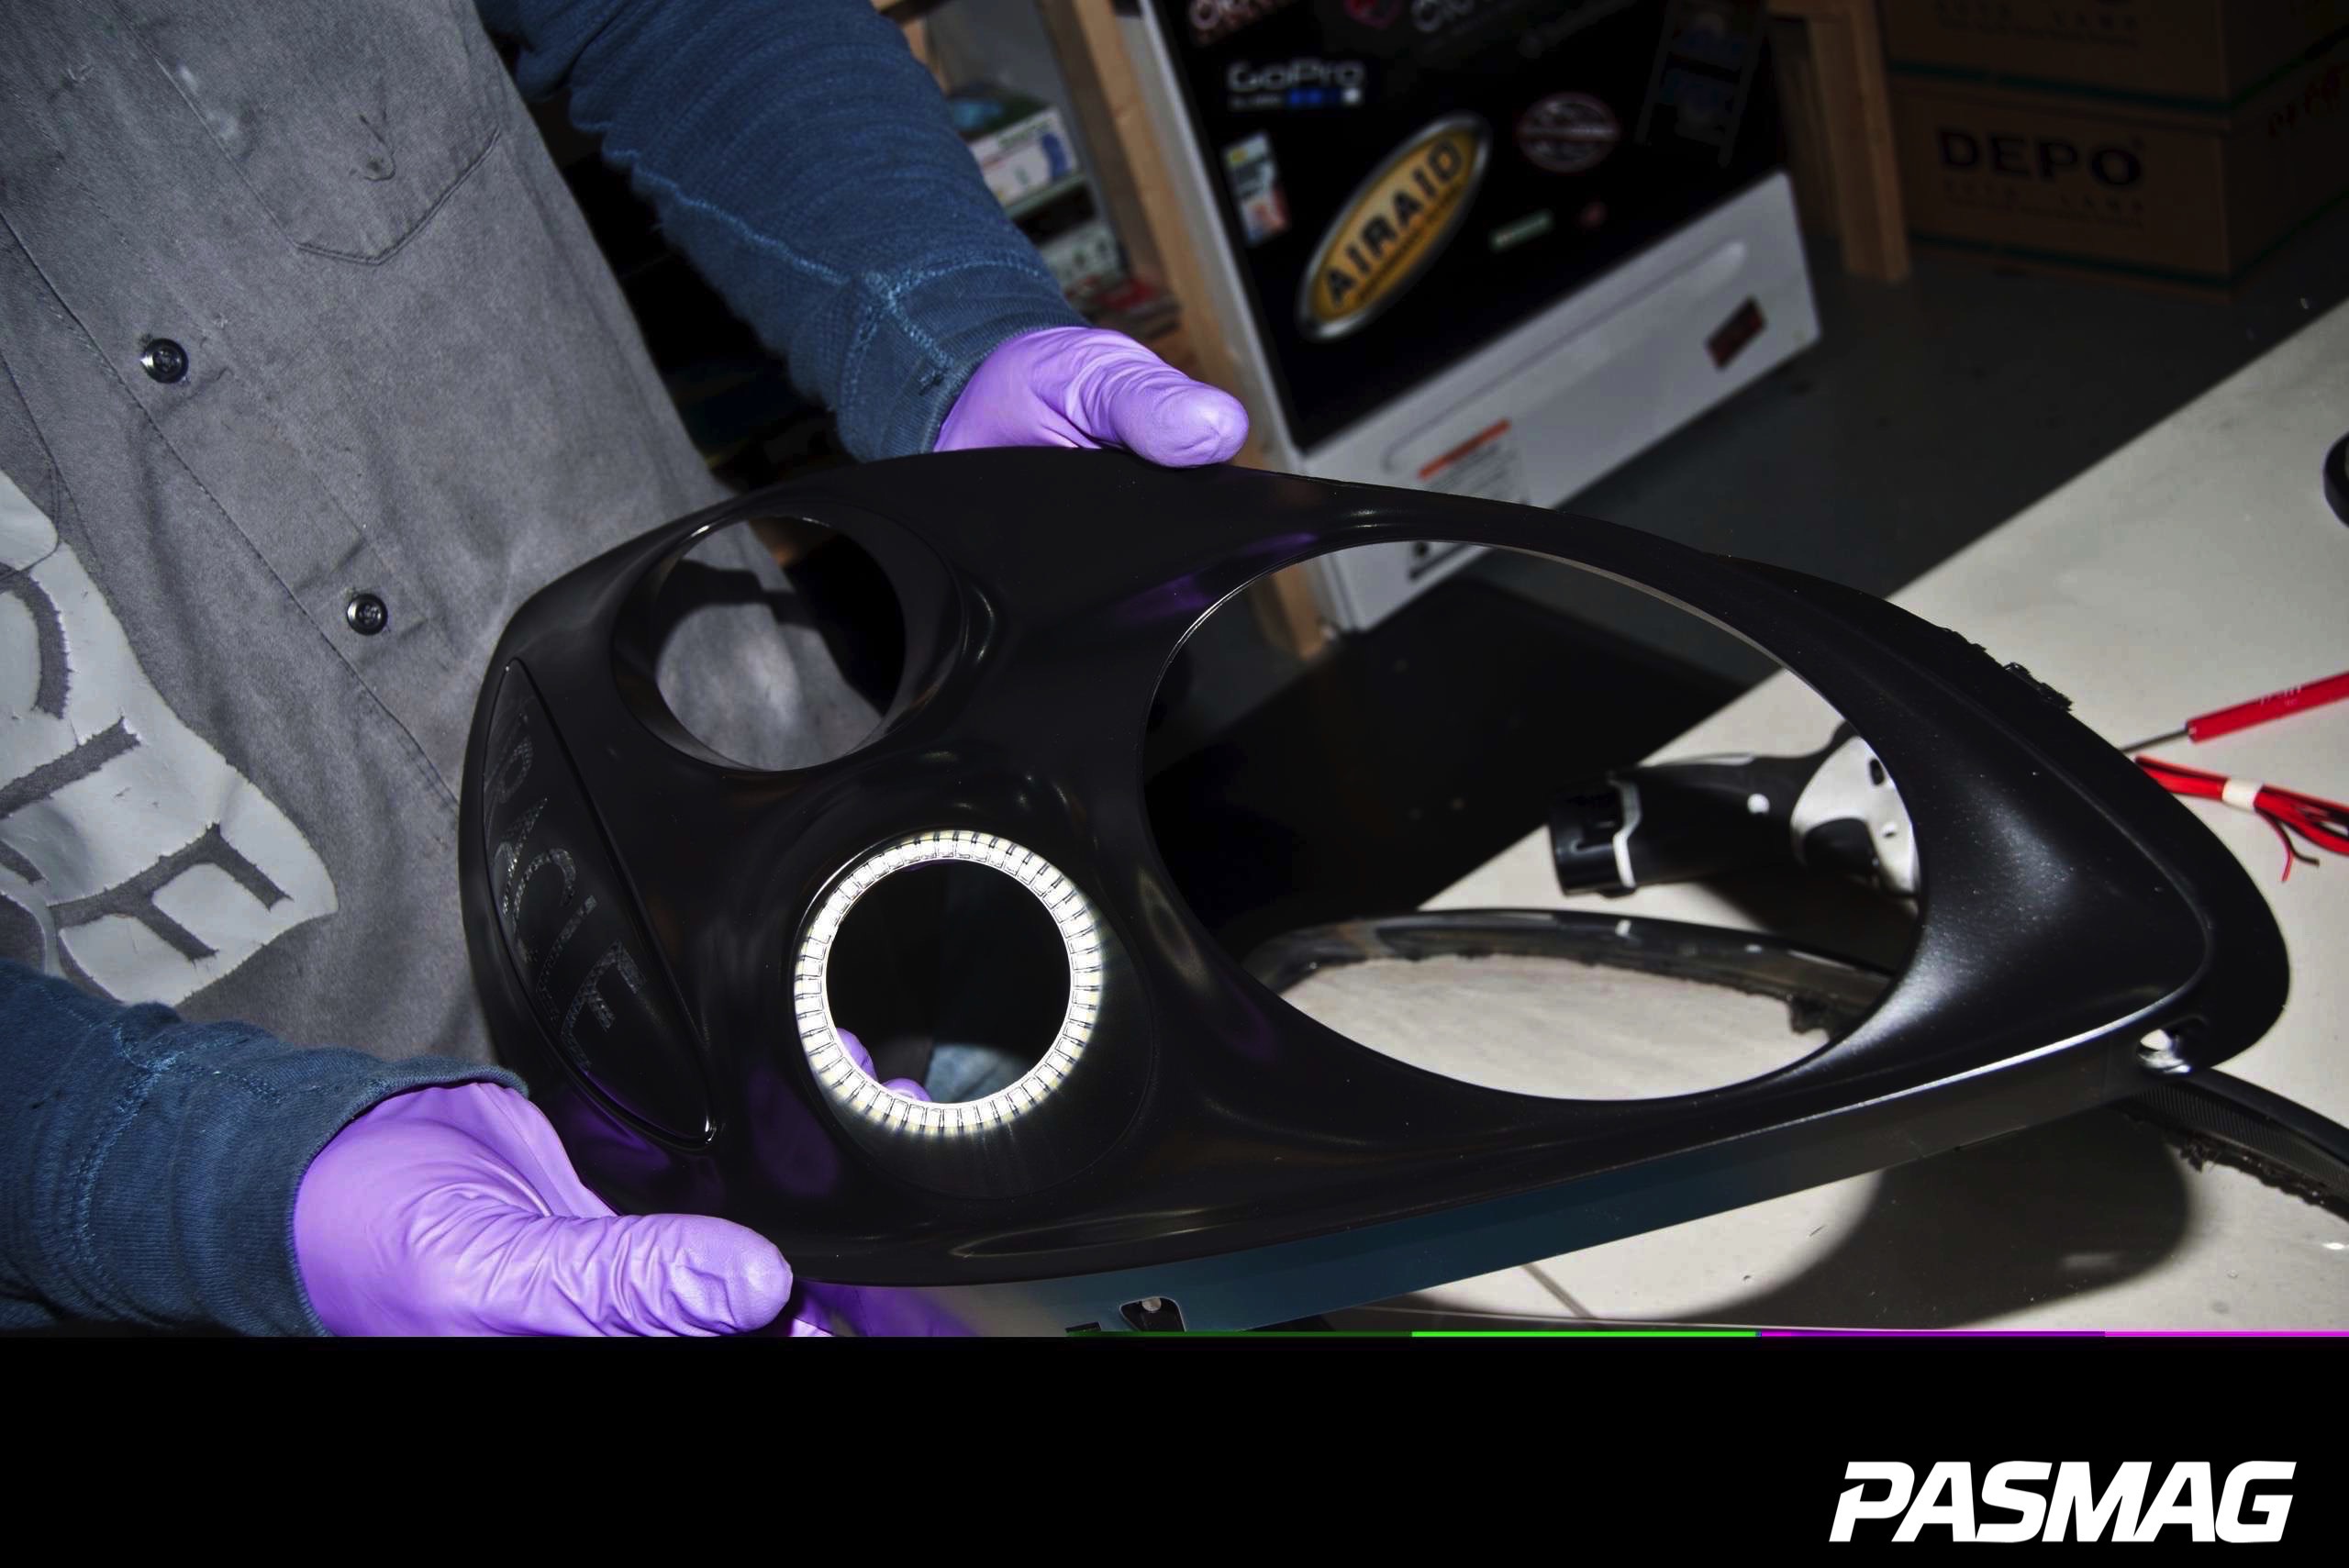
7. Now it's time to install the Oracle SMD Headlight Halo kit. We begin the installation by test-fitting the rings into the headlight. Each Oracle Halo ring is CAD-designed to fit the opening in that particular headlight, so follow the included installation instructions with your Oracle Halo kit for more information. The ring has a self-adhesive 3M backing to easily secure the halo in place.
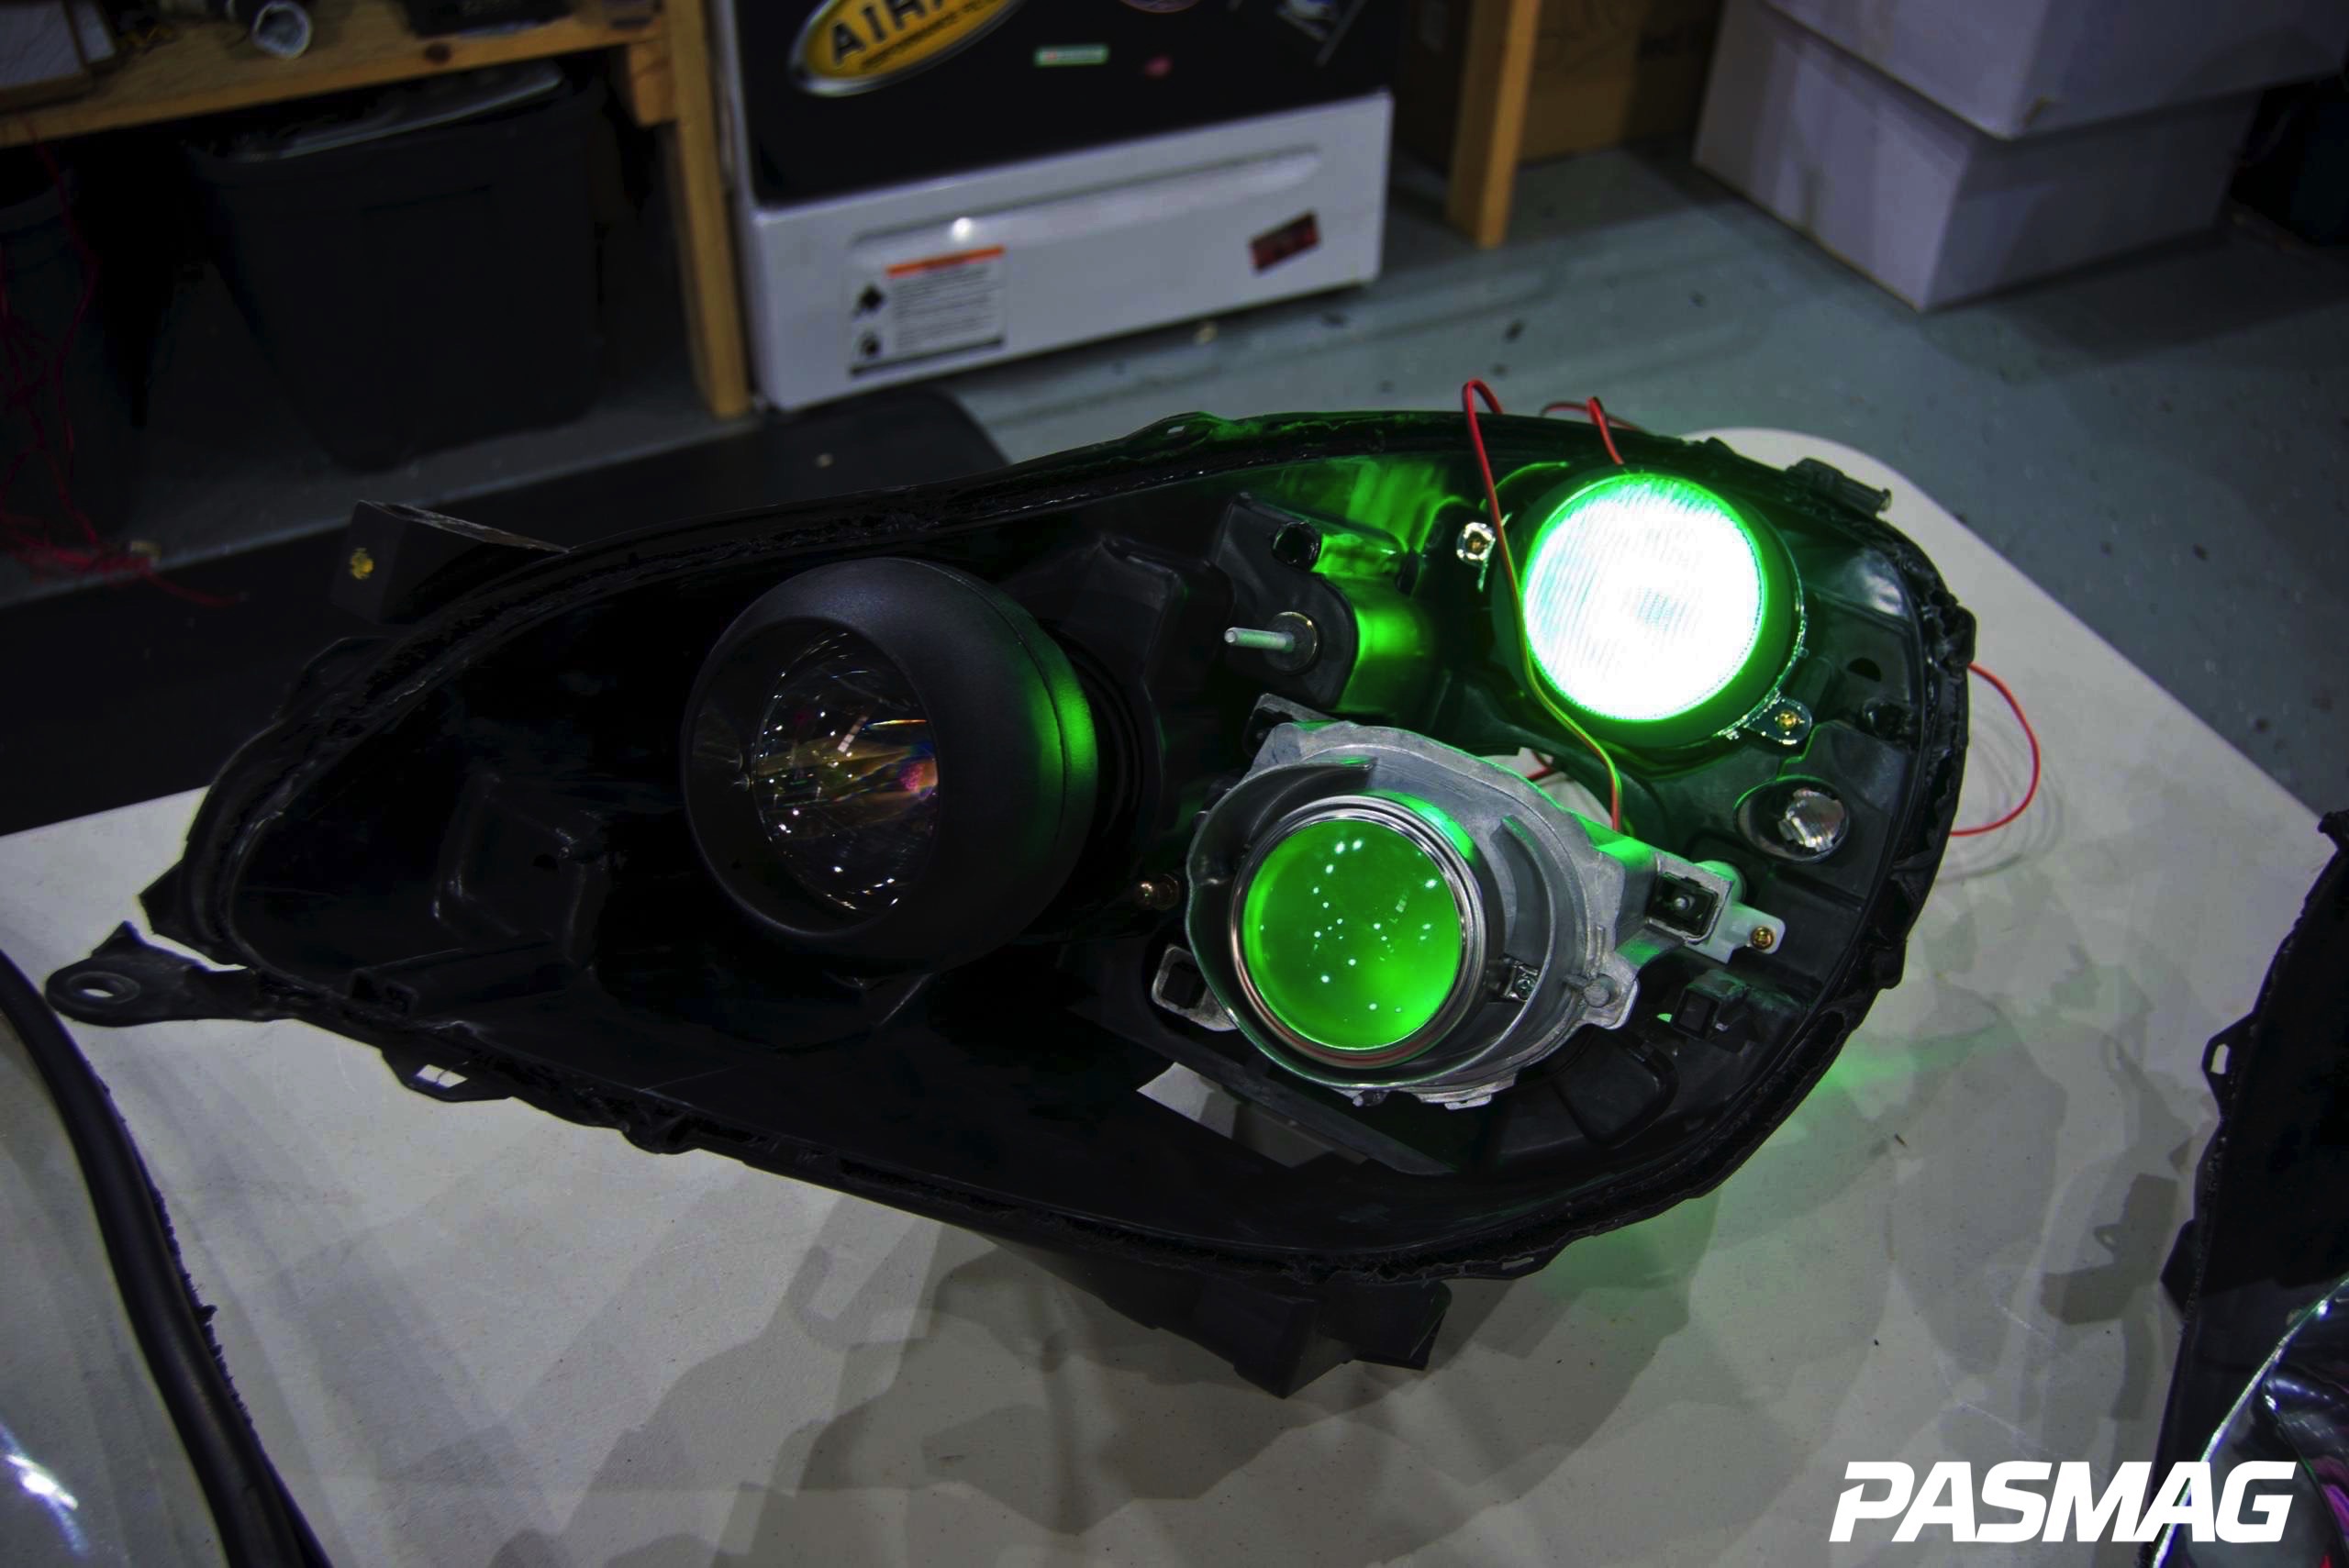
8. Prior to re-assembly, we want to test everything so we can mark and organize our wiring before routing it out of the re-sealed headlight housing. We can test the rings with any 12 V power source (such as a car battery), but a 12 V drill battery works just as well and is more convenient. The white Oracle SMD Halos and green Oracle LEDs are tested and paired up in the projectors.
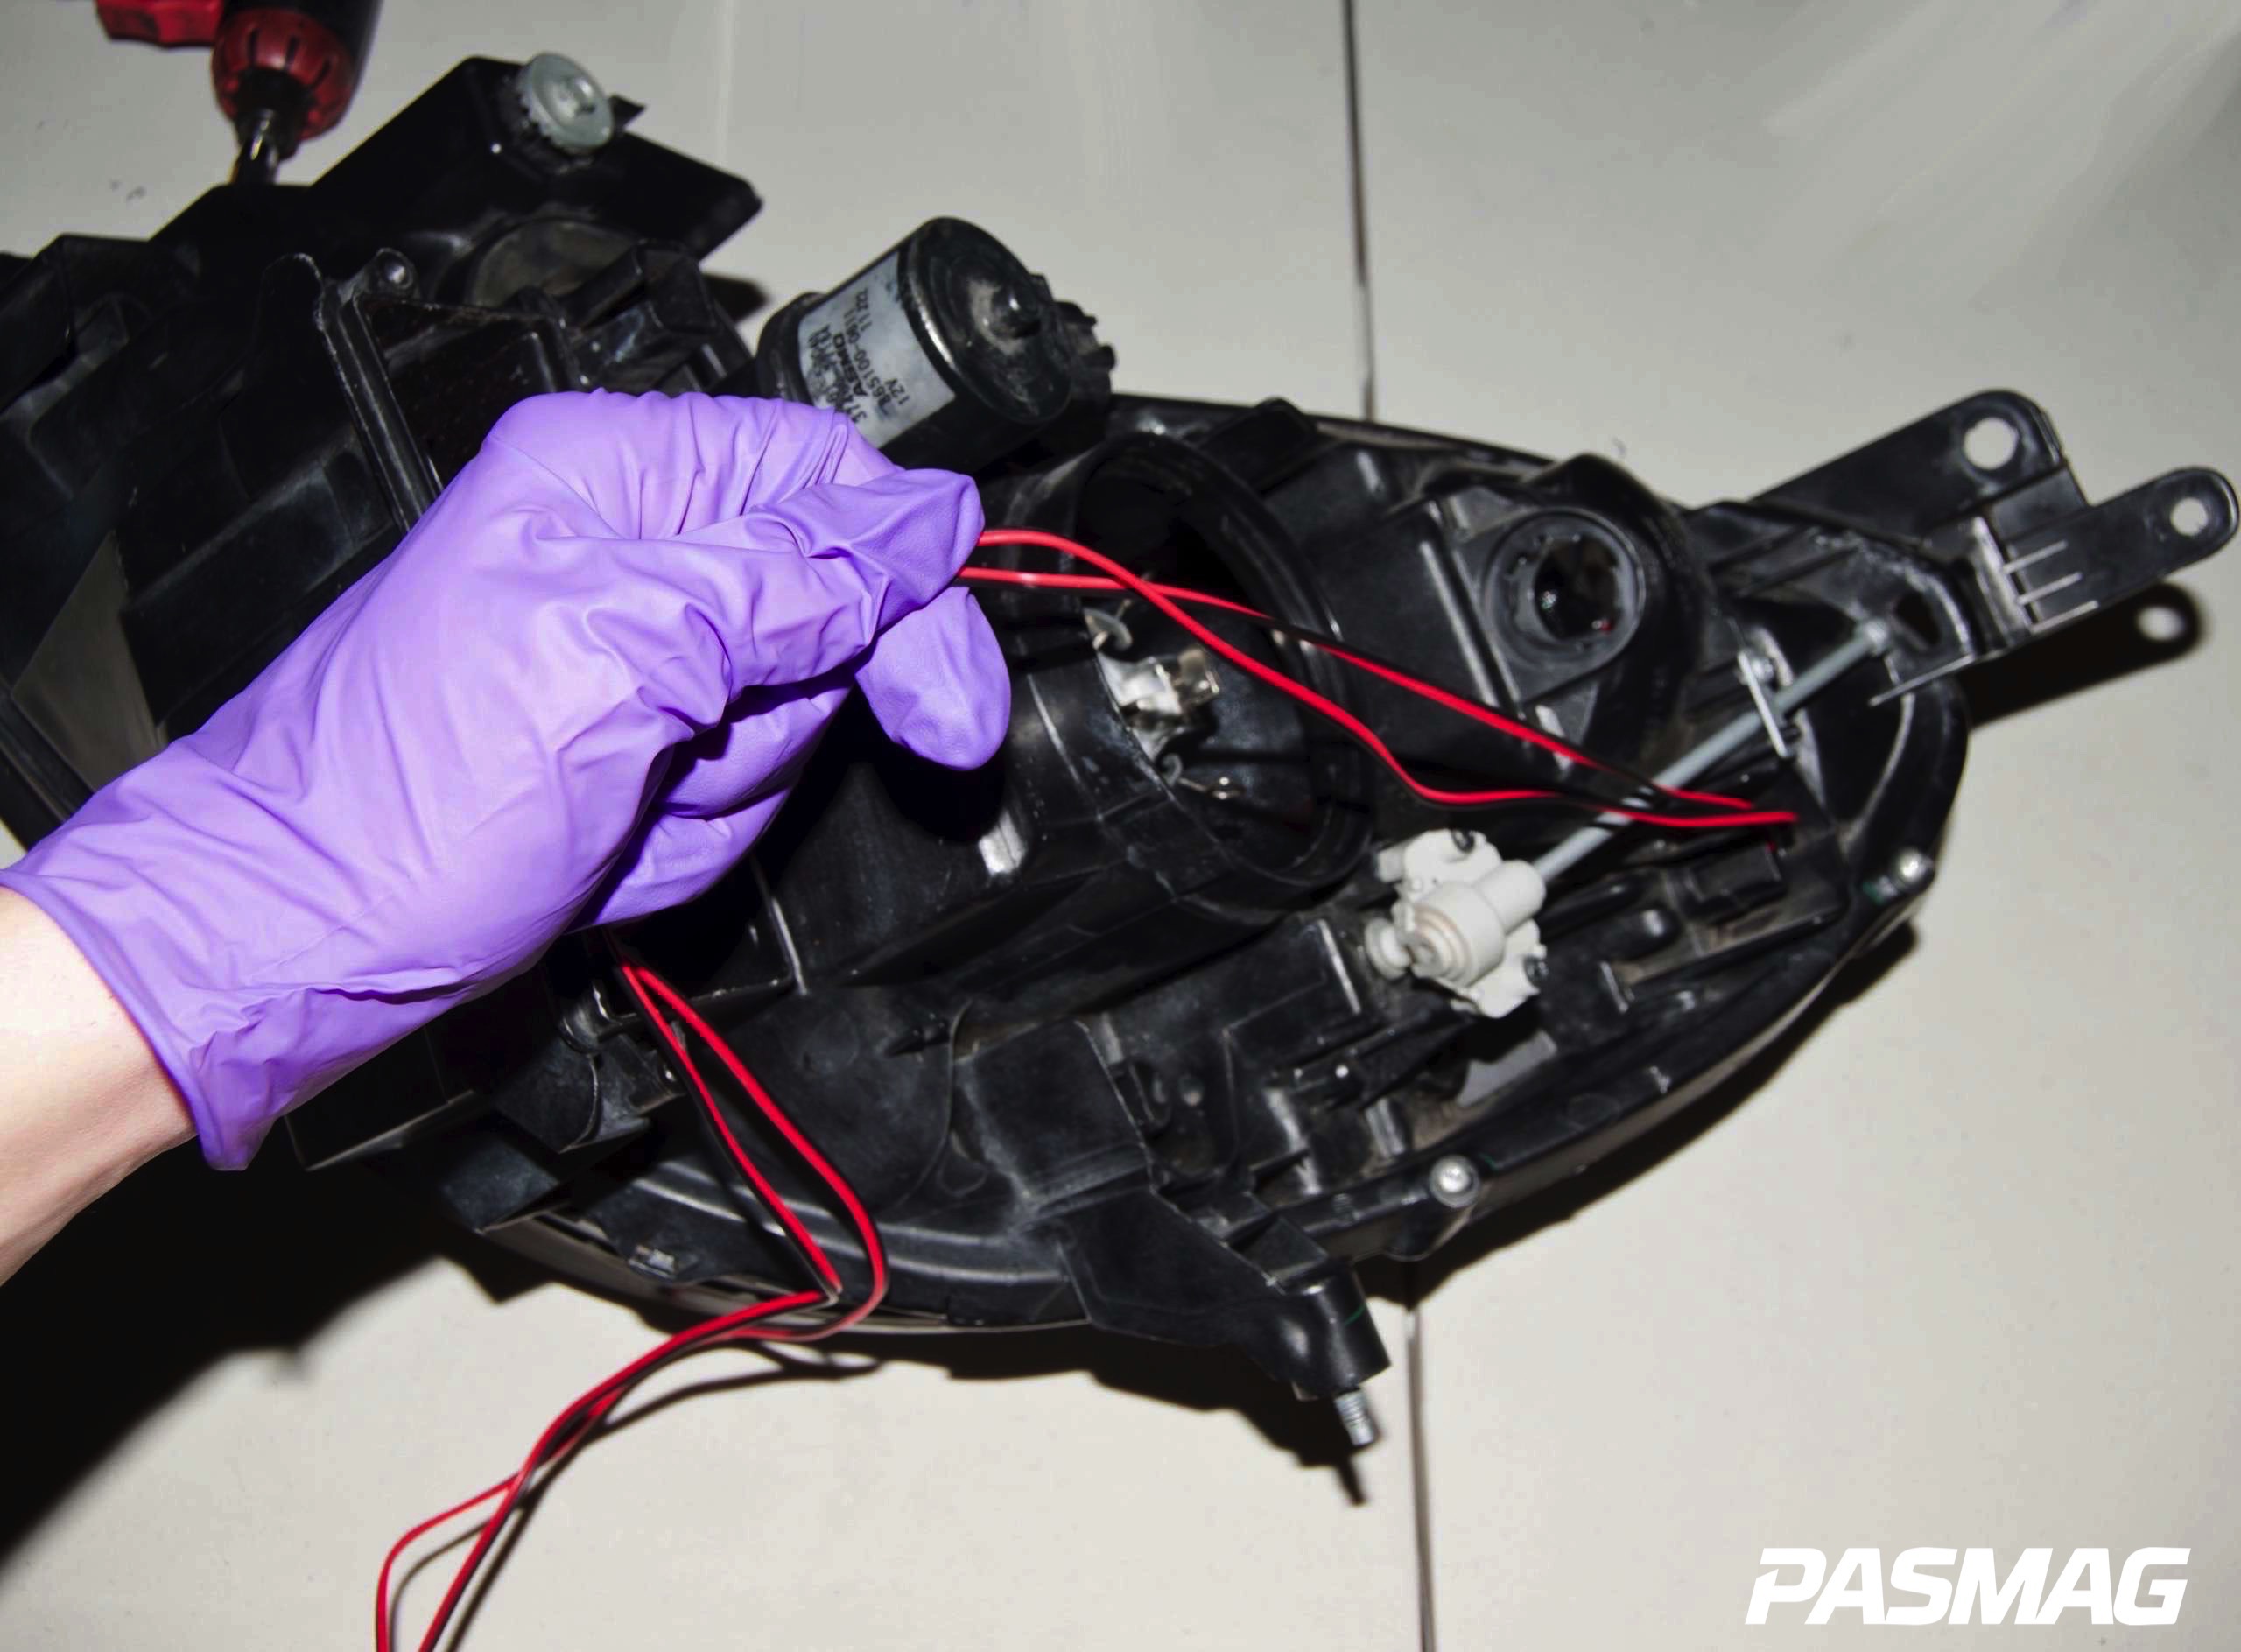
9. Route your wiring out of the headlight. It sounds simple, but this step is often the source of moisture problems down the road. Do not drill a hole into the headlight – there is no need to add more holes. All headlights are equipped with vent holes from the factory, so route your wires through one of these and reinstall the vent cap after you have fished your wires through.

10. Now we are ready to reassemble the headlight. To do so, simply reverse the steps of disassembly. Be sure to reinstall any screws or clips that were removed during the disassembly process. Once the headlight is reassembled, re-seal it by heating the seal again. This time we will heat to 215° F for 10 minutes. Once it is heated, press the lens into the housing and clamp until cooled. That's it! Now you've got a custom set of lamps that will set you apart from everyone else!
Related Articles
 Metra Electronics / Heise LED 6 Gang Switch Panel
 Injen Technology Cat-Back Exhaust for 3rd Gen Tacoma
 ACT Unveils Push-Type Mod-Twin for Subaru WRX
 KICKER Introduces Pairs of 3-Way Component Systems
 OPTIMA Batteries - Battery Mounts
 Ford and xix3D Unveil the Ford Wrap Program: A New Horizon in Vehicle Customization